
Let me start by telling you I’m kind of obsessed with sun-dyes. They are super cool and feel a little magical. Essentially, they are dyes that are colorless when you apply them, but turn vibrant colors when exposed to sunlight. My mom introduced sun-dyes to me when I was in college and I’ve been going through sun-dye phases ever since.
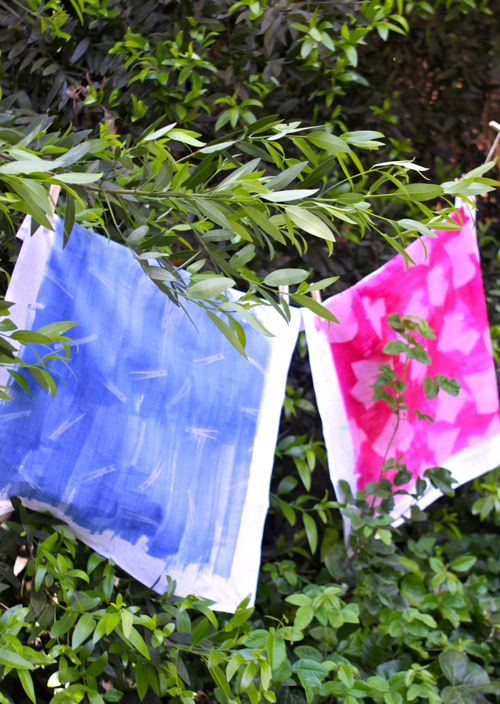
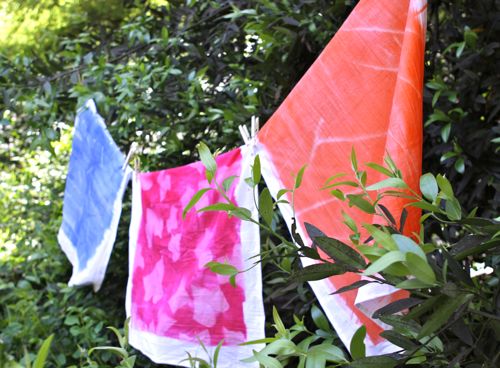
For this activity, we decided to dye bandanas. I couldn’t actually find plain white bandanas, so we used square cotton dishcloths instead. They’re a generous size and work as head wraps, capes, or can even be tied around the waists of little ones as a beach/pool coverup.
The only brand of sun-dye that I’m aware of is called Inkodye. It doesn’t come in a ton of colors, but you could do a little color-mixing if you want to expand the palette. The main trick with sun-dye is you need both a low-light area and a sunny area to work in. The dye will start exposing as soon as there’s even a hint of sunlight, so you want to apply the ink, and add any objects that you want to use to block the sunlight, in low light.
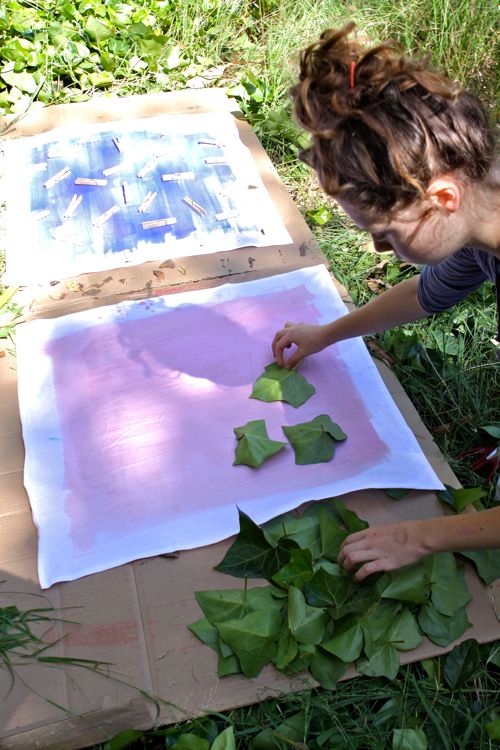
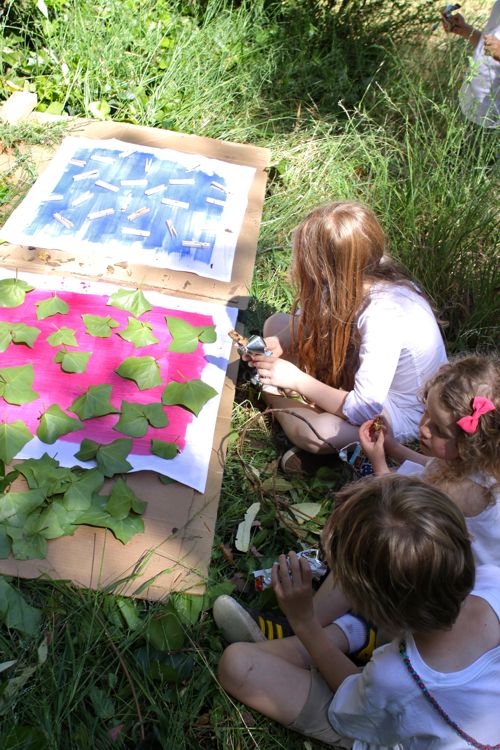
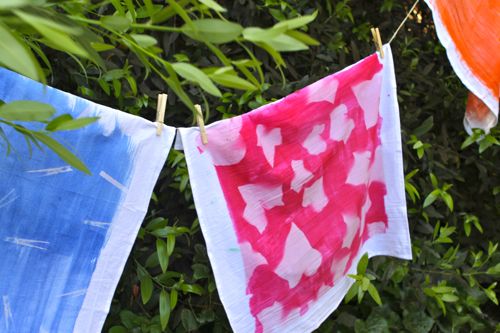
Adding objects creates a pattern — we used plants, leaves, even clothespins. Pretty much any opaque object could work. In fact, my sister Jordan told me about a friend who painted a duvet cover with Inkodye, then took a nap on it in the sun, and when she woke up, the imprint of her body was on the duvet. So cool!
One of the nice things about this activity is that there is some downtime — when we made these, the kids could sit and relax and have a snack while the sun did its work.
One note: I would recommend having extra dyeable items on hand, because the process is super fun! And you’ll definitely want to dye more than one item. : )
I love this project! Even if your kids aren’t artsy, they’ll get a kick out of seeing the colors appear in the sunlight. And it’s pretty much no fail — no matter what objects you add, or even if you add none-at-all, the bandana is going to look fantastic.
Tell me, Friends. Have you ever tried sun-dyes? Is your imagination running with objects you could use to create patterns? (Me too!)
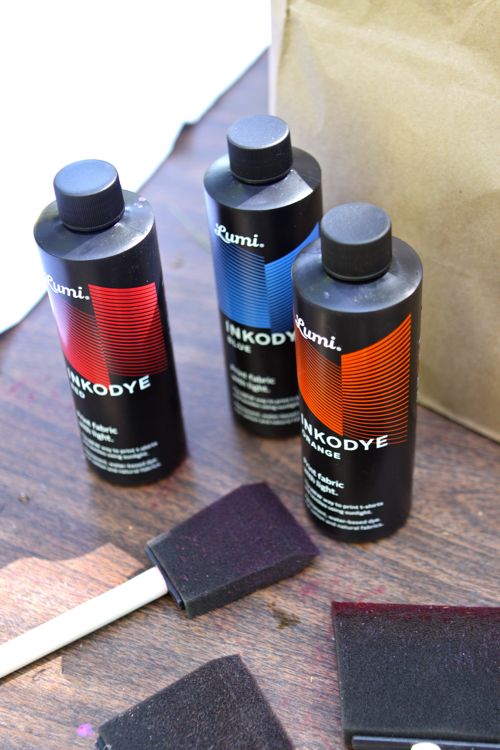
The materials for this project are pretty simple. I used:
– Inkodye
– Bandanas (really, dishtowels) — you could use anything you like! T-shirts, a bolt of fabric, a pillow cover, canvas shoes, sheets, etc.
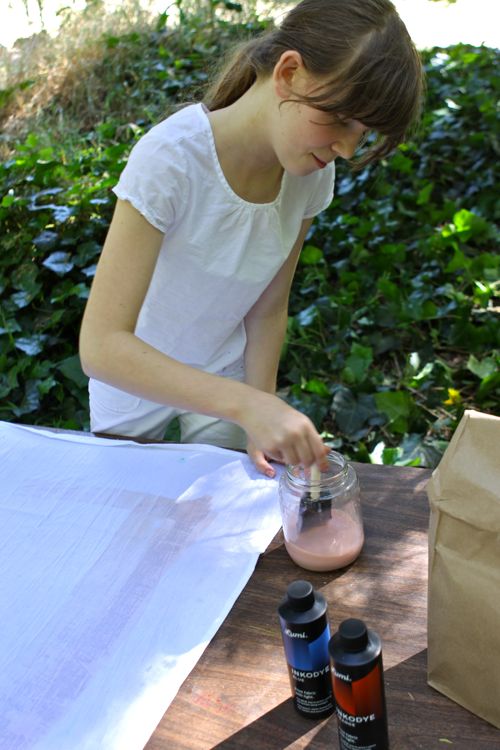
– Sponge brushes
– Wide mouth jars (for dipping the brushes into)
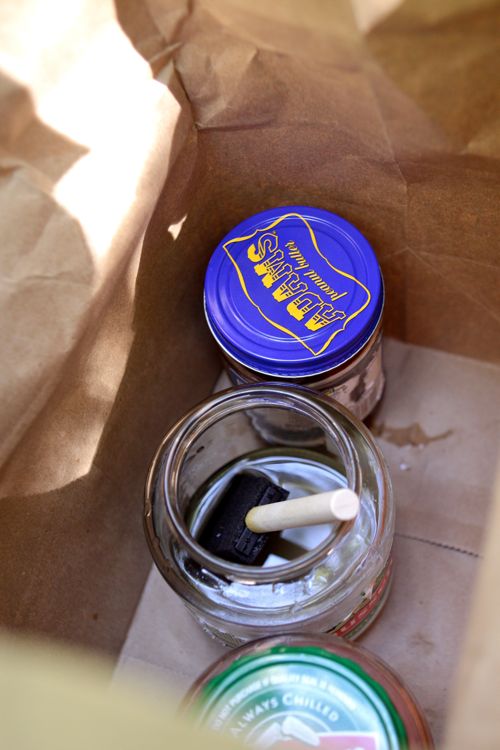
It was such a sunny day that when we put the Inkodye into the empty wide mouth jars, the ink instantly started changing colors!
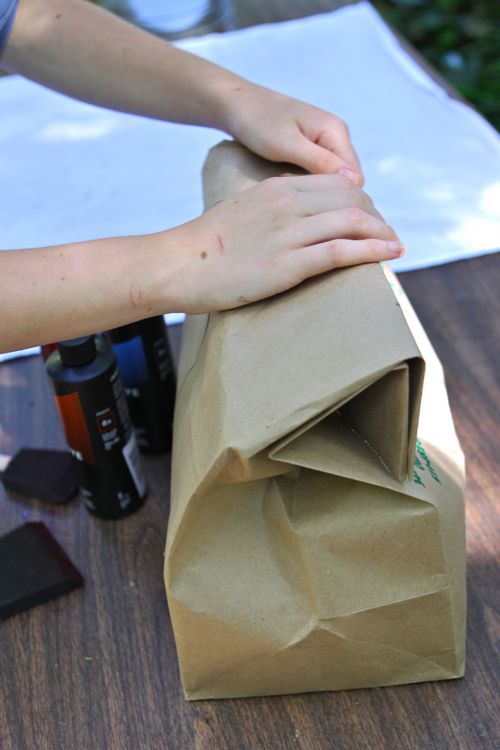
So we kept the jars in a paper bag to prevent exposure. Another option would be to paint the outside of the jars with an opaque black paint. Or, you could work inside, in a room without windows (or with good window coverings), and then bring your project outside for exposure once it’s prepped.
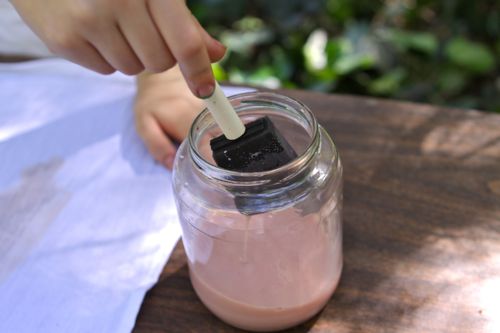
The bottles of dye aren’t big, and I was afraid we would run out, so I diluted the ink with water. On one batch, I used too much water and the ink didn’t develop as vibrantly. But as long as I didn’t use too much, the final color still turned out as intense as it should have. That’s just a little trick to make the ink go further.
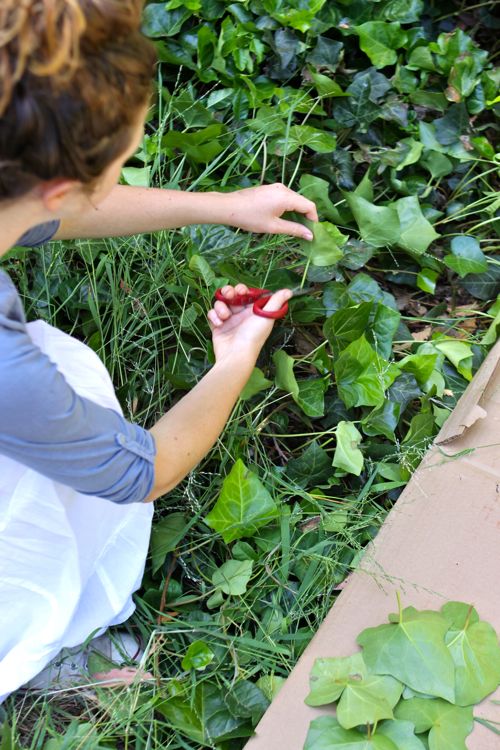
Be sure to gather your leaves/props ahead of time. The sooner you add them to the freshly applied ink, the more crisp your images will appear. Work quickly once you’ve applied the ink!
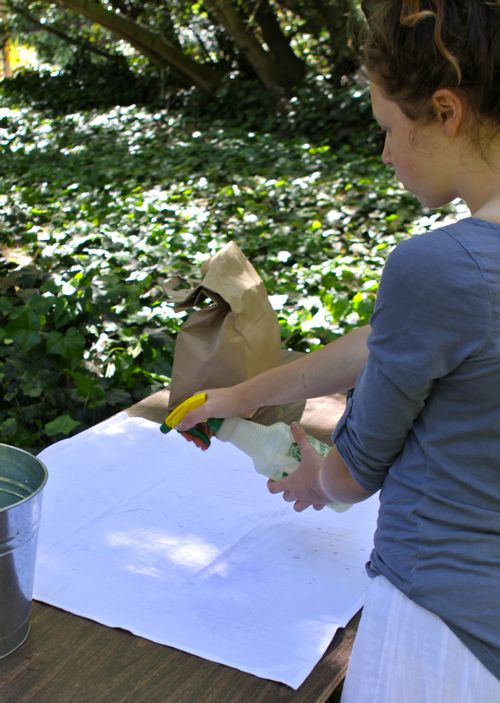
One other note: If you’re considering this activity for a summer party or gathering, I would definitely recommend experimenting first before trying this with a group. You’ll want to figure out the best places to work as far as low-light and sun-light are concerned. Also, different fabrics will accept the dye in different ways. For example, our dishcloths were starched and when I first brushed on the ink it didn’t soak in well, so I had to use a spray bottle to dampen the cloth first, and then apply the ink.
I think that’s it as far as notes go. Please let me know if you have any questions. And if you try this project, I’d love to hear!
P.S. — Like to make things? Find more awesome projects here.
This got me laughing initially because (I must need a nap…) I thought this was about making sundried bananas! So close, but yet not at all what you’re talking about. Anyway, looks like fun, a good thing to do with kids. I like to collect activity/creation ideas to do with my niece when we’re together.
Hah! That is fantastic. Sun Dried Bananans and Sun Dyed Bandanas sound almost identical!
Lol! That’s hilarious😁
Love this!! I’m so going to do this! Maybe next week! The kids will love love love it! Excellent idea. Thank you!
Yay! So glad you like it. It’s a really good, kid-friendly activity.
Is there a specific way to set the dye? I’ve been wanting cloth napkins for a while, but haven’t gotten there yet. I think doing this with utensils would be perfect. Thanks for sharing such a fun project!
Good question, Ruth. I’ve washed and dried the bandanas in the washer/dryer and the color held up beautifully. I don’t know how the setting technically works — perhaps it’s automatically set by the time the ink is done exposing.
We’ve done this with silk ties as a Father’s Day present. We used Jacquard dyes from Dharma Trading Company. It was fun and my husband wears the ties to church sometimes, if you want to see them.
Dyeing ties! Brilliant.
I was wondering how long the cloth sits out in the sun, I wanna do it with the kids I watch in the summer but they are a little antsy so I may need a different activity to do inthe meantime.
It doesn’t take too long — seems like 10 to 20 minutes. Planning another activity while it dries/exposes would be great.
I think using chains of all sizes would be excellent to use on these bandanas.
Totally! Very cool.
This is such a fun craft! I’d make a wall-hanging on a large piece of cloth, like maybe a silverware pattern (knives, forks and spoons scattered on the cloth) to hang in the kitchen.
Knives, forks and spoons would be so smart! They’re so heavy and dense they would be perfect for blocking the sun, and weighing down the fabric too.
I’ve never even heard of sun dye! I love this activity.
So glad I could introduce you to the wonders of sun dye!
Yay! A craft even I can do!
Right? Simple as can be!
But you didn’t explain HOW to do it. Not a tutorial?
Sorry for the confusion — it’s such a simple process that when I first wrote it out in numbered steps it seemed silly, so I just worked instructions into the body of the text instead.
The short form: paint the dye onto the fabric, put objects on the fabric to block the sun, then set the fabric in the sun and the color will appear. That’s it.
If you have any questions, feel free to ask!
Pingback: the summer list… | House of Mayhem & Chaos
This is great!!
I’m going to try this on my boys clothes!
Can this type of dye be used on baby items (they tend to put them in their moth)? I know certain dyes are not recommended for baby items due to them leaking color more rapidly. Also, how long does the dye last through washes before fading?
Could give an estimate as to how much dye is needed per package of dish towels? Many thanks for the fun activity suggestion!
Pingback: Friday High Five: Summer Highlights - Room & Board: The Blog
Hi. I was thinking about doing this with my son’s kindergarten class. I know the shirts have to be washed afterwards to stop the processing. If I throw the tshirts in a black garbage bag will this stop the processing while I’m driving home to wash them, or will the processing continue and the designs be affected by the wrinkling of the shirts from being in the bag?
You can do the same with Pebeo Setacolor paints, the one for light fabrics only. You will get to see your colors as you paint, dip, spray them on and they will be lighter where your sun blocking objects are. If you want to see them and tips for using them, try google. You can use these pains without fun printing as well so they’re more versatile.
So fun! I used Jacquard SolarFast (and discovered that diluting is so smart), which has a wide color array and develops very quickly. It gets breezy here, so with botanical prints especially, laying a plexiglass sheet on top holds everything in place while still allowing clear prints.
FYI – you can get white fabric that is ready for dyeing at most fabric stores. This fabric has not been treated with anything so you don’t need to wash it first. You just need to read the end label to make sure that you get the correct fabric. I believe it says PFD (prepared for dyeing). I think even Joann’s has it.
BOM DIA ! ONDE ENCONTRO ESSE CORANTE SOLAR? MORO NO BRASIL E NÃO SEI ONDE ENCONTRA-LO.
OBRIGADA. LUCIA
Hi Gabrielle,
Would you be able to recommend french products also to make them?
Thanks in advance,
Sarah
Do a search for Jacquard SolarFast and Lumi Inkowash — I’ve seen both for sale on French/European sites.
Oh, this is so fun! My kids are at an age where I am SO busy taking care of them, but I still want to do fun craft stuff. Probably mostly for me… ha! I am ordering supplies now. Thanks!
Although it looks like Inkodye isn’t actually made anymore. I’m going to try SolarFast, which is similar.