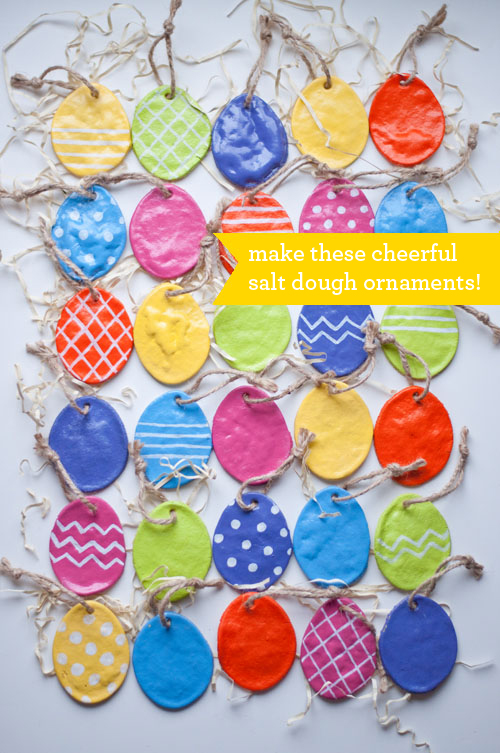
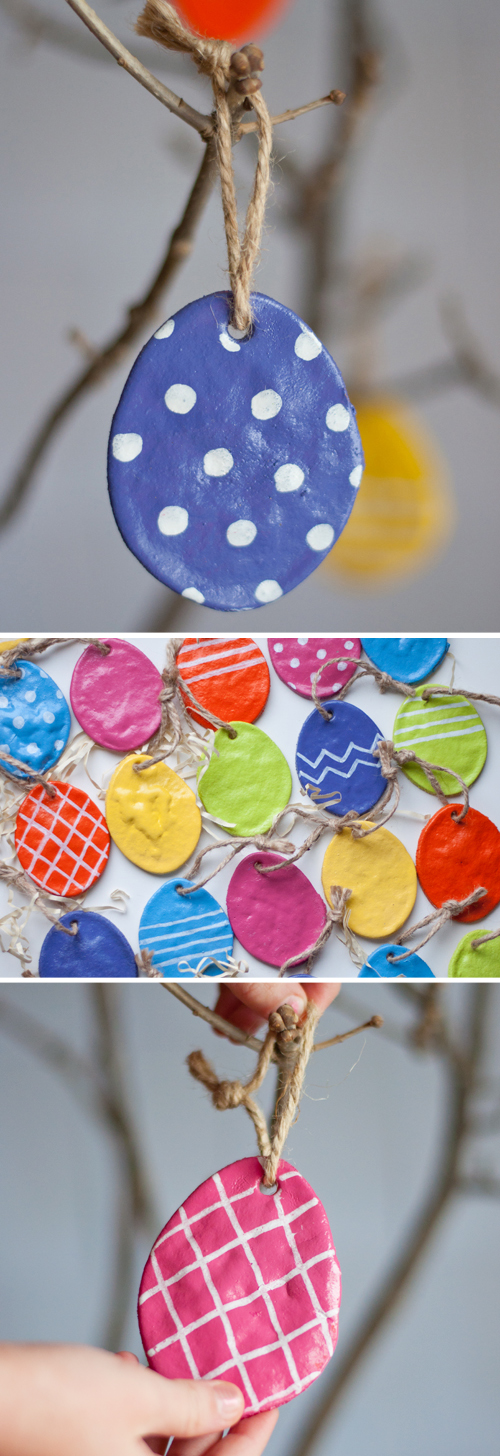
Easter is on its way and I am very much looking forward to it. I’m ready for the bright colors, the pastels, and anything with spring green. And I am helping it along with the bright tones of these Salt Dough Easter Egg Ornaments.
EASY DIY SALT DOUGH EASTER EGGS
Salt dough lends itself to all sorts of shape making. Once baked to thoroughly dry, the dough is hard and can last for years. The dough is also paintable which makes it all the more fun.
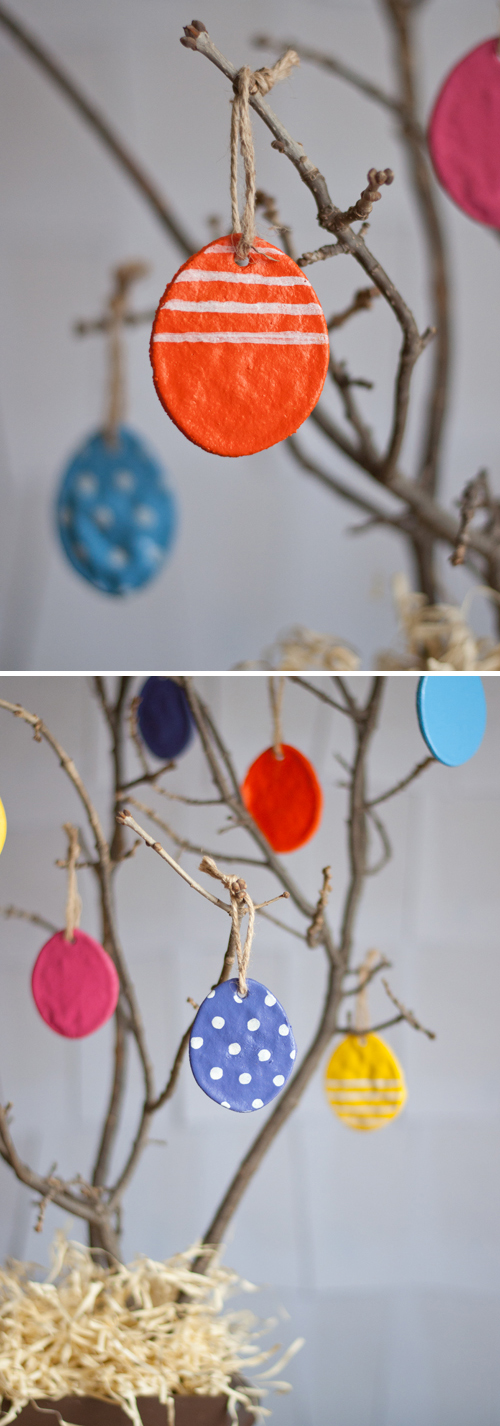
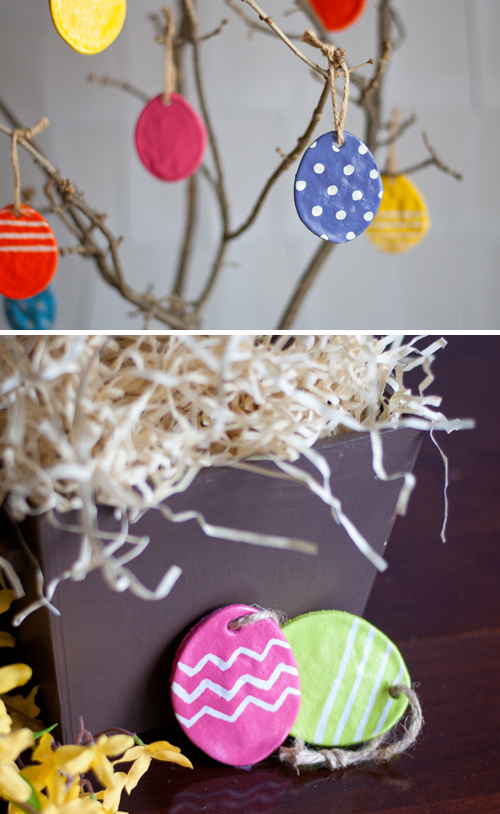
I love the tradition of an Easter Tree — a branch on which to hang eggs, bunnies and colorful bits. Part of this batch of Salt Dough Easter Eggs will hang on our tree but I hope to hang some outside too. You see, if a spray paint or clear spray paint sealer is used, these ornaments can hung outside and inside alike.
I think seeing bright bits of color amidst the early spring landscape would be lovely, don’t you? Let’s get started.
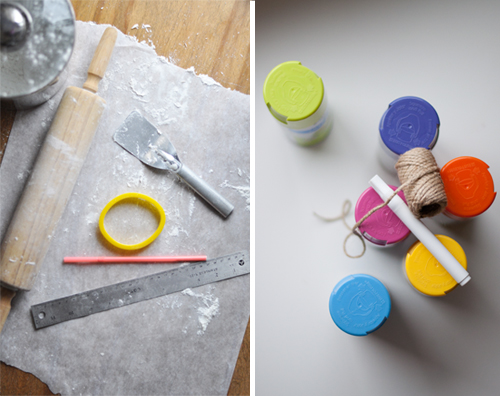
Salt Dough Easter Eggs – Supply List
– batch or two of salt dough (see below)
– rolling pin
– ruler, to measure dough thickness
– egg shape cutter
– spatula
– straw, for making holes
– parchment-paper covered baking sheets
– spray or acrylic paint
– paint pens, optional
– clear coat sealer, optional
– twine, ribbon
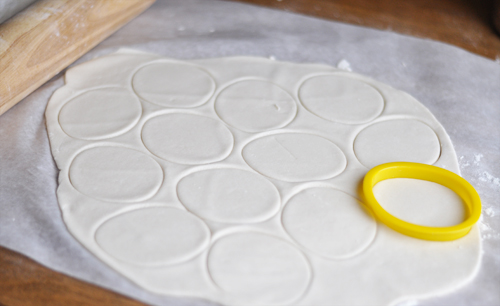
Recipe for Salt Dough Easter Eggs
Mix up your favorite salt dough recipe. For this project, I used the following recipe:
1 cup flour
1/2 cup salt
1/2 cup water
Stir together all three ingredients until a dough forms. Kneading the dough a couple times can help make it smoother.
Roll it out (I rolled mine to 1/4 inch thick) and cut out desired shapes.
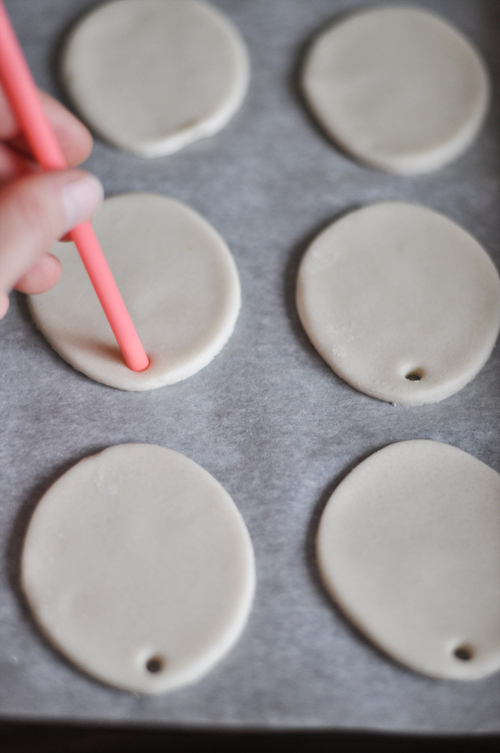
Place the salt dough Easter eggs on the parchment-covered baking sheets. Remember to make a hole so you can hang the ornaments — a straw works perfectly!
Bake at 250F for 2 hours.
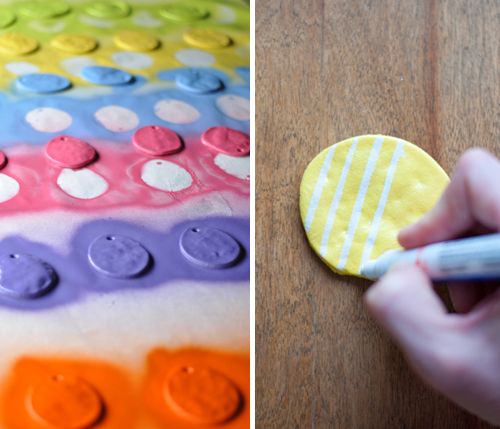
Directions for Salt Dough Easter Eggs
Once the shapes are adequately baked, dried and then thoroughly cooled, it’s painting time. I like using spray paint because it’s faster and easier but acrylics work just as well.
Allow the paint to thoroughly dry. Use paint pens to add polka dots or lines of decorations to the eggs. Optional: To further protect the color and design, add a clear coat sealer.
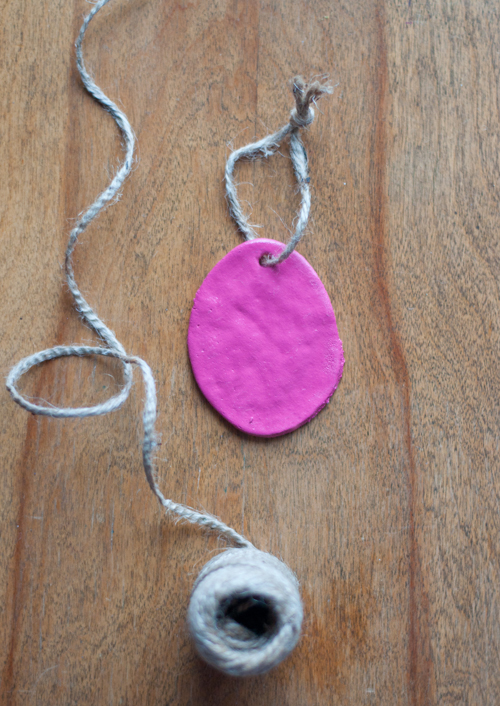
Loop twine or ribbon through the holes and hang.
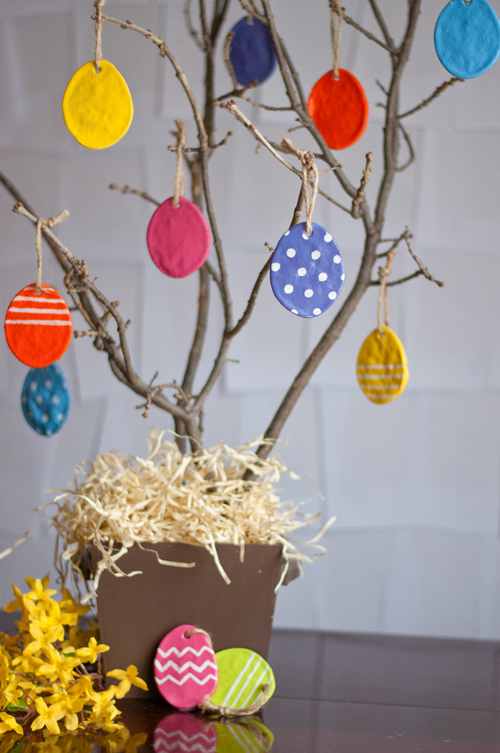
Hooray! Your Salt Dough Easter Eggs are finished. It’s feeling more spring like already!
P.S. — Adorable Painted Egg Cartons.
Credits: Photos by Amy Christie for Design Mom.
Check this out
Could I use water based paints instead of acrylics? Thank you!
Hi,
At what temperature and how long do you bake these in the oven ?
Mary
This is easy peasy! I made this exactly to directions with white unbleached flour and they turned out perfect! They rolled well and was not sticky at all. After baking, they are smooth and ready to paint. Can’t wait to break out the paints with the little one for some fun! Thanks so much for this! Love easy DIY projects! =)
Mine are in the oven and they are puffing up while baking. I tried pressing them down but they puff back up. They are suppose to bake 20 minutes more. Hoping they will flatten as they cool.
Any suggestions ? I rolled them to 1/4 inch thick so if i go thinner will that help?
Did you possibly use self rising flour instead of all purpose? I am not sure if that would caused the bubbling but it was the first thing that popped into my head.
Pingback: Show Your Thanks – The Joy Spread
To skip some or all of the painting, you can use food coloring in your dough. You’ll just have to add more flour. We did they they turned out so cute. We even made rainbow coloring ones with the different colors rolled together.
Thank you! We had a wonderful time doing this, 1 cup of flour was just the right amount that I felt okay using it right now, and now we have a lovely new tradition. This helped make this Easter special. Thanks!!
Pingback: Easy Easter Crafts for Kids - Mommy with A Goal
Such a fun idea! Love how they look hanging and on display.. great one, Brooke! :)
Pingback: 40 Non Chocolate Easter Gifts For All Ages | Simplify Create Inspire
Where do you get the paint pen .I want to get n try with my grandchildren, look like fun.
The eggs are so cute. Now how about hearts for Valentines?
I was wondering if you could use gel dye in the dough before you bake them? Also might be a cute idea for kids to make heart shaped for Valentines and a tag on the string to whom they are for
I want to try them with my grandchildren, ages 1, 2 1/2 and 4.
I added good color to the mixed dough for a marble effect they are in the oven currently. Will see how it worked after baking.
Use wax paper.
Pingback: 40+ Super Easter Craft Ideas For Preschoolers | Let Go of Being Perfect
Pingback: 39 DIY Easter Decorations - Ak Pal Kitchen
Pingback: 90+ Easter Crafts for 2024 that are Hippity Hoppity Happy - Hike n Dip
Pingback: 19 Easy Easter Craft DIY Ideas You Need To Know About - Simplymarla
Pingback: Easter Crafting Adventure: Fun Homemade Projects for Kids