Because of my love of the stars, when my daughter was little, I purchased her a night light that shines stars all over her bedroom walls. After seeing a few light-filled jars on Pinterest, I had an idea to fill a jar with the constellations — and I was able to create my own constellation jar, using items I had around the house!


CONSTELLATION JAR TUTORIAL
What you’ll need for your own constellation jar:
– a wide mouth jar – The jar needs to be wide enough to fit the small click light inside. A pickle jar works great.
– an aluminum cake pan
– small click light, like these
– an awl
– scissors

Cut a strip of the cake pan long enough to fit around inside the jar and tall enough to reach to the very top of the jar. Use a spoon to brandish out any writing or crinkled parts.
Use the awl to poke holes for the constellations. Mine are not accurately placed, it is only a small strip of aluminum after all. I included Hercules, the Big Dipper, the Little Dipper, Draco, Cassiopeia, Cepheus, Orion, Cancer and Gemini.

I connected the constellation dots with a silver Sharpie to make them easier to spot.

Fill in the other space with more holes. Make the holes smaller than the ones used to make the constellations because it will set the constellations apart.

Roll the aluminum sheet until it fits snug inside your constellation jar. Hold the circle in place by cutting two tabs and folding them in opposite directions.

Put the encircled aluminum sheet inside the constellation jar. Turn the click light on and place the it inside. Top with the lid. I spray painted my jar lid. It’s looks nicer and smells less like pickles.


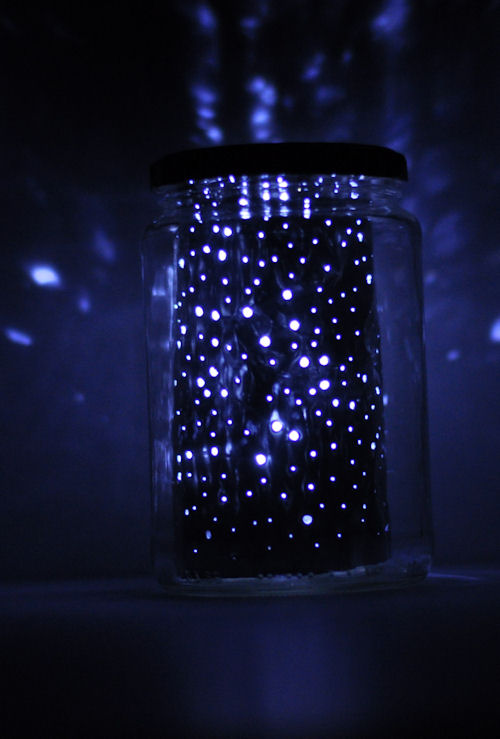
Take into a dark room and enjoy your very own constellation jar.
The night sky in a holdable form. I connected the dots below so you can see them too. The Little Dipper, the Big Dipper, Draco and part of Orion.

P.S. — Check out this DIY kiddie carwash.
—-
Created by Amy of This Heart of Mine for Design Mom.