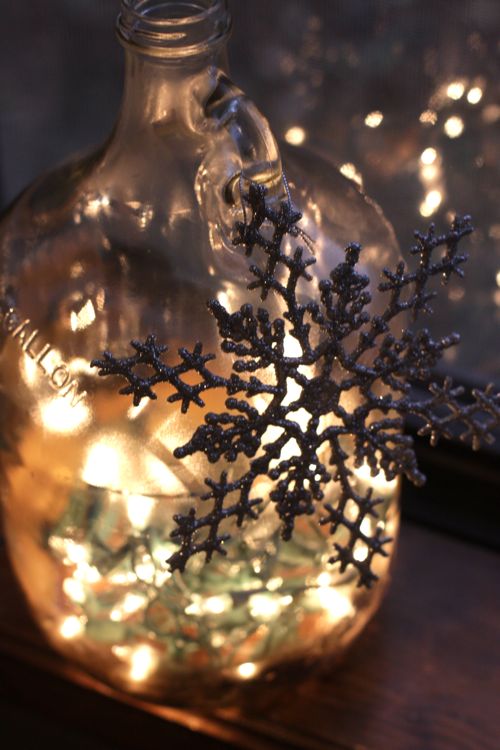
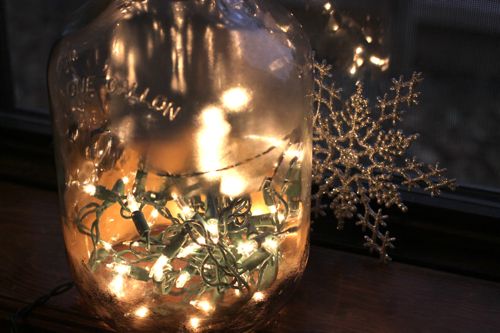
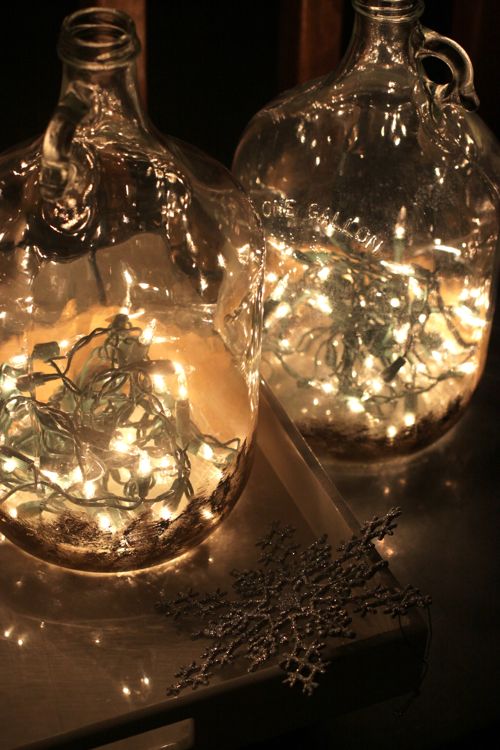
The other day, I wrote about attempting to drill through glass and I finished up the project this weekend. I think it turned out beautifully — I love the idea of bottled light thanks to Christmas Lights in a bottle!
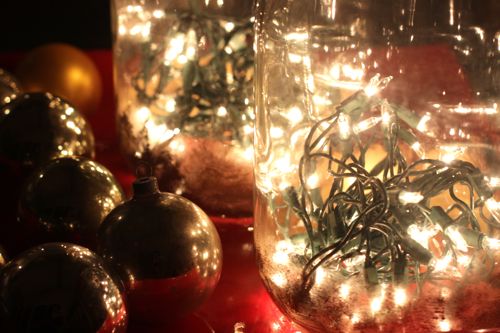
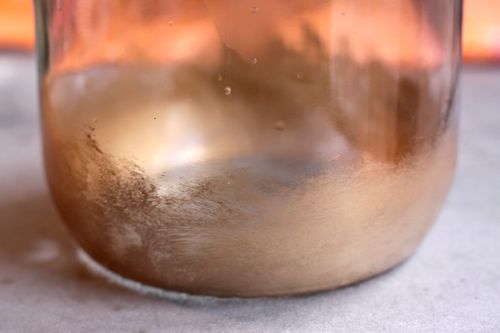
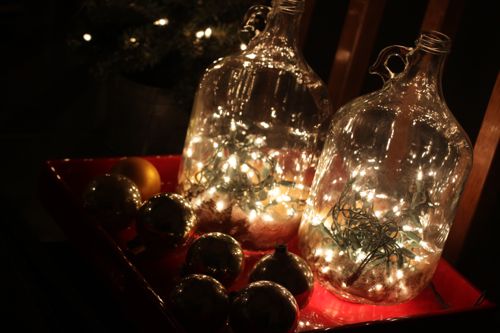
These would be pretty by a wintery window or under an entry table. I like the way the gold paint makes the bottom of the bottles look misty and glow-y, even during the daytime.
I’ve got a ton of images and DIY instructions below if you’d like to try this too.
CHRISTMAS LIGHTS IN A BOTTLE TUTORIAL
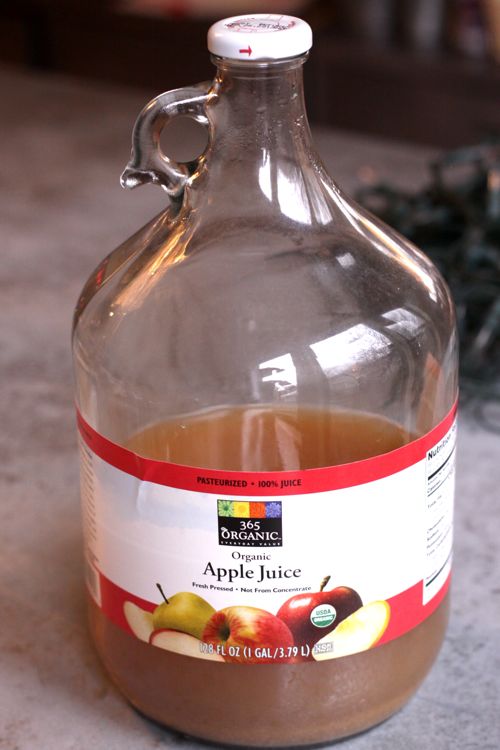
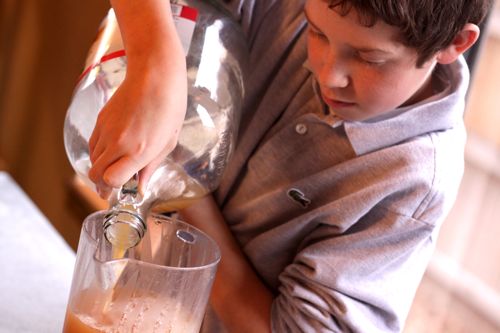
I started with these apple juice bottles. I have long admired these bottles — I love the contrast of the big round barrel and the teeny little handle — and was glad to finally come up with a project where I could use them. The juice is good too! I got impatient waiting for the family to finish up the contents, so I had my oldest son pour what was left into another pitcher, then I washed out the inside.
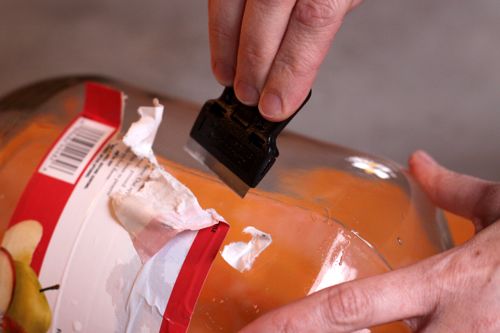
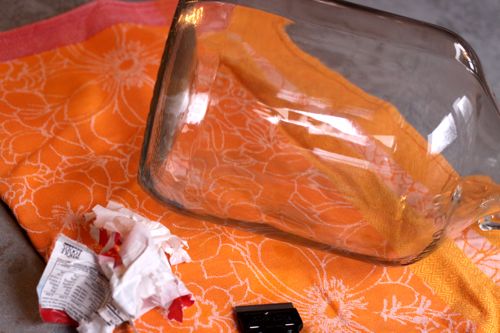
Next, for my Christmas lights in a bottle project, I used my handy mini scraper tool to take off the label. This tool is basically a straight edge razor blade with a handle. When you’re done using it, you can flip the blade upside down so the sharp part is hidden in the handle. Such a useful tool! I use it to take sticky things off windows and other glass — no chemicals required.
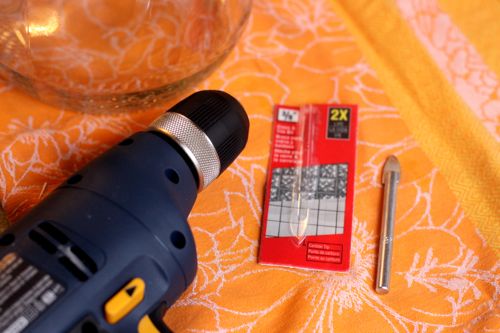
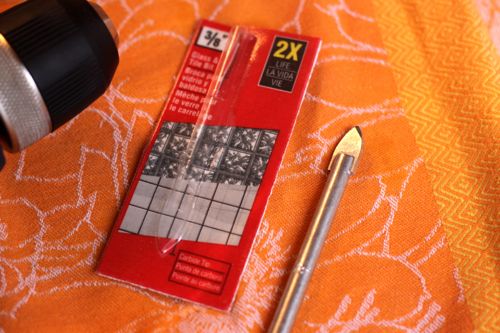
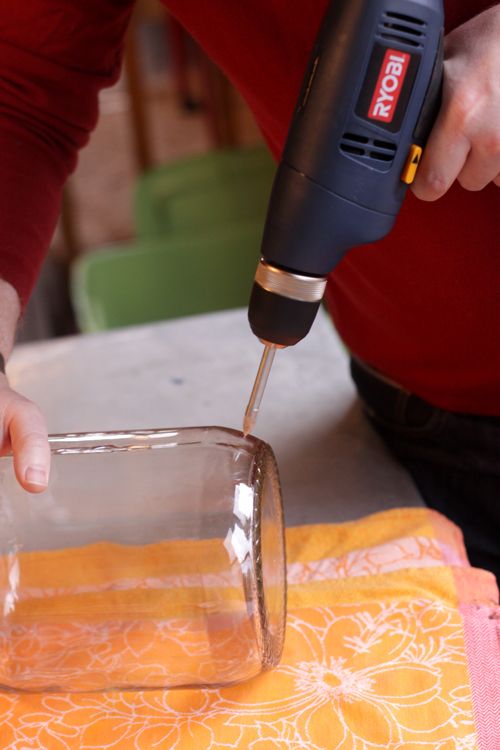
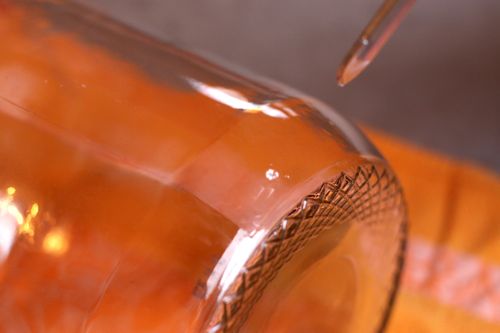
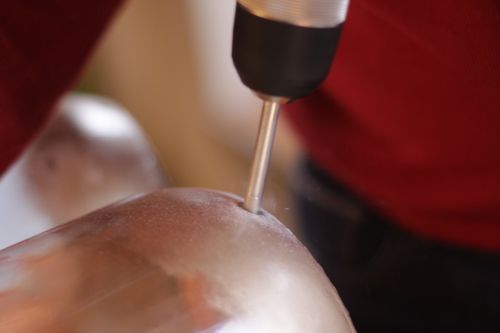
Once the bottle was clean and label free, it was time to drill through the glass. We used a 3/8″ drill bit designed for glass and tile. The drilling takes a little while — maybe 20 minutes — because you can’t go too fast. The drilling will create white dust (I guess it’s technically sand) and as the hole gets bigger, it will smoke a bit from the heat.
[UPDATE: Hah! Apparently I did it all wrong. Lots of readers are chiming in with suggestions for safer and easier and faster ways to do this. Among other things, suggestions include wearing a mask, drilling while using water to cool the bit, and using other tools entirely.]
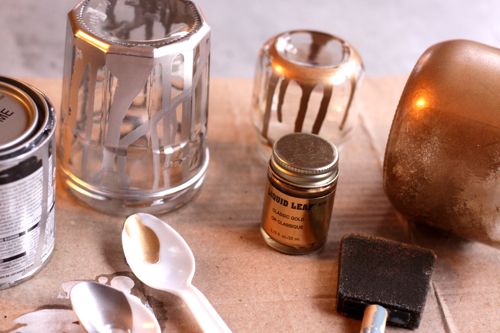
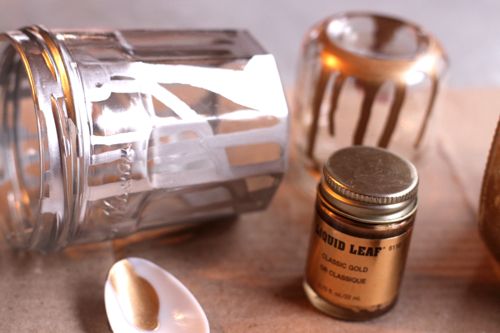
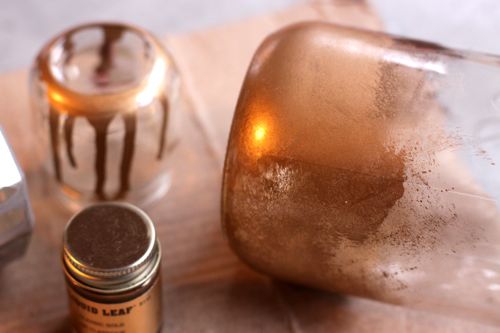
Next we painted. I experimented with some old jam jars and baby food jars first to try different techniques — like paint dripped from plastic spoons. But the kids voted and liked the sponged look best, so that’s what we did for the final project.
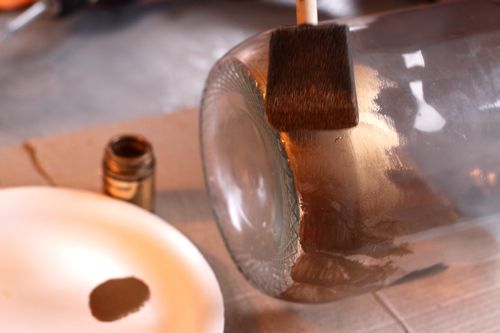
I used a disposable sponge brush and Liquid Leaf paint — but any metallic enamel paint should work. The paint is not water-cleanup, so a disposable brush is great for this project. I only needed a little bit of paint to get the coverage I wanted. Instead of brushing the paint on, I was mostly “patting” into place.
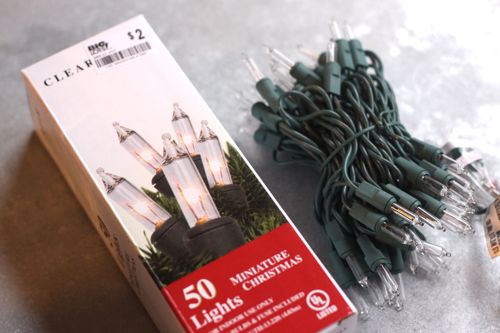
Once the paint was dry (it dries very quickly), we started stuffing our Christmas lights in the bottle. You’ll need a 50 light string that is not made to connect end-to-end. We had the hardest time finding lights like this. We went to 4 stores, but they all carried only end-to-end lights (which are the kind I prefer for my Christmas tree). Finally, I tried to think of who might carry old-school Christmas lights and Big Lots came to mind — because they often carry items from last season. Hooray! They had just what we needed.
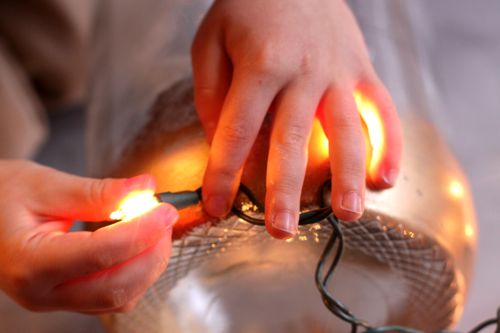
The lights fit through one at a time, but it was a bit tight — I would recommend using a slightly larger drill bit and the light stuffing would go much faster. Oscar and Maude loved this part the best. Stuff every light on the string in, and the plug will dangle out the back, ready to find an outlet.
And that’s it! The Christmas lights in a bottle are a very satisfying project and a fun addition to our holiday decor. Though really, these don’t have to be holiday at all. We could use these for any sort of event where we want a little glow-y light happening. Maybe we need to have a party where bottled light is the theme. : )
I read another blog about drilling glass. That person said you would need a face mask of high quality on for this process due to glass particles in the air. A painters mask would not work. Don’t know if this is true though.
Am I missing something? Why didn’t you just put the
Ights into the bottle through the cap?
Because then the plug would look silly coming out the top. A hole in the back at the bottom hides that.
This was so informational! I have some nice bottles to do this with but I’m going to use silicone glue and glue glass beads to the outside of the bottle. Then it could be used for a bedroom or even outside! Picture all different shades of pink for a girls room.
Use a mask so as not to breathe in the glass dust. Safety glasses as well.
My sister made me a christmas gift with a glass tile brick. She drilled ahole in it and put lights in it with a christmas theme picture on outside, it is verrrry cute!
Not just Christmas, Use red/white/blue strands for the 4th of July coming up too! If you wanted to add multiple strands and need a larger hole, you can use a small diamond tipped hole saw. Just be sure to use water as a lube so the glass doesn’t get too hot while drilling.
Alternate ideas – frost the bottle with spray window frost (krylon makes some) or color the glass with a translucent glass paint! :-)
“You’ll need a 50 light string that is not made to connect end-to-end. We had the hardest time finding lights like this. We went to 4 stores, but they all carried only end-to-end lights ”
Wow… I’ve never even heard of end-to-end lights. In Australia, pretty much ALL fairy lights are in a string which don’t connect end to end!! How interesting o.O At least we wouldn’t have any problems with that part of the craft!
Wear safety glasses. If you use a small misting bottle to keep the drill site moist you will not have the dust, just wet dust that looks like mud, and keeps the spot from getting so warm and smoking.
How lovely!!! I don’t suppose you’d be willing to sell a pair? :-)
Wow, your bottles turned out very nice. My husband and I also make lighted bottle and bottle lamps from wine bottles, beer bottles, growlers and other recycled glass bottles. We made a video to explain the drilling process for our blog readers. It’s on the homepage of our blog http://www.bottle-lamp.com if anyone is interested. :)
You’ve turned ordinary into extraordinary with a little paint. Very well done.
A very innovative idea you are very clever.Thank you.
This is great but I think you should really put in something telling ppl to use a mask while drilling. If that glass dust gets in your lungs it can be veeeeeerry bad!
Add some potpourri and the lights will warm it up. Makes the house smell great and it looks pretty.
There is a special glass kit u can buy..I make these from mason jars and older big bottles..a regular drill will break it…I put cinnamon soaked potpurri and sticks in with lights and even small glass balls ..use your imagination.:)
where can you get this special glass kit?
it helps keep it cool if you keep the hole and drill tip wet- you can use a spray bottle.
I have some old colored andclear jugs (bleach) I plan on using for this project. Can’t wait to see how they turn out!
I bought some solar power light strings from a website called greenfingers.com. (I think its a UK company) I intended them for Christmas but they ended up decorating my chicken run. They are still there now, in June and they still work brilliantly.
I wonder if it would be a lovely idea to use these lights to make outdoor bottles of light. Perfectly safe, and all you do is hang the bottles up, connect the lights to the solar panel and they’ll give a lovely light from dusk onwards.
You can also use a wet sponge to add small amounts of water to mitigate the heat (not so much that it splashes up to the drill). Water will cut down the friction which is causing the heat, eliminate the dust, and lower the risk of cracking. It will also speed the process. This is why tile and glass are cut with wet saws. Also, that “white powder” is glass dust (silica) and is very unsafe to breath (responsable for a lung desease called silicosis). Please use a respirator if you are dry drilling or sanding glass or ceramics.
Love this idea.
I received a glass block filled with rainbow lights as a Christmas gift from a friend one year. They tied it with a ribbon to make it look like a present.
It is the envy of all of our Christmas decorations haha.
I love this idea. I am wondering if the lights get too hot after a while .
Betsy
You can also find the small string lights At Hobby Lobby. The color ones you can find in the craft department in the glass jar aisle or straight lights in the floral department.
I just found this tutorial through pinterest and I am so glad! I cant wait to do this at Christmas :) Thanks so much!!
Try using some wedding lace swtretched tightly around the bottle and then taped at the seam. Use your sponge and paint lightly on all the lace. Set aside and let dry thoroughly. Peel lace off carefully for a beautiful pattern. Golds and silvers and frosted paints work best.
If you spray water or put vegetable oil where you are drilling…it helps to keep the dust (glass shards) from flying around :)
Just thought I would give you a new tip on removing labels – I learned this tip from my handyman husband. Heat the label with your hairdryer. The glue will melt and the label comes right off. No more sharp blades!
These are nice as gifts too….just add dried potpourri to jar or jug and the lights act as a warmer….
You could also put the 1st light on the string out the top of the bottle and glue it with hot glue put a little lamp shade on it and you have a beautiful lamp.
Good details!
I would just suggest that you drip small amounts of water as you drill to keep the glass from getting too hot and to reduce the glass ‘dust’. With the gold paint on the base of the jug, brown wire lights might blend well.
Great project…great instructions. Thanks!
WEAR A MASK!!! Any time you are working with any product that causes dust you should always wear a mask. The dust you get when drilling into the jar is glass and you do not want to breath that in to your lungs.
I too have enjoyed this project. I made them as gifts for a Chrismas party I hosted and filled the jugs/jars with lights and Chrismas Scented Potpourri. Use cool light bulbs and it gives just enough heat to warmup the potpourri and intensifies the scent! ~happy crafting :)
Always liked ththe look of lights in the jars/bottles. After reading all the comments, I was thinking maybe cut the bottom off using the yarn and lighter trick, sorry do not have instructions but have seen them on several blogs. Then you do not have to have a drill, a bit or worry about the dust. Use the battery pack lights with timers or if using plug in cut the bottom at an angle so cord can come out of the higher end of the cut. Amd would also cut down time of stuffing lights into bottle. Now you would have to figure out something fire/moisture proof for bottom, maybe alumin foil? I have not thought that far, so you are on your own for that LOL. Also maybe use one of the push lights and use chopstick to turn them on thru the top. You know the lights you push the top to turn on? Would give a different look but might look good if frosted stencil on the bottle/jsr.
As for the person who even thought of someone sueing, it has become a sad sad world when people look at things with maybe a chance to make money from it for their stupidity of not thinking things thru. Oh and no offence to the lawyers out there, but I wonder about some of their ethics on the cases they take on. Yeah I do mean offence to them LOL after all most of our congress is made up of lawyers and look what they have done to the country.
Have a good day and thank you for the very informative tutorial. Take care.
I do this with wine bottles – leave the labels on for decoration – and then tie artificial grapes or leaves around the neck. These turn out GREAT and everyone loves them for gifts!
I had a project that required me to drill holes into over 100 glass wine bottles. I quickly learned the best technique. I did the walmart isle, grabbed a plastic storage shoebox, the kind with the lids. Used regular sand and filled the box half way. then added warm water, not cold, not hot, but luke warm water to just above the level of sand. When it came time to drill holes in the bottle, it settled nicely into the sand, the small amount of water would fill into the bottle to settle it into place. It worked wonderful, and the (glass powder) would be kept at bay into the water and the sand. When the project was finished, I simply poured the sand into a bucket to save for when I do my concrete stepping stones.
I’ve done something very close to this. I found the WHITE corded lights look prettier in my projects. They are widely available online if you can’t find them in the store. I also use “warm white” LED so they don’t get so hot.
Very pretty project!
What a super idea. The comments left by your readers were very helpful too. I can’t wait to try this. I’ve always wanted to do it but never took the time to learn how — until now. I put you on my Pinterest page to share with others. – that’s how I found you, on another Pinterest page.
Do you still live in the french countryside?
It’s really beautiful idea, but it’s a little dangerous do the hole without water. My english is not good but I saw some people talking about it and it’s true. We can not do any polishing in glass without water.
I hope everybody read it and really do it.
I’ll do it for sure ;o)
The Plugs come apart on the end so you can Actually put the lights into the bottle and pull the end through Reattach the plug in part and same Yourself a lil more time!!!
Love this idea! Question though-do regular string lights make the bottle warm/hot to the touch? We have a kamikaze toddler around and he seems to find the most dangerous things to get into sometimes *sigh*
Also, was wondering is anyone had suggestions for a project I’m working on. I have a few LED lit orchid branches that I’d like to do roughly the same thing with but these things are battery operated and thus come with large, clunky battery boxes. Not sure how to get the branches into something that hides the cords and maybe some of the battery boxes with drilling (or something…) a slit all the way down the back of a vase or other vessel.
Thank you for posting this project. I also appreciated all the helpfull advise from others. My son drills wine bottles and then wires them for lamps. We use a large grommet used for belts and glue to the outside with E6000. This gives a smooth hole to thread the cord thru and gives a nice finished look. Thanks again. Loved your project
Thanks for sharing. I have always wanted to put lights in wine bottles. I can’t wait to try this.
Just a suggestion: Use a drill press to safe time. It takes me about one minute tops. Continually run a soft stream of water as you are drilling. Good idea to take it outside or in your garage to do this!
Oh yay! I’m going to do this with wine bottles and those great big shower cubes for my winter wedding. To line the isle and center pieces.
ok, I just look at the picture’s real good. very nice, i can do this.
I have not read all the comments, but I’m sure that a lot of them told you- THIS IS NOT HOW YOU SHOULD DRILL THROUGH GLASS!!! I have been working in stained glass for years and worked with an artist that I had to drill a lot of holes. I recommend using a dremel tool with a dimond head round bit. Make a pool of water or stream water on the spot you are drilling. Start by making a small divet with the drill bit straight on then start to rotate in a circle- should not take very long.
It only takes a few minutes with a diamond hole saw. We use a 1/2″ hole saw bit and spray occasionally with water.
Great idea , here’s a great time saver. Cut plug in off the light . Fish cut off wire from bottle neck hole back down to small drilled hole,Use a coat hanger as your fish tape, then feed lights into bottle from the top . Install new plug on wires and your done.
I’ve seen this done with those “glass-blocks”, looked great too.
I really like this idea.My husband used to make beautiful lights from the glass blocks he would get at the hardware stores. He would put clay on the side where the hole was to be and had a tiny stream of water dripping and would drill the hole. It may become hot. Stop and let it cool. I would insert the lights and make a beautiful bow. I added stems of flowers, holiday decorations, little baby gifts, etc, use your imagination, inserted into the bows and they would hang over. I gave about 20 as gifts. I have to make the jug now.