Project By Gina Vide. Readied for publishing by Amy Christie.
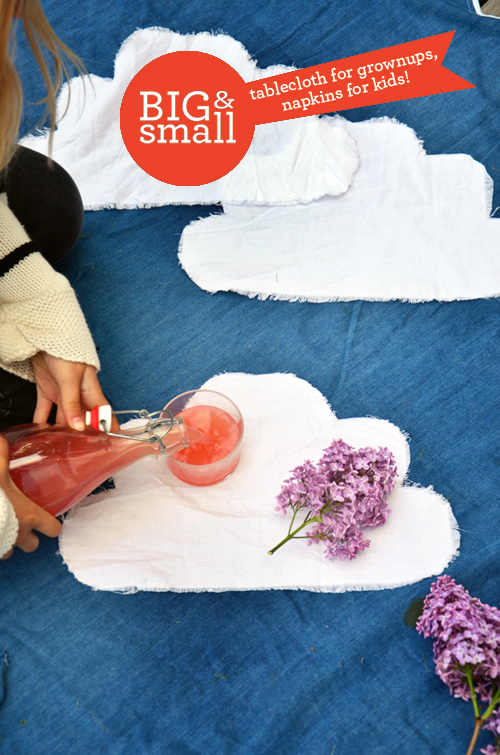
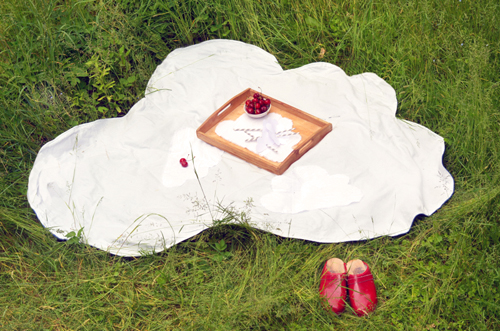
Watching clouds float by under the summer skies is one of my favorite things to do in the summer, whether on a picnic or simply stealing a quiet blissful moment. Today’s Big + Small project gives you the chance to actually make a cloud of your own — cloud napkins, and an easy-to-transport cloud picnic blanket/tablecloth.
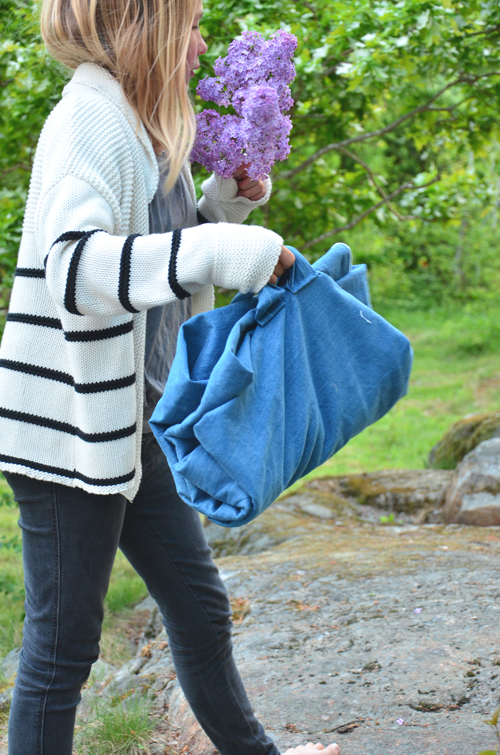
Children can make the simple cloud napkins with very little assistance from the grownups — just a couple of steps! And adults can make the wonderfully useable cloud tablecloth. It’s foldable, washable, and the handles make it easily transportable, too! A perfect picnic blanket.
You’ll have so much fun working side-by-side on this cloud project with your kids!

Big + Small’s can work together, and sail off together, on this Cloud Picnic! Let’s get started.
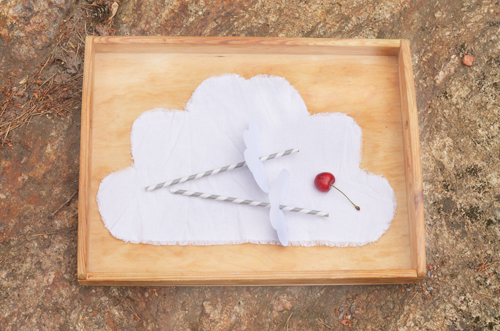
First up, the SMALL project: Fringed Napkins shaped like clouds.
Supplies:
– White Cotton Fabric
– Scissors
– Cloud Pattern
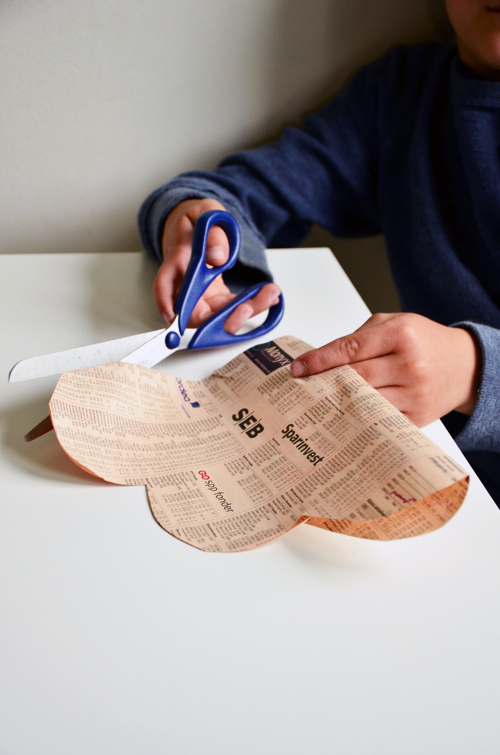
Print the cloud template and cut out.
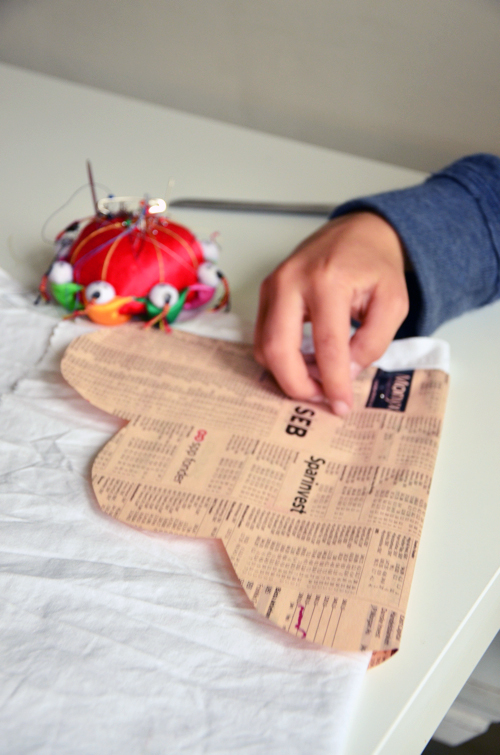
Lay fabric out flat on a cutting surface. Fold in 1/2 with the right sides together. Fold the cloud template and pin along folded edge. Cut out as many clouds as desired. Then unfold each cloud.
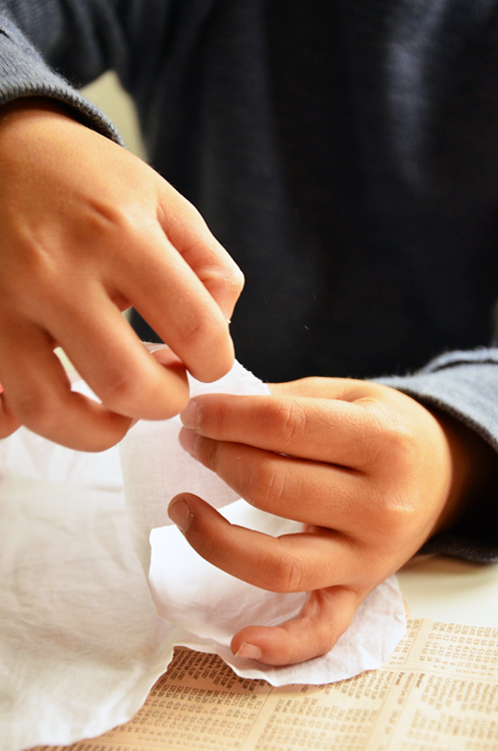
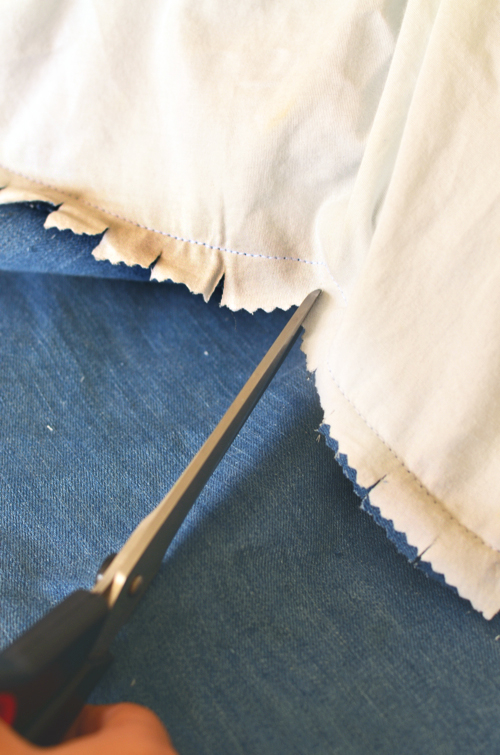
Simply fray the edges of the cloud by gently pulling the fabric along the edge of the cloud. Fray the edges to your preference. I frayed these about 1/2 ” along the entire edge of the cloud.
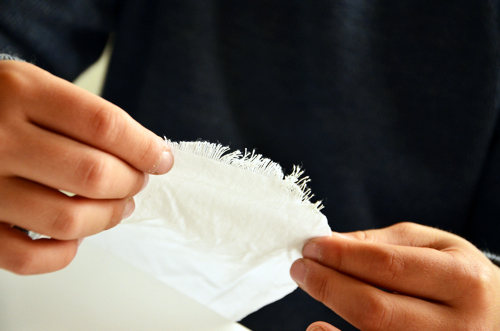
Once the edges have been fully frayed, the napkin is complete and ready to use.
Note: These napkins fold neatly, with the sides folded into the middle.
Next up, the BIG project: A Picnic Blanket shaped like a cloud.
Supplies:
-Heavy Duty Denim Fabric
-Heavy Cotton White Fabric
-White and blue thread
-Scissors
-Chalk
-Pins
-Measuring tape
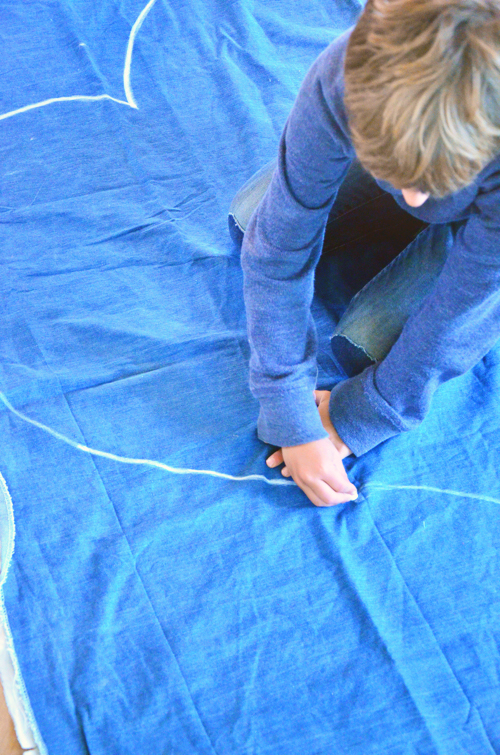
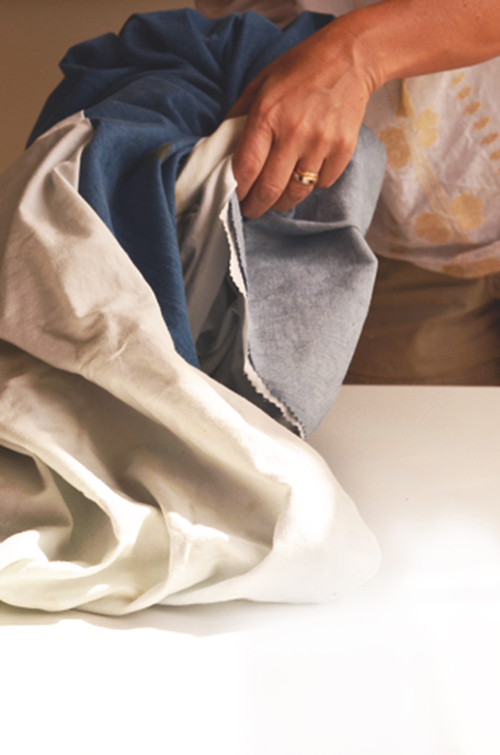
Place one fabric on top of the other, right sides of both pieces together. Lay the fabrics out smoothly on a cutting surface or floor, using your hand to make sure the wrinkles are flattened. To draw the cloud, imagine that the long edge of the fabric is the base of the cloud. Using dressmakers chalk, draw a cloud shape onto the denim. If you need to see a cloud reference, take a look at the Napkin Cloud Templates and enlarge.
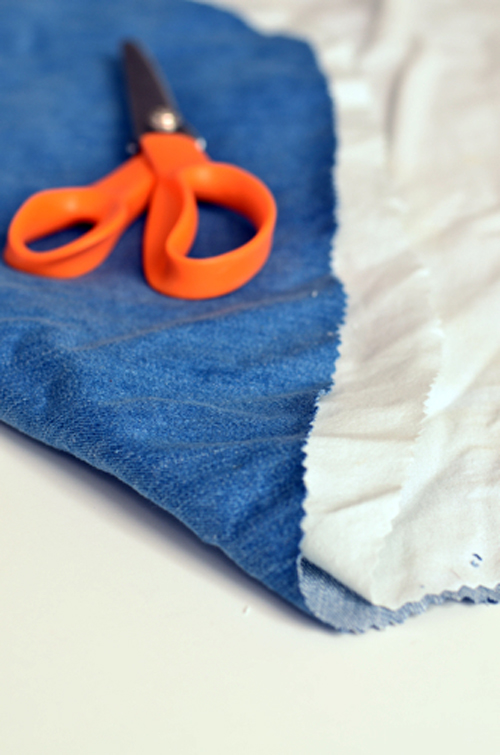
Cut out the cloud shape from the double layers of the denim and white fabric. Also cut 2 denim rectangles that will be used as outer picnic blanket handles. The handle rectangles should be 4″ x 12″.
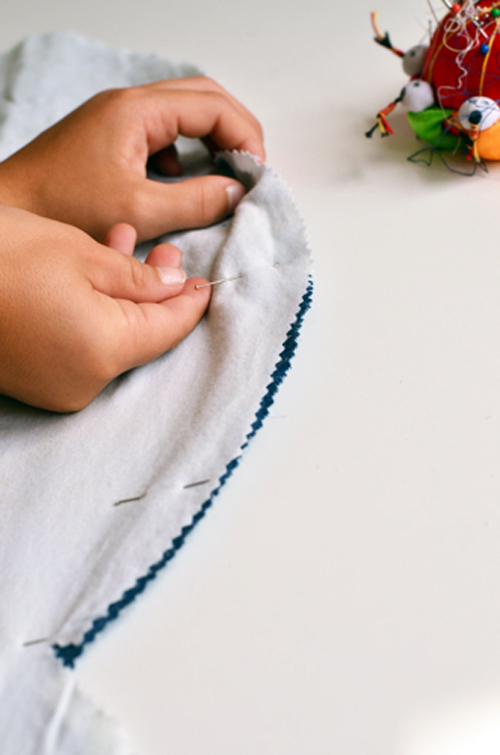
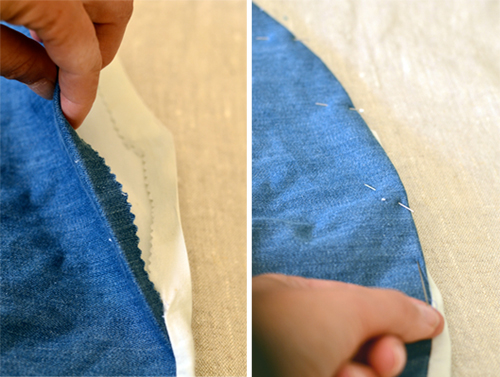
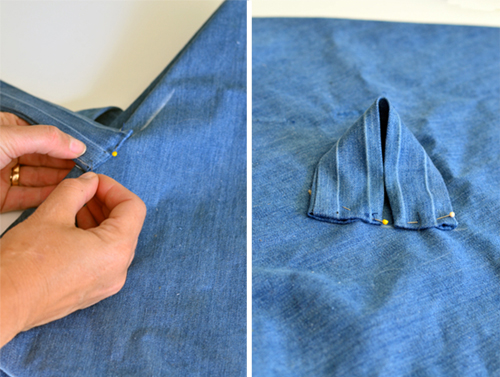
Keeping the right sides together, pin these two cloud pieces carefully along the edge.
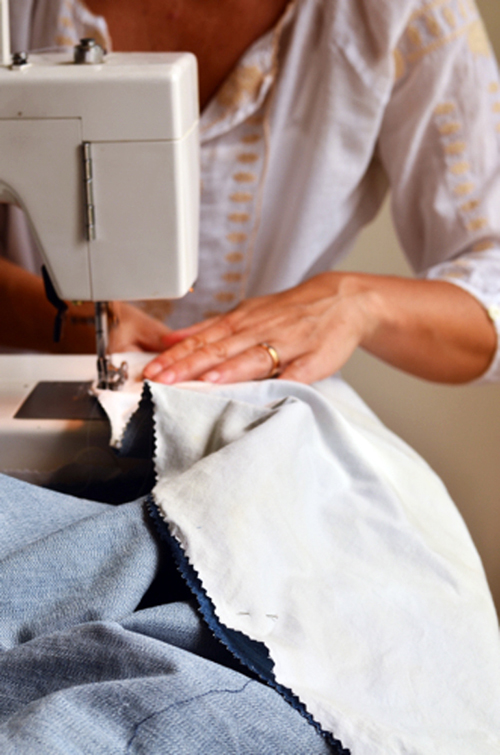
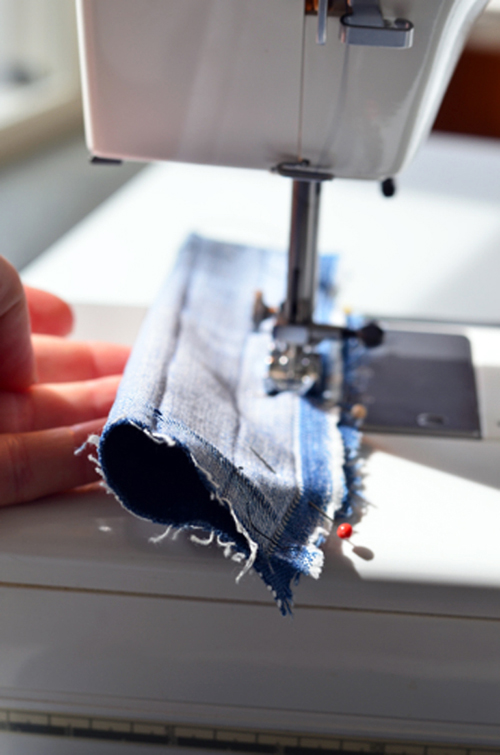
Once the edges have been pinned, sew a 5/8″ seam along the edge of the blanket leaving an approximate 1 foot unstitched — this opening will be used for turning the blanket right-side out later.
Before turning the blanket inside out, snip small cuts at the curves so that when the blanket is turned inside out, the edges will lay flat. Cut carefully. These snips should not break the seam line. They can be approximately 1/2″ and should be about 1 inch apart in the areas of the cloud that are curved, with special attention paid to the dips. All dips need a snip in their middle so that the fabric will lay flat and not pucker.
Pull the interior through the opening to turn it right side out.
With seams folded in, pin and hand sew the opening of the blanket with a whip stitch to close the blanket’s edge. Then carefully iron and smooth all edges of the blanket. Finally, press the full blanket.
For the handles, Fold the two rectangular denim shapes in half lengthwise with their right sides together, creating 2 x 12 long strips. Sew the long edge of each rectangle. Turn right sides out. Fold in a 1/2″ seam along the top and bottom of these strips and press with iron.
To add the handles to the outer side of the blanket, follow this folding procedure:
First, lay the cloud blanket flat on the ground and folding in both sides (gate fold) so that the edges meet. Then, fold the top point and bottom points in until they meet. Next fold this in 1/2 again and finally, fold in 1/2 again.

Find the center of the unfolded edge of this newly folded blanket. Mark the center with a dot of chalk; then, measure the width of the handles and mark this width, to the right and left of the center, with sewing chalk. These chalked lines will be the guidelines for placing the bases of the handles. The handles should be placed approximately 1″ below the edge. Repeat this on the other side of this newly folded blanket.
With the handles marked on both sides, place the handles and pin to secure before unfolding the blanket.
With the blanket unfolded, hand sew or machine sew these handles securely in place on both sides.
Once these handles have been attached the picnic blanket is ready to go.
Wishing you and your littles a Cloud 9 Summer!
P.S. — Are you familiar with our Big + Small series? It features projects designed for grownups and kids to work side by side. Something simple for the kids, and something a little more challenging for the adults.
Wishing all of your readers cloud 9 summers! What an amazing summer you are having! We’ve had many cloud 9 blanket picnics at home and at the beach (since returning) since making this project — plus a plethora of cloud napkins the kids and friends have supplies us! I am definitely keeping a stash of these napkins on hand year around.
(I so wish I had thought of this fold-up, cloud blanket when the kids were babies! I can just imagine a “cloud 9 baby” laying on this if the white side were velour or a soft fabric. I would love to see how this tutorial is used! Thank you, Gabrielle for the chance to share.) Cloud 9 wishes!
Lovely project. And lovely sweater. Where did you find the cream and striped sweater if you don’t mind me asking?
Thank you, Laura. I would love to see what you make, if you use the tutorial. When not out on picnics, we’ve been using these napkins all Summer.
Regarding the sweater, “Gap saves the day, again.” I found this sweater this past Spring on the Gap UK online site when I discovered that the Gap was now shipping (reasonably) to Sweden (where we live.) I would assume it was sold in the US, as well but don’t know. This is a sweater that both Mother and Daughter easily agree on.
I’m weak for these color tones and stripes, too — it seems that I’m probably always made sure that she has had a sweater in this color way from the time she was a new born. If you’re a knitter, I remember knitting something something with Debbie Bliss’s cashmerino yarn with one of her patterns that was great. I I LOVE her yarns and patterns which are easy enough for even a basic, basic knitter, like myself, can do. Thanks for taking the time to comment. Continued happy Summer wishes.
Thank you for such a nice reply! I couldn’t find the sweater anymore, but I did find your lovely blog and got lost in it’s pages for a while. I will have to make the darling treehouse with my daughter…..and the confetti cookies too! Thank you as well for reminding me of Debbie Bliss. I used to knit more when my children were babies. Baby clothes are fast to knit up. I still make hats, but perhaps I will have to embark upon a little girls sweater as the weather cools down this fall! Thanks again for your nice response!
You make my day. It’s always so nice to find like mined creatives! I would love to see how any of my tutorials work for you and I’m so very happy that you found me here at designmom. Wishing you continued inspiration!