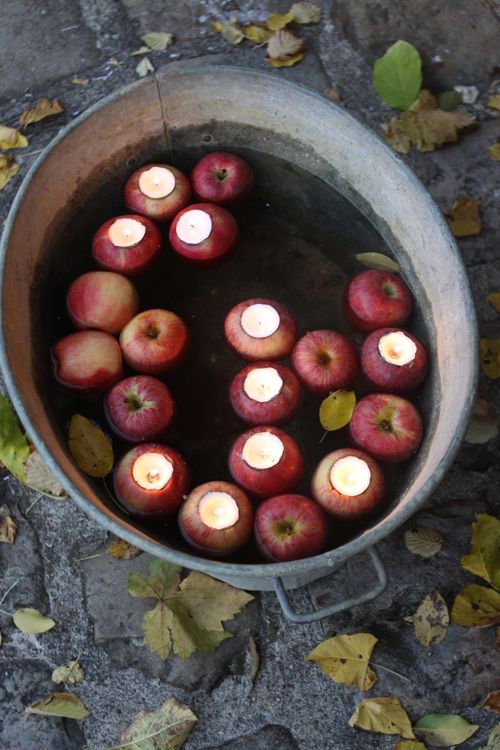
Let’s make apple votives! This is the ideal fall project. It’s simple, it’s easy, and you probably have everything you need to make these in your house right this minute. They’re the first Martha Stewart project I ever tried (way back in 1997!). And they’re still one of my favorites.
Making apple votives is super easy and doesn’t take much time at all. The finished display is so pretty and festive it makes for a really satisfying project.


How to Make Apple Votives
Gather supplies. You’ll need apples, votive candles, a craft knife and a spoon.

Before you begin, float all your apples in water. Some will float with their tops up, others won’t. Pick a few of the top-facing apples for your votives.

First step, rest a votive on top of an apple and use the craft knife to trace around it. You’re just tracing, you don’t need to press hard.
Second, move the votive and make straight cuts the depth of the craft knife all around the circle you traced. Try to cut straight down (it helps me to imagine the straight edge of the votive).

Third, slice across your cut circle 3 times, as if cutting it into pie pieces.

Fourth, use a small spoon to scoop out the apple pieces. They should come out easily.
Fifth, after removing the apple pieces, your votive may slide right in, flush with the apple, but if it doesn’t quite fit, you can use the spoon to dig out a little more.

Last, place your votive in the apple. It’s ready to float and light!

