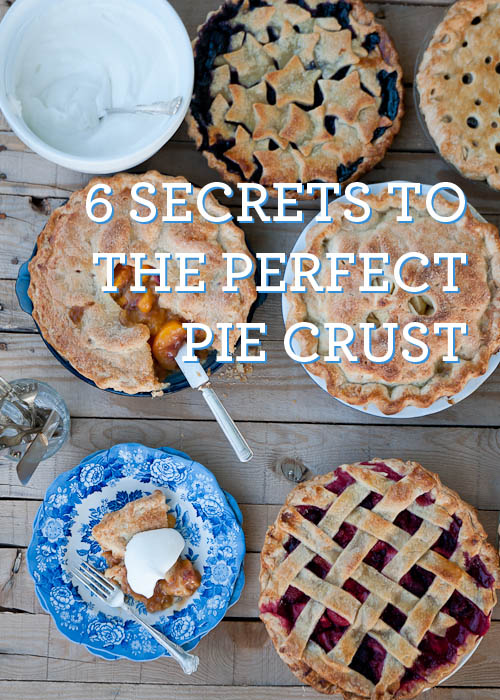
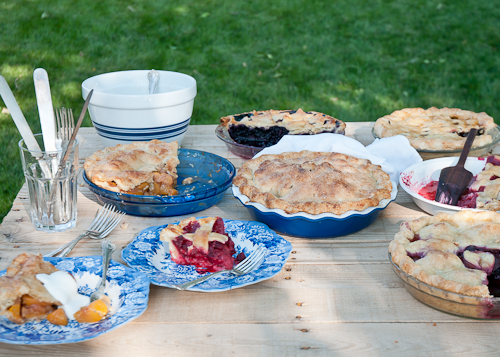
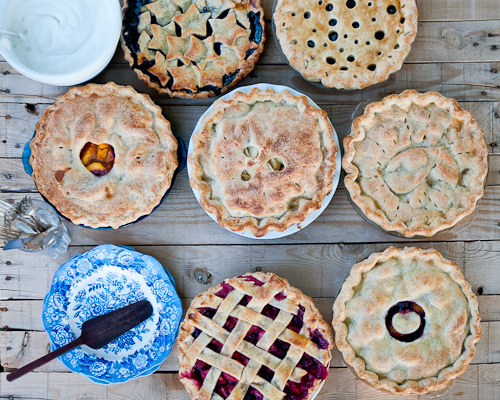
Today is the perfect time to practice your pie crust skills. Don’t be intimidated! Follow these secrets and you’re sure to find success. Preparing this post included making 7 double-crust pies, so it’s a promise that you can trust these instructions.
Let’s start with pie plates. There are many types, but for practicing, start with ceramic or glass, because they cook more evenly than the metal pans.
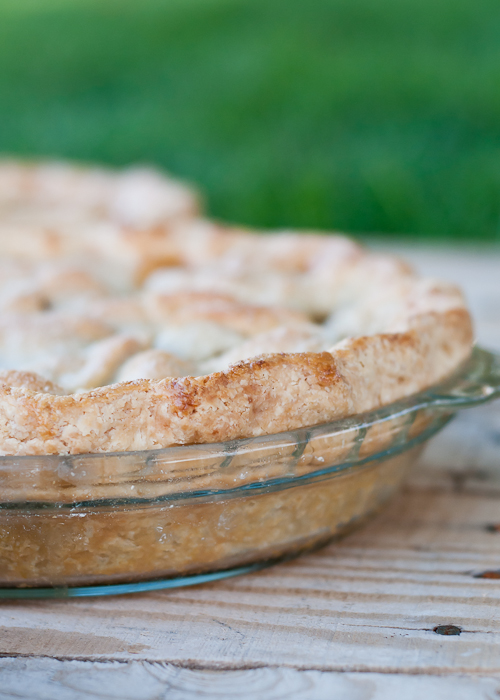
Secret #1: If you’re nervous about overcooking, choose glass, so that you can clearly see when the pie is browned properly on the bottom.
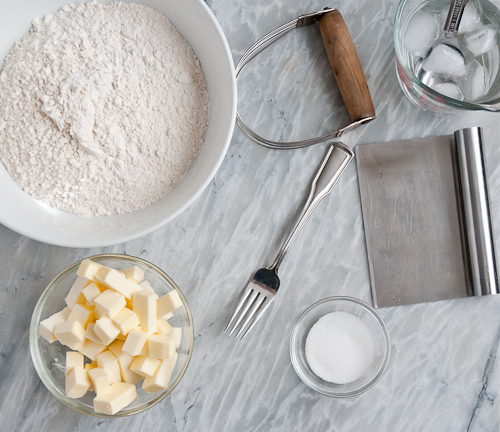
Now we get to ingredients. Pie crust is made of five things. Here’s the recipe for 1 Double Pie Crust:
– 2 1/2 cups flour
Use a basic, unbleached all-purpose flour.
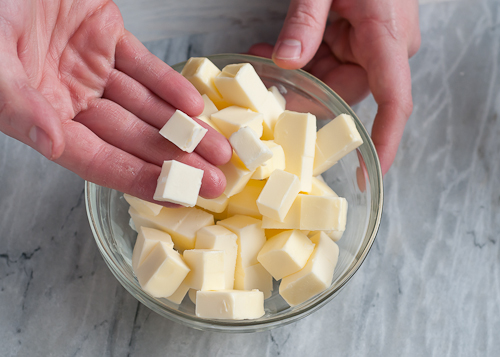
– 1 cup fat
This could be butter, vegetable shortening, or lard. Use what you like, but skip the margarine — it has too much water in it and the flavor is terrible. The photos here feature butter crusts. Secret #2: Flour doesn’t taste like much, so, like shortbread cookies, pie crust gets its flavor from the fat you use.
– 1 teaspoon salt
Salt = flavor booster.
– 1 tablespoon sugar
You need a little sugar in the crust for flavor and because it helps the crust brown. Too much will make it brittle and tough, so just go for a touch of sweetness.
– 4-8 tablespoons (1/4 to 1/2 cup) liquid
We recommend ice water. But you can also use milk, buttermilk, vinegar, even vodka. Whatever you use, make sure it’s icy cold.
That brings us to Secret #3: Everything that goes into the pie crust should be cold, cold, cold. That goes for fats, dry ingredients, and liquids. The reason pie crust is flaky is that as you work the fat into the flour, the flour coats the fat, then the fat melts leaving a little air pocket, hopefully in layers upon layers. Cold fat is easier to work with.

MAKING THE DOUGH
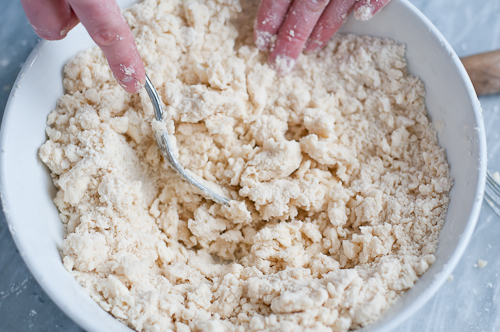
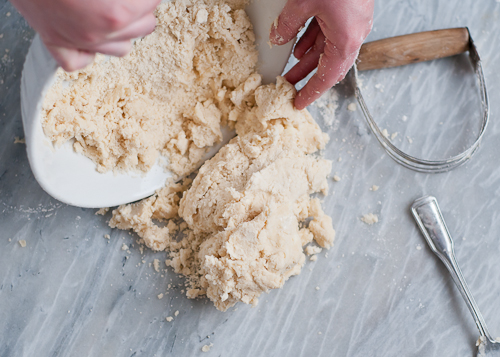
Combine your flour, sugar and salt, then cut the butter into the flour. You can do it by hand or use a food processor, but while you learn to master the crust, we recommend using a pastry cutter — it will help you have the most control.


As you cut the butter into the flour, leave some big and small pieces of butter .

Next, add the water to help hold it together. This is important: Do not add too much liquid. You want just enough so you can hold it together. But not too much that it’s sticky. It should feel about like play dough.
Secret #4: The amount of liquid you use will vary a little each time you make a crust. This is because weather varies, particularly humidity. So you want to go by feel, not by a precise amount.
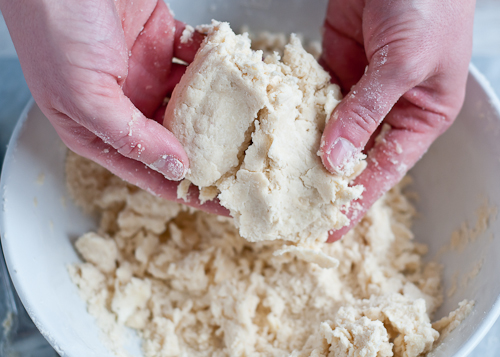
Now that the dough is mixed, turn it out onto a lightly floured surface. There will be some unincorporated dry bits — that’s totally okay.
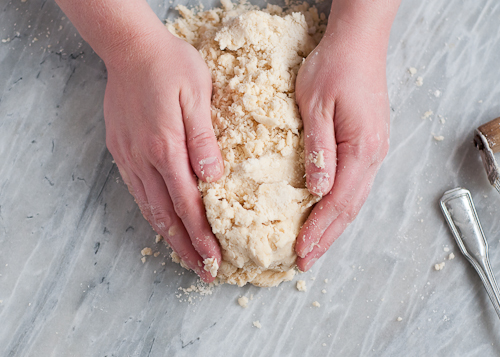
You’ll want to gently press the dough together. Don’t knead it like you would bread dough or biscuit dough. A few presses is all that is needed. Repeat to yourself: gentle, gentle, gentle.
You should be able to see the butter marbled throughout the dough.
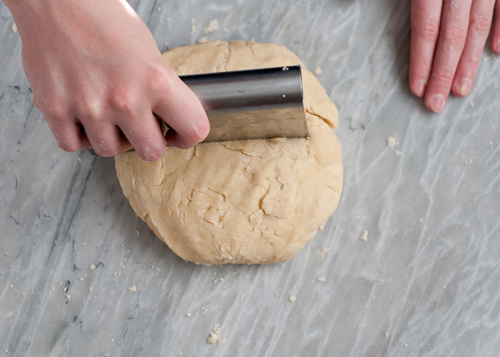
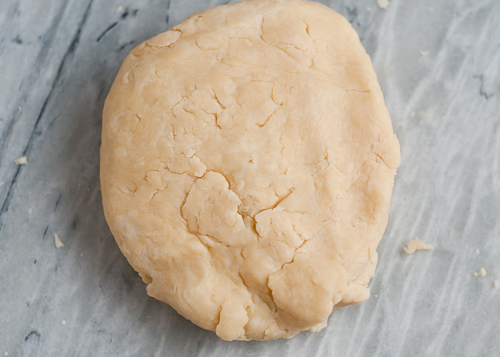
Divide the dough into halves. If we’re feeling extra picky, we’ll even weigh them out to make sure they’re exactly the same.
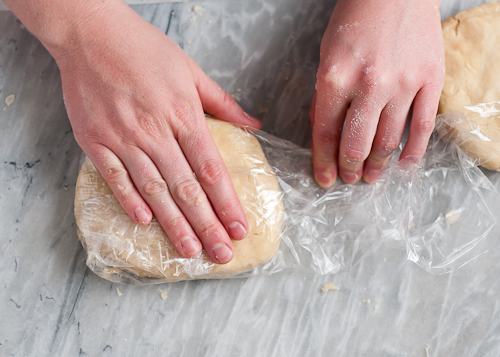
Wrap each half in plastic wrap.
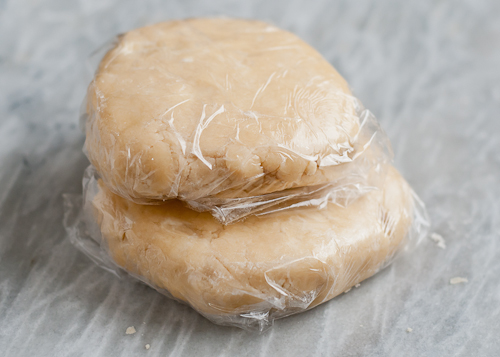
You can freeze it for later, or chill it in the fridge for about an hour until you’re ready to roll out your crust.

ROLLING OUT THE DOUGH
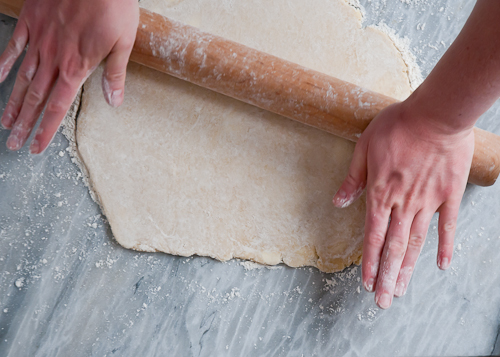
First you’ll roll out the bottom crust. You can use any clean, lightly floured counter top. If you have a marble slab (or granite counter tops), now is the time to use them, because they stay nice and cool. If you’re in practice mode, you might try a pastry mat — they have rings printed on so you can measure the crust as you roll it out.

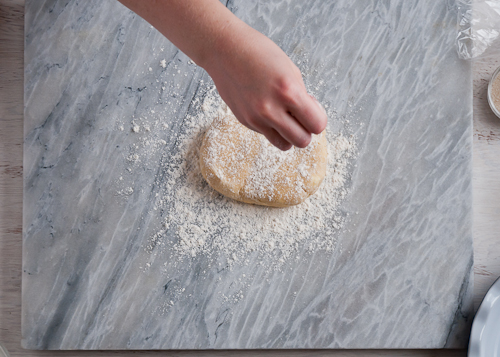
Lightly flour the top of the dough as well.
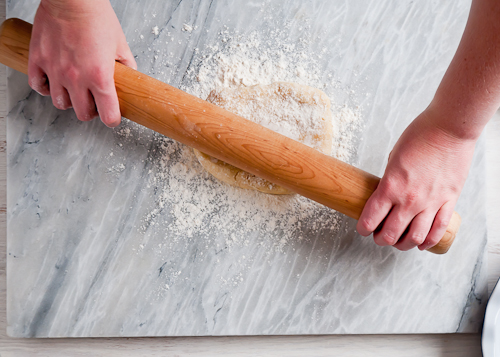
Starting in the center, roll outward. Imagine the shape of a wheel with spokes — that’s what you’re doing with the rolling pin.
Pick up the dough and give it clockwise turn periodically as you roll, so the dough is as close to a circle as possible.
When you’re rolling, apply gentle pressure as you roll forward. I like to use a wooden rolling pin without handles for more control.

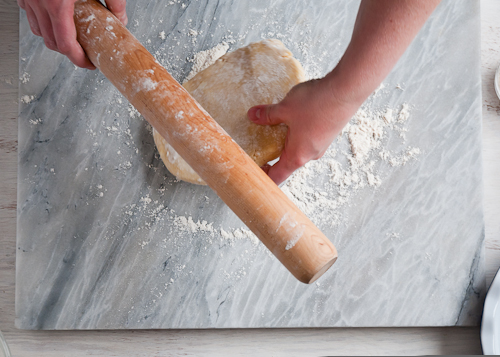
Take a break to check and see if you’ve rolled the crust large enough. If you don’t use a pastry mat, simply turn the pie plate upside down and use it for reference. Roll the bottom crust out a little larger than you think you’ll need — you want plenty of extra dough around the rim of the pie plate to create a pretty edge.
Secret #5: If at any time the dough becomes too sticky or soft, transfer it to the refrigerator for a few minutes to firm it up. If the dough cracks or tears, dab a little water on it and press it back together, or patch it with a bit of extra dough.

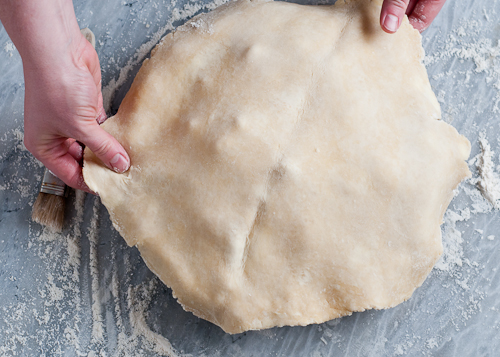
Once your bottom crust is rolled out to the right size place your dough inside the pie plate. (If you’re using a metal pan, you might want to grease it well.) The easiest way to transfer the dough is to fold it gently in half and then in half again.
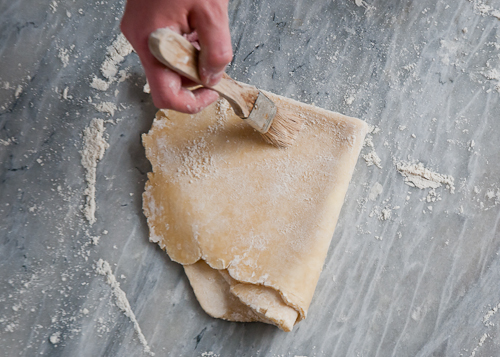
If you notice you have excess flour on the dough, use a pastry brush to quickly sweep it away.
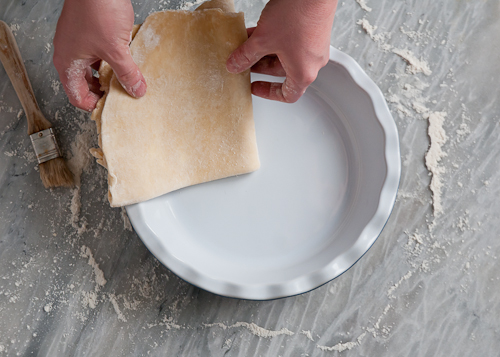
Lay the dough in the pie plate and unfold and reposition it.

Fit it into the bottom of the plate.
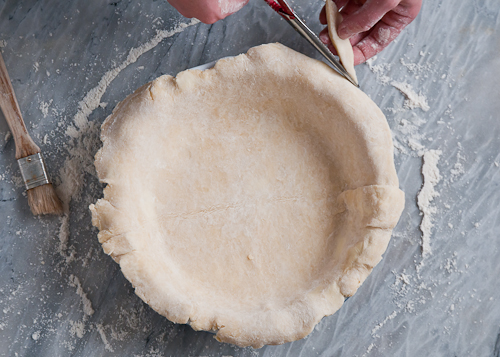
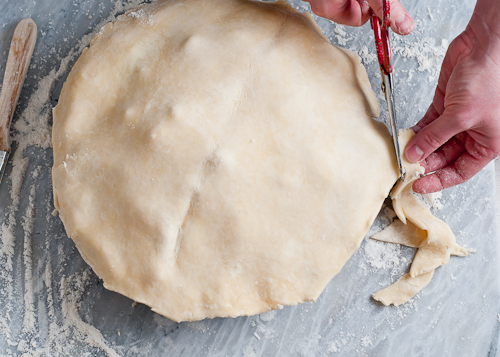
Use kitchen shears or a knife to trim the dough all the way around. Leave about 1/2″ of overhang depending on how big the edge of your pie plate is.
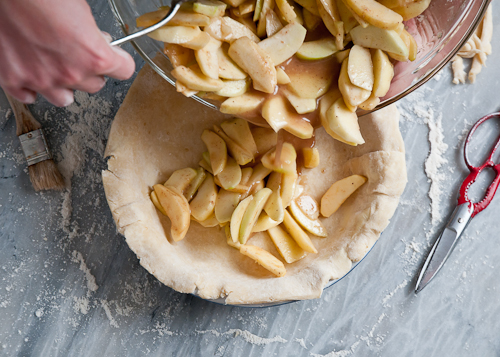
Fill with the fruit. Then chill the fruit-filled bottom crust in the fridge while you roll out the top crust.
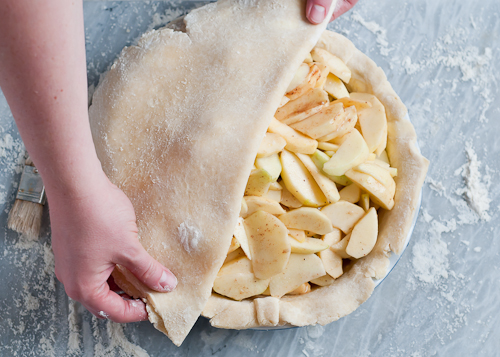
Repeat the steps for the top crust, making sure to make it a little larger than the pie plate too.
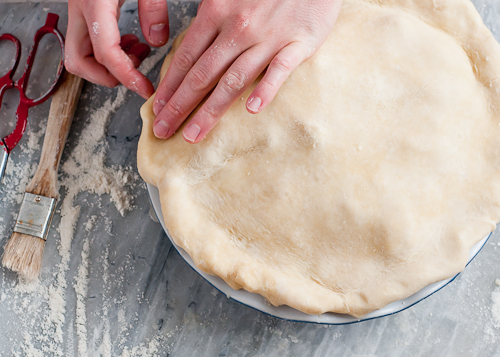
After you’ve rolled out the top crust, carefully position it on top of the fruit.
Trim again. You want a little more overhang than with the bottom crust.

To really seal the edges, weI like to dab the bottom crust with water to “glue” it to the top crust.
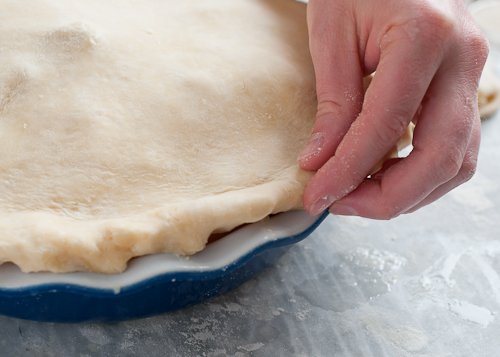
Go around the whole circumference of the pie and fold the dough under along the edge.
Seal it well with your fingers, creating a decorative edge. Two easy and beautiful techniques are pressing with the tines of a fork, and pinching the dough between your fingers. Here’s the pinching method:
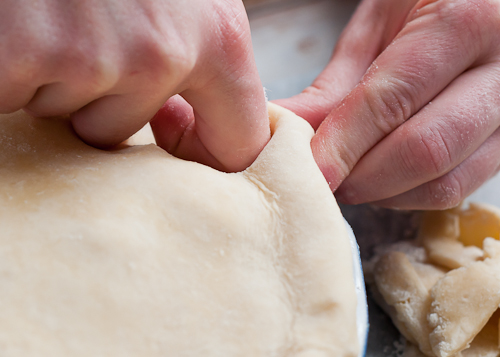
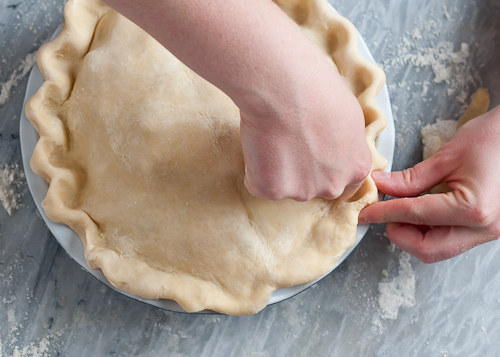
Crimp the edge all the way around.

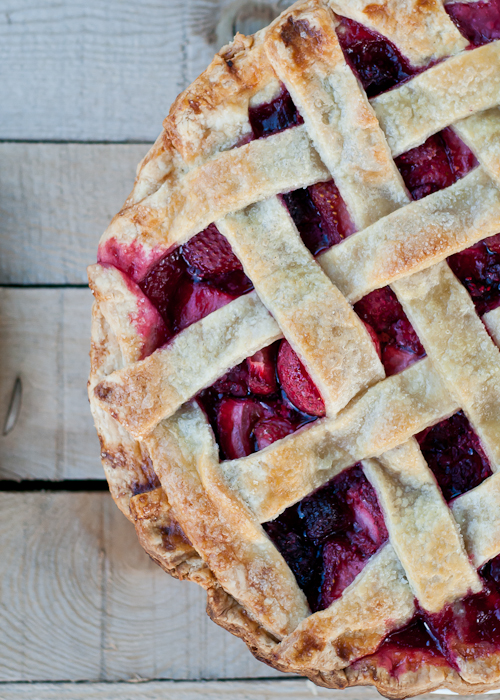
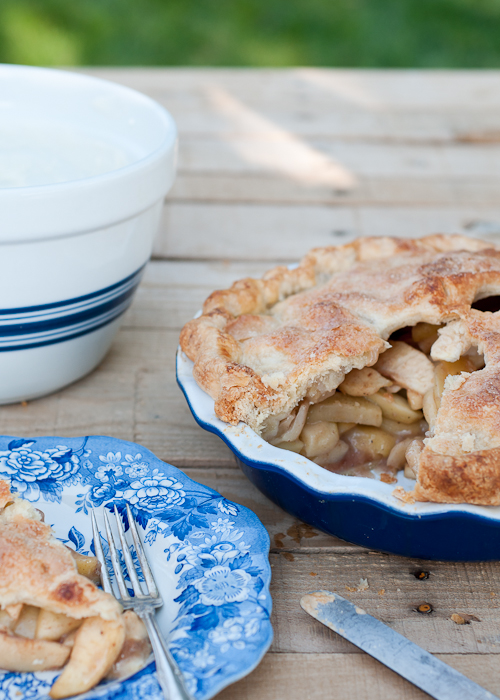
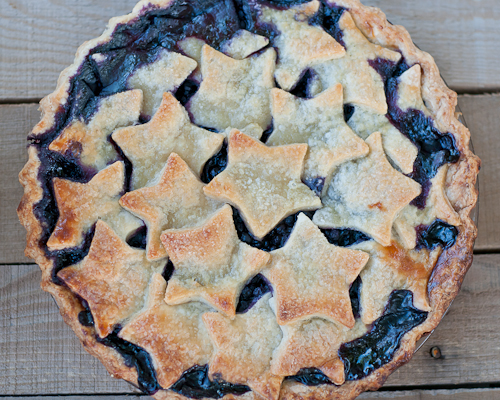
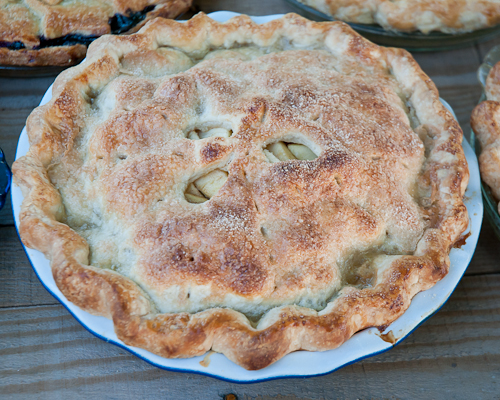
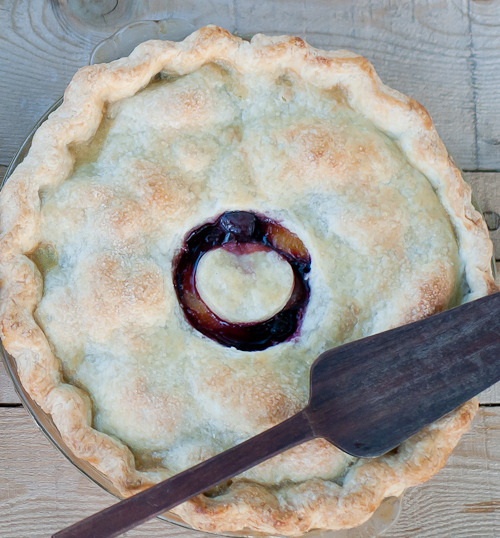
You’ll want to be sure to cut vents in the top. It’s as easy as making little slices with a knife. But if you’re in the mood for something more elaborate, you can use cutouts on the flat top crust before you place it on the pie.

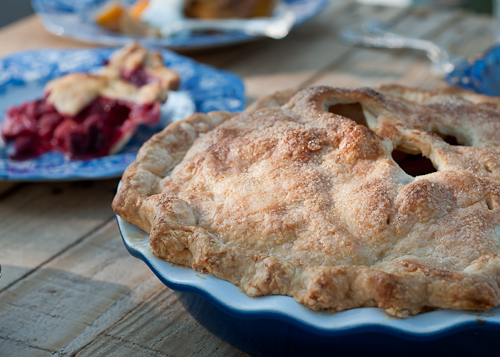
Secret #6: For a golden brown finish, whisk an egg with a little water or milk and brush it over the top crust before you put it in the oven.
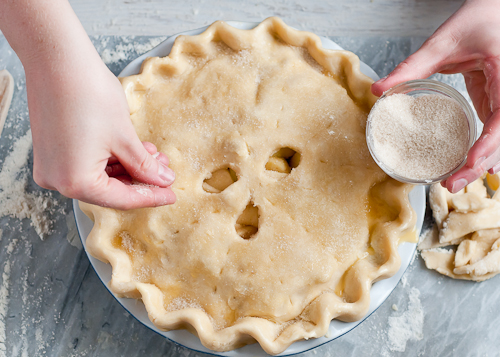
You can sprinkle it with sugar too.
The final step is to place your pie in the oven with a foil-lined baking sheet on the rack below to catch any overflowing juices. You can also wrap the bottom rack in foil. Both of these techniques make clean up a snap.

Follow baking directions for the filling you’re using. For most fruit pies, you’ll bake them at 400-425 degrees F. for 20 minutes, and then lower the oven by 25 degrees F. and continue baking for an additional 40-50 minutes, or until the juices are bubbling and the crust is golden brown.
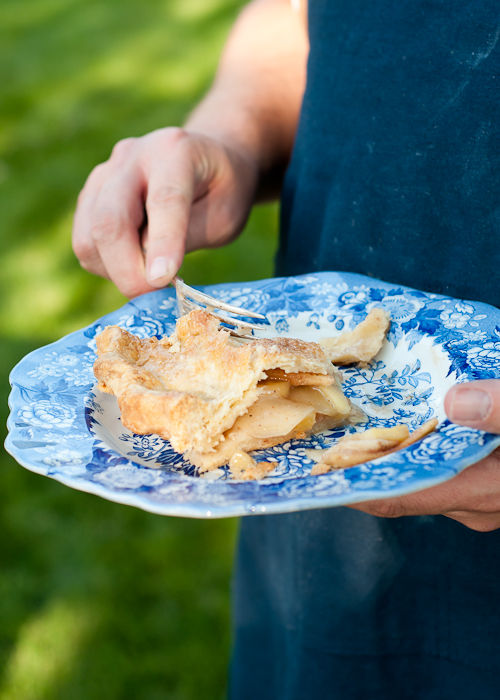
Voila! You just baked a perfect pie. Doesn’t that feel great? Happy baking!


Photos and tips by Lindsey Johnson for Design Mom.