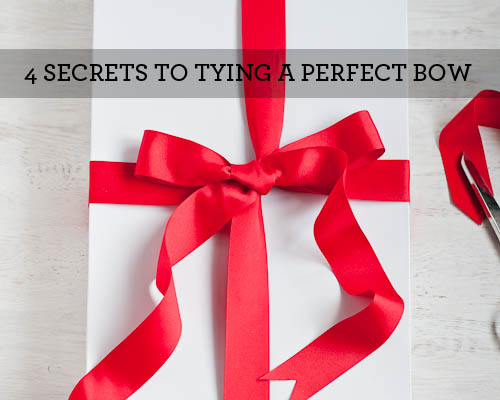
I have a big basket chock full of all kinds of pretty ribbon I’ve been collecting over the years. To me, a pretty bow on the top of a gift is almost as important as what’s inside! But a bow is a bow is a bow, right? And it’s no different than tying a shoe, yes? Well. Yes and no.
I’m going to show you three bow-tying techniques — each one achieving a slightly different look for different purposes. I’m also going to show you the trick to getting your ribbon to lay flat on the bottom of your gift box. Professional gift wrappers use this very same method. (Fancy!)


HOW TO TIE A BOW
Let’s start with learning how to get the ribbon flat on the bottom of your package.
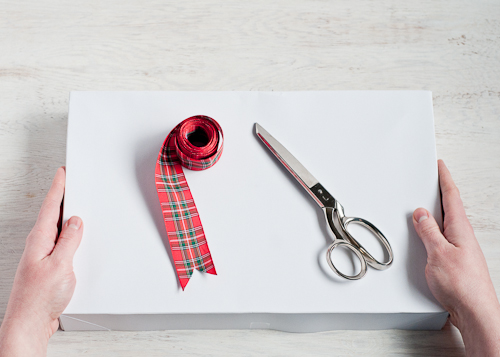
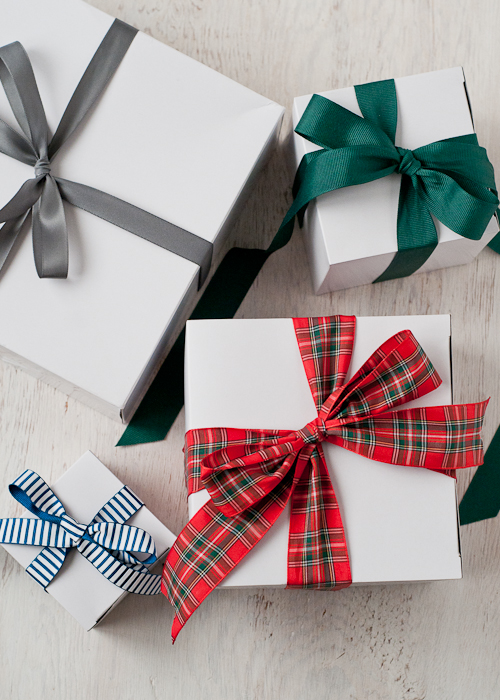
Choose a pretty ribbon. For smaller boxes, I like to use narrower ribbon, but it can be fun to change it up and use wide ribbon on smaller boxes too. For this part of the tutorial I chose an unwired, woven ribbon in classic plaid. Satin and grosgrain are my other favorites and make the loveliest bows.
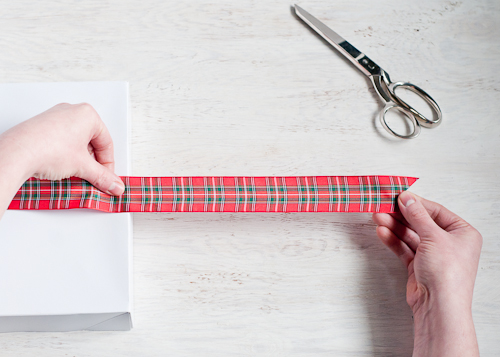
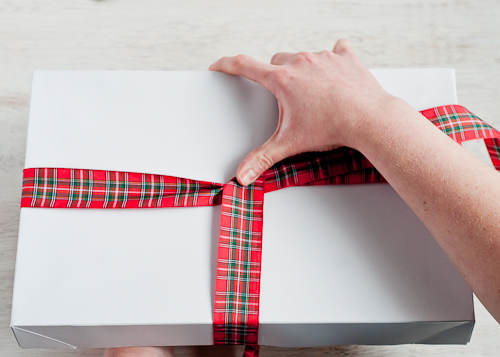
Lay the box flat on the table. Bring one end of the ribbon across the top of the box leaving enough ribbon on the end for the bow, between 4-8″ depending on the width of your ribbon and how big you want the final bow to be.
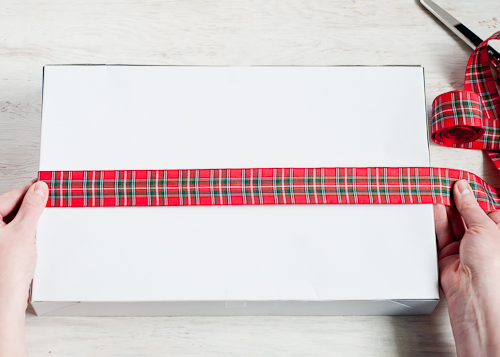
Now bring the ribbon across the top, around the side, across the bottom and back up the other side.
Bring that side up to meet the top ribbon in the middle of the box.
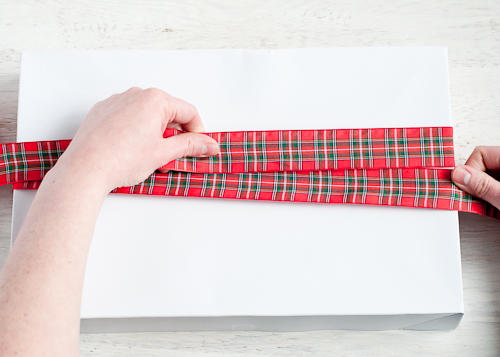
Fold the top ribbon over as shown. Secret #1: If you are using a ribbon with a pattern only on one side, give the ribbon a double twist here so the pattern faces up as you wrap it around the other side.
Hold the ribbon fold in place with your thumb as you gently lift the box up and bring the ribbon all the way back around to the top center of the box.

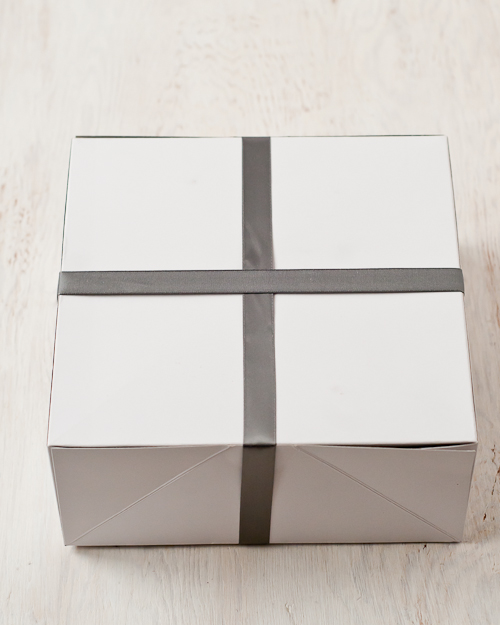
This is what it will look like on the bottom. Nice and flat! Just like you want it.
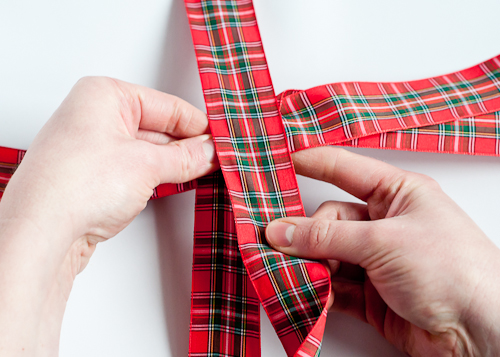
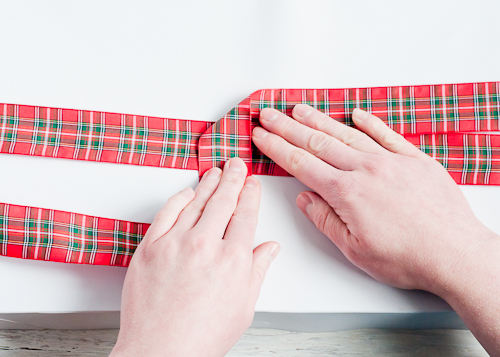
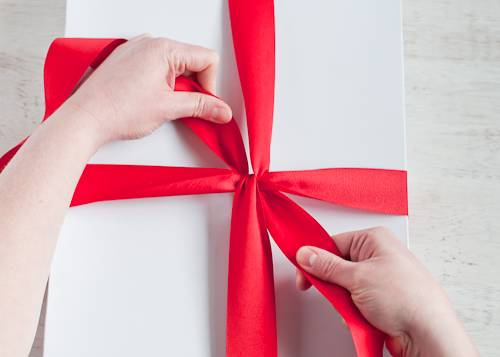
Cross the end you just brought up from the bottom over the center.
Bring it around underneath.
Pull both ends in opposite directions to tighten. Now we’re ready for the bows!
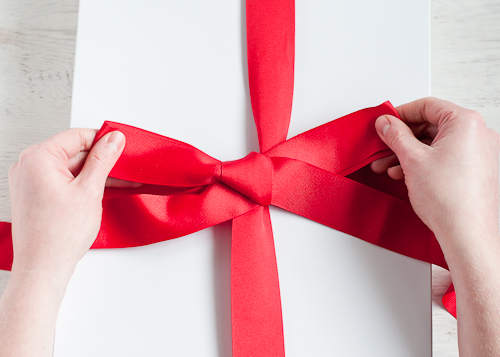
HOW TO TIE A STANDARD BOW
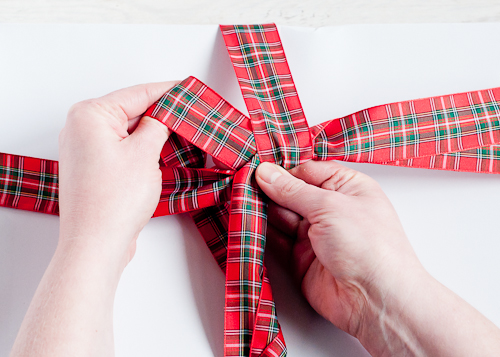
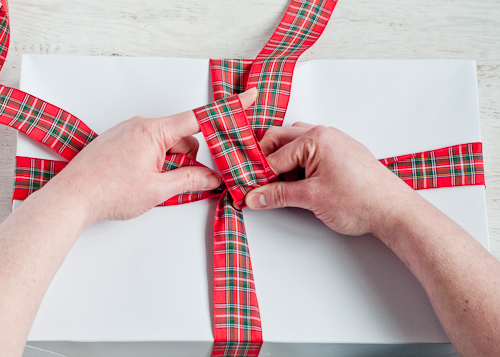
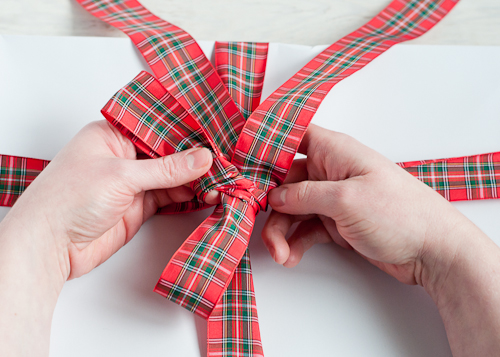
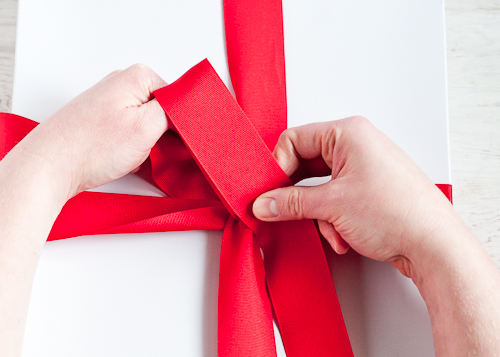
Starting with the right side, make a loop with the ribbon. Secret #2: I prefer to bring the ribbon up to make my loop rather than down. I think it makes a prettier bow.

Bring the other side around the loop you made, just as you would when tying your shoes, and up through to form the other loop.
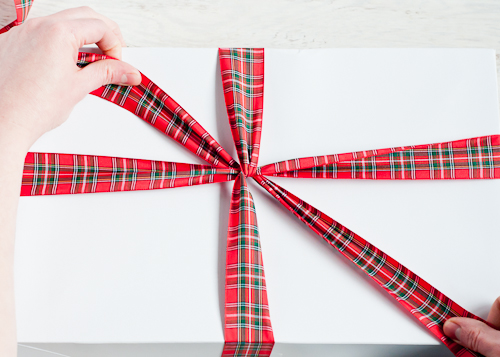
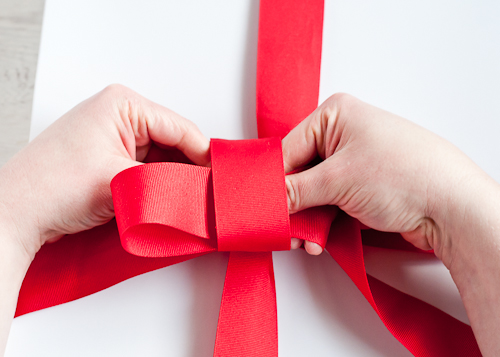
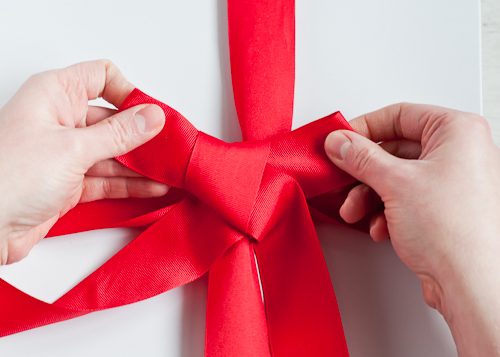
Pull on the loops to tighten. Done.
HOW TO TIE A BUNNY EAR BOW
I’ve found that flimsier ribbon works better with either the bunny ear or standard bows. If I’m using a wider grosgrain ribbon, I prefer the flat bow below.
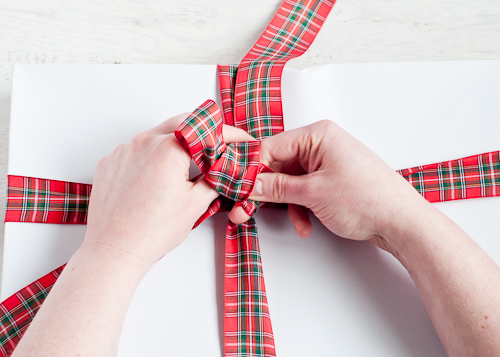
Start by making two loops of equal length on each side.

Cross the left side over the right.
Bring it through.
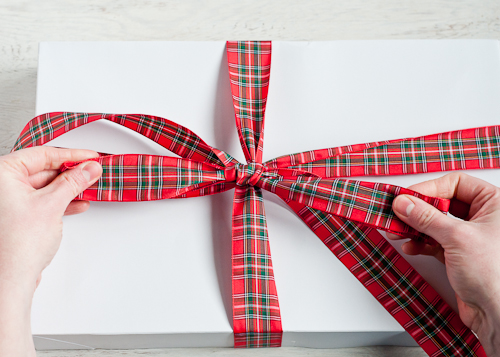
Pull the loops tight, adjust length, and snip ends.
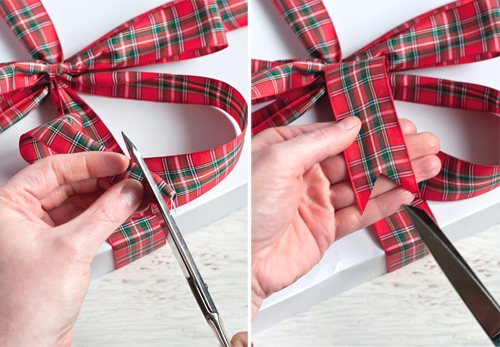
Secret #3: To snip the ends in a classic V, simply fold the ribbon in half and cut it at an angle from the edge towards the fold.
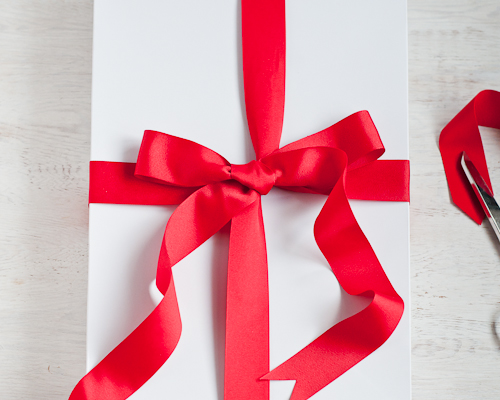
HOW TO TIE A FLAT BOW
A flat bow is not much different than the first bow I demonstrated. Secret #4: A flat bow looks good on a gift, but it’s especially perfect to use on greeting cards or crafts where a flat-lying bow is needed. This is also the bow I use to make hair barrettes for my daughters.
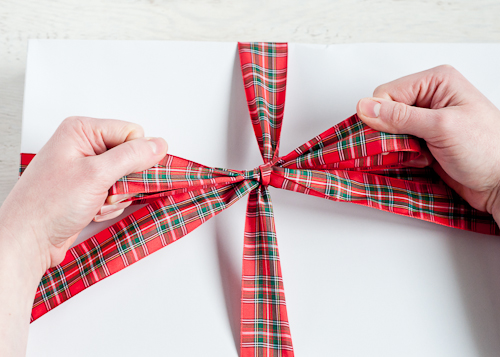
Follow the ribbon-around-the-box directions as above, pulling the ends tight in opposite directions.
Form a loop, this time with the ribbon coming down instead of up.
Bring the loop over to the side, like a bowtie and bring the other end around from behind and over the front of the loop, and through.
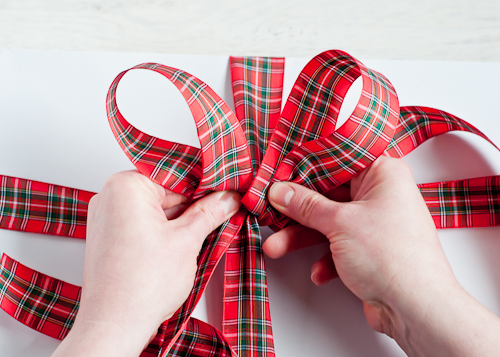
Pull the loops tight and adjust length as needed by gently tugging on the ends.
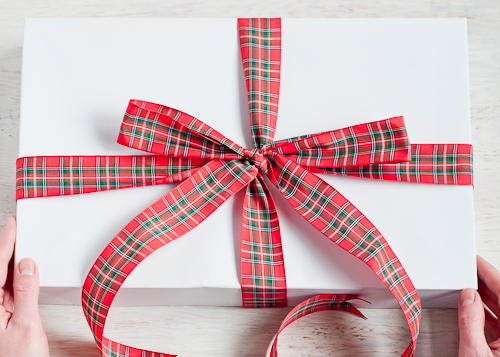
Trim the ends and you’ve got one gorgeous bow!
Here’s to a season of beautifully be-ribboned gifts!
P.S. — Find all the secrets to living well here.
Oooh, thank you for this! I’m never happy with my bows. Anxious to try your tips out….
You need to do a video on this, and here’s why…
1. I can’t figure out what you’re trying to say.
2. Your Halloween/movie night videos were superbly entertaining.
3. I like your voice. Hope this one isn’t creepy.
As for more video, I just made a really cute on (at least I hope it’s cute!) featuring last-minute hostess gifts. It should be ready soon — I’m guessing next week.
Thank you for liking my voice! I’m still so new to video that it sounds strange to me to hear it. : )
Is there a protocol for snipping the ends? I’ve seen some people who like to cut them off completely, so that only the bow is left. I prefer mine long and trailing. Either way it seems I’m doing it wrong. Is there a most desirable end-to-loop ratio?
(p.s. I totally second the request for a video. Videos are fun.)
This was great. My mom worked nights in the gift wrap department at our local dept. store. She taught me how to do all kinds of bows. I loved watching her wrap for the holidays. This reminded me of those memories.
I spent shifts wrapping gifts at the university bookstore when I was in college. Good times!
I need a video too! Although maybe if I had a box and ribbons with me right now I might be able to figure it out.
Oh. That’s so true! A video would be great to demonstrate something like this. Though, I promise, I tried Lindsey’s instructions with a ribbon in front of me and they made sense. Hah!
Pingback: Happy Weekend! | Pretty Morning
Pingback: Before We Go... | this heart of mine
Pingback: {lime link love} ed. LVI ~ gift bows and rainbows - 74 Lime Lane | 74 Lime Lane
Pingback: Remembrances of My Youth « A Voice From the Foothills
I agree, a video tutorial would be nice. But your blog is Great!
Pingback: Lylium.org » Gift Wrapping Round-Up: How-To’s, Inspiration, Resources
Pingback: Gold Stamped Gift Tags | One Charming Life
Pingback: DIY Simple Poinsettia Hostess Gift | My Full Circle Life
Pingback: 25 homemade bow tutorials | a subtle revelry
Pingback: How do you kickstart yourself after a holiday? | Coletterie
thank you very much for the tips. i will use them, as i have a lot of presents left to wrap!! :)
Pingback: Ribbon & Wrapping Roundup « M&J Blog
Pingback: Link Love | DIY Tutorials
Pingback: A Subtle Revelry | 25 Easy Handmade Bows
Thank you for the information and your efforts!
Can you please respond to jenni baileys questions one of which was if there is an ideal bow to lengths ratio? Some of us are artistically challenged and take our cues from those who arent. I know there are different looks but a rough idea of styling preferences would be good. A video of some of the techniques would be good but this was still very helpful. Thank you!!!
Pingback: How to Tie a Bow
Pingback: How to Tie a Bow | I Want to Know How
Pingback: How to Tie a Bow | Dealsfinderonline
Pingback: How to Tie a Bow | How Can I ... ?
Pingback: How to Tie a Bow | popquizhelp
Pingback: How to Tie a Bow - Berbit.net
good to know! Thanks!!
Pingback: How To Choose And Wrap The Perfect Gift For Any Occasion
Wholesale bows on items, Tiongkok bows in items on the market ,kinds of lace on gifts manufacturers.
I like your handwork
Pingback: Fihor Blog
Pingback: Udfev Blog
Pingback: Letterhead Blog
I’ve always disliked how my bows lie diagonally, not any more thanks to your really clear description. Very much appreciated
As a 25 year old guy who knows crap about this stuff, thank you. Maybe this year my presents won’t look like the contents of a trashcan stapled together.
Pingback: Creative Christmas Gift Wrapping Ideas | UnRubbished