By Marisa of Omiyage. Photos by Alexis Edghill. Edited by Amy Christie.
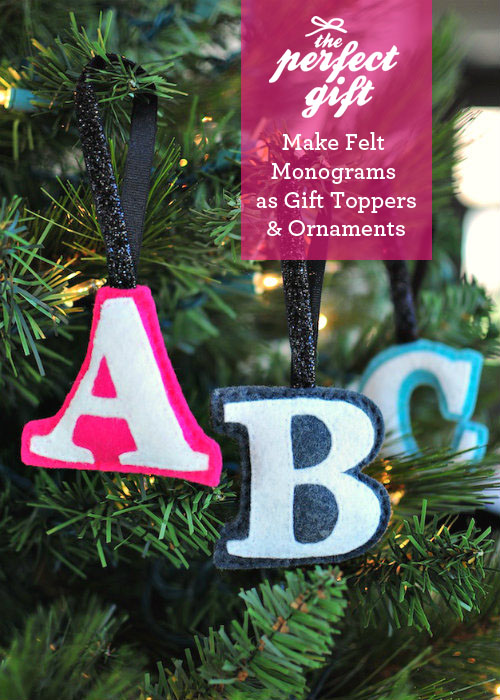
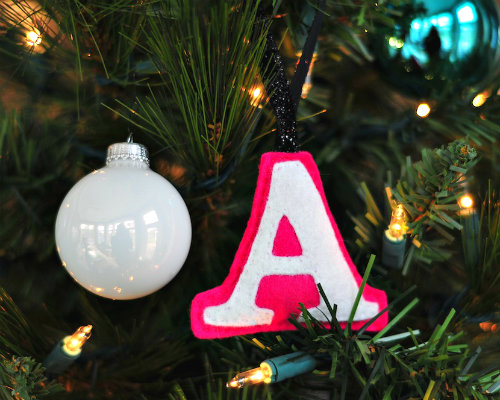
I love making things all year round, but there’s something extra-special about crafting for the holidays, don’t you think? Last year, we made these felt monogram ornaments and they were definitely a hit!
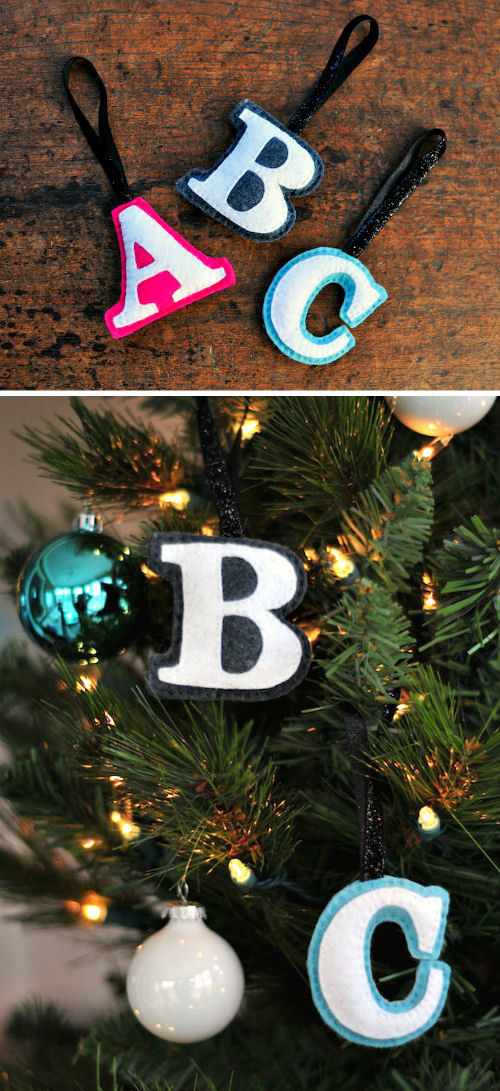
We sent them out instead of Christmas cards, tied them onto gifts and placed them on our own tree. Everyone, young and old, loves receiving personalized items. But the best part of these ornaments (besides the fact they’re simple to make) is that you can customize them with any colour combination or font style you please!
You can even choose to sew them by hand or by machine — whichever you’re more comfortable with. It’s like a choose-your-own-adventure in one little ornament!
So, let’s get started!

Supplies:
–Wool Felt (I used White, Magenta, Swan and Graphite)
-Needle & thread or Sewing machine
-Spray Glue
-Polyfill Stuffing
-Ribbon
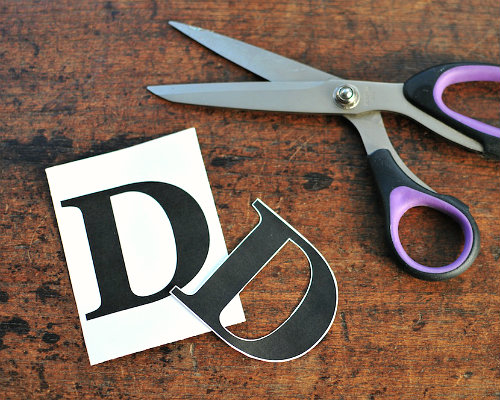
Print out a letter in the desired size and font. The printed letter should be approximately 2.25″ tall for a finished ornament height of 2.75″. (I used Georgia Bold in size 240.) Cut the letter out, leaving a small white border on all sides.
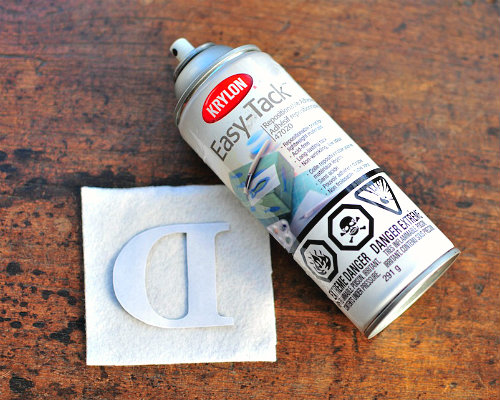
Use spray glue to stick the cut out letter to the white piece of felt. Make sure to put the printed side down. Cut the letter out of felt, using the paper letter as a guide. Carefully peel the paper letter off of the felt. Ta dah – you made a felt letter!

Then, place the felt letter onto a coloured square of felt. This will become the background/body of the ornament. Sew around the edges of the letter.
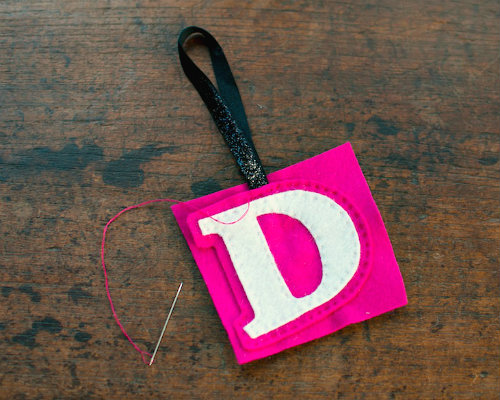
Trim around the outside edges of the felt letter was just sewn, leaving a border of approximately 1/4″ of coloured felt on all sides. Then it’s time to form the ornament.
Place the letter onto a second square of coloured felt. Stitch around the outside edge of the letter. At the top edge of the ornament, sew in a loop of ribbon. Stop sewing when a gap of just 1.25″ or so remains. If you’re sewing by hand, don’t cut or tie off your thread.
Stuff the ornament with polyfill then sew up the remaining gap.

Trim the back piece of felt to match the front. That’s it — the ornament is complete!
Now go ahead and fill the tree with a letter for each special person in your life, spell out a festive message or place into Christmas stockings for a fun surprise come December 25th!

Not just for the tree, these ornaments also make wonderful gift toppers. Tie one onto a present for an extra special finishing touch.

Happy holidays & happy crafting!
——
THIS IDEA WOULD ALSO BE GREAT FOR:
– Making an alphabet garland for a nursery.
– Spelling out ‘LOVE’ and send it to that special someone.
– Using as a place card for a festive table.
– Gifting newly weds their new monograms.
P.S. — We love making gifts! You can find all the posts in this series here.
Cute! The glitter ribbon makes it!
xox Liz and Lo {celesteandpearl.blogspot.com}
Yes, very cute. Love it.
What a grat idea!
Awesome thanks for sharing going to have to try
I love this! It’s so simple and cute, I’m definitely going to give it a try. :) Thank you!
Pingback: Link Love: Felt Christmas Ornaments | FaveCraftsBlog
What a cute project! I love it so much that I decided to feature it in our roundup of handmade felt ornaments! Check it out here: http://www.favecraftsblog.com/felt-christmas-ornaments/
Pingback: DIY Felt Monogram Ornaments « MARISA EDGHILL