May I tap into your wisdom and extensive craft experience? Please? Here’s what’s happening:
For Betty’s Christmas Sibling Gifts, I thought bottle cap magnets would be just right. She would have a great time making them (she did!) and her brothers and sisters would be able to use them in their middle school lockers and on the family bulletin board, which is actually a magnet board, and on the fridge too.
The project has been going along swimmingly. But now I’m stuck. Take a look.
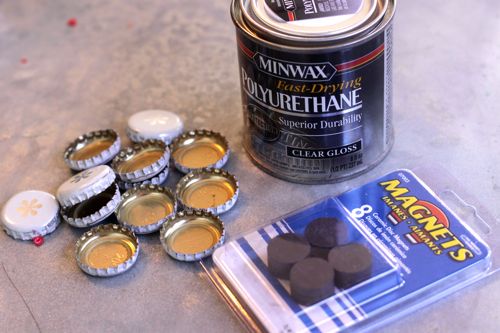
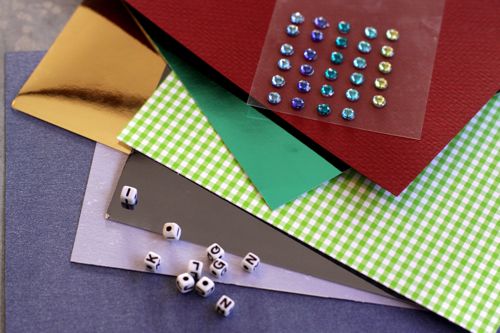
1) We started by gathering supplies. Empty bottle caps (we drink a lot of Izze soda pop), magnets, and clear gloss “quick drying” polyurethane. We also gathered pieces of pretty paper and little shiny things and itsy bitsy letters we could add to the bottlecaps.
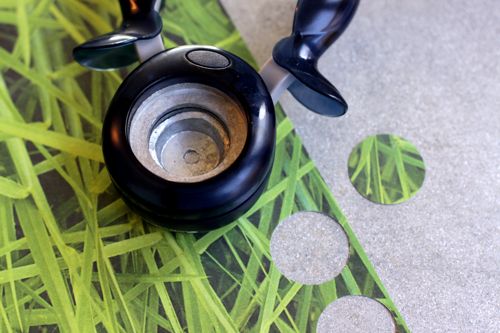
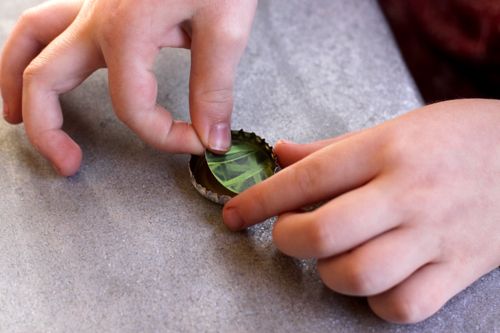
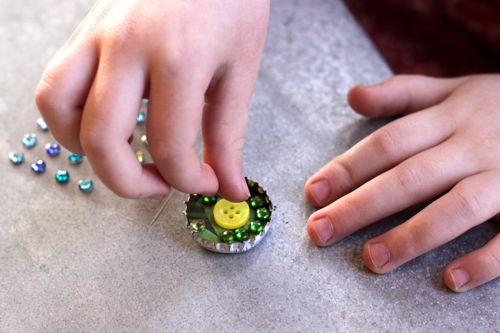
2) Betty used a 1-inch hole punch to cut out a circle of paper. She placed it in the bottle cap and then topped it with all the shiny/interesting things her 4-year-old heart desired.
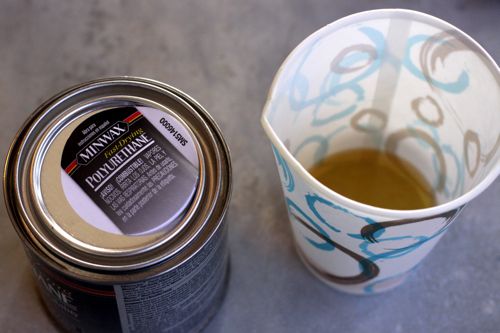
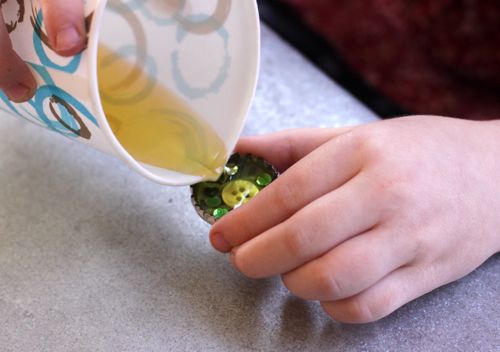
3) Next, we decanted some polyurethane into a paper cup. (Tip: squeeze one bit of the cup together to make a spout.) Betty filled the bottlecaps with polyurethane. Then she used the handle tip of a plastic paint brush to move things around if they shifted during the pouring.
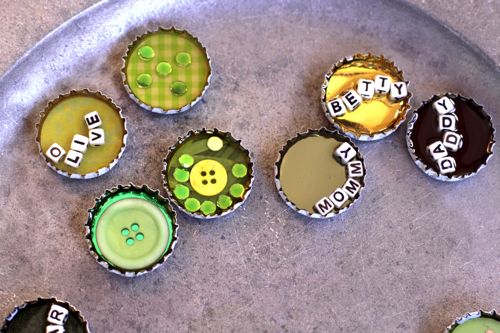
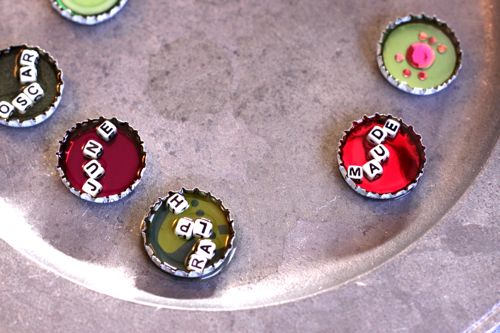
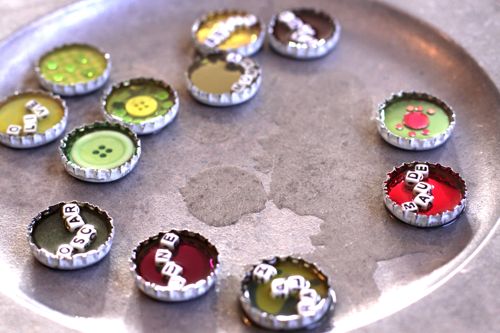
4) And that’s about it. We are waiting till they dry and then we’ll hotglue magnets to the back. Easy peasy. Betty made a total of 18 and they look great. She even made one for Mommy and Daddy. : ) Here are some that have just been filled and are waiting to dry:
Here’s where the fail comes in. It has been 5 days and they’re still not dry. Not even pretending to be close to dry. Not only that, they’re also bubbling and yellowing and doing strange things. Ugh! They’re pretty much ruined. Clearly, I should have filled them with something other than polyurethane, but I’m not sure what.
We have plenty supplies left and we can definitely start from scratch, but I need suggestions of what I should use instead of polyurethane.
If it helps, the inspiration for this project came from seeing one of those countertops that has been filled with things like charms and bottle caps and bits of ephemera. The little pieces are then covered with some sort of liquid that dries hard and clear (a liquid which is apparently not polyurethane).
Need more sibling gift ideas? We made several fun projects this year: Monogram Mugs, Bleached Out Tees, Custom Leather Patches and Photo Snowglobes. You can also find a list of projects from past Christmases here.

I LOVE this idea. My 4-year-old and I tried it tonight. We couldn’t find Diamond Glaze, but we did find Mod Podge Dimensional Magic at Joann’s. We’ll see tomorrow if it worked!
Ice Resin is the best. It’s non-toxic, dries in 24 hours and won’t yellow or crack (it may bubble a little). It’s only available online (I usually buy it here http://objectsandelements.com/shop/ice-resin-supplies-c-57/ice-resin-p-117 ) The other stuff works great too but stinks to high heaven and gives me an instant headache…
OOh! or you can use “Diamond Glaze” much easier and available at Michaels/hobby lobby.
I would recommend it for this application.
I am loving this post, because I had a huge bottlecap magnet fail myself not too long ago. I used Envirotex. Total fail. Twice. I did have some people recommend Diamond Glaze to me, and I see a lot of people in these comments have recommended it, too. I’ll definitely try again with Diamond Glaze.
I Like this blog
thanks for the nice post
I would LOVE it if you could do some experiments and tell/show us the difference between all of these products. I’ve used resin successfully before, but I had no idea there were other (possibly better) options! Looks like something we should all know–when/how to use these various chemicals so we don’t all have to toss them into he landfill when we’ve chosen the wrong one! :)
Contact my friend Ruby:
rubyresourceress@gmail.com
She used to make and sell bottlecap jewelry and I bet she has a good answer for you.
I’ve made bottle cap magnets and charms, and also other types of charms that I fill with resin, and I use Diamond Glaze and Glossy Accents – they’re absolutely the right thing to use for this, and so super easy. They’re basically the same product, except the Glossy Accents is thicker and may be easier for a 4 year old to use.
Hope this helps! Use them!! :D
Mod Podge Dimensional FTW!! but a gazillion people have already told you that.
Thanks for posting this, your commenters have upped my craft supply list twofold!!! Crafty geniuses, all :)
how about modge podge? Might go on white but will dry clear???
Surely there’s some kind of 2-part epoxy you could use. I had a college roommate who used a clear epoxy on the soles of her shoes that she used for ballroom dancing. Kept them slick enough for twirls, I suppose. It came in a pre-loaded applicator with two tubes that mixed the materials together as it dispensed them. I bet that would work.
Just wanted to add that you might want to use a stronger glue to affix the magnets to the bottle caps. E6000, maybe? I feel like hot glue doesn’t bond metals very well and you don’t want to go to all this effort just to have the magnet part fall off!
Gabby – I hope you’ll post a follow up and let us know what you ended up using the second time around. My five year old would love to do a project like this, but resin has intimidated me. If one of these resin alternatives works, I’d love to know!
My 28 year old self is actually planning on making something similar for my husband’s classroom. It’s still a tomorrow project (i.e. I haven’t done it myself), but Martha Stewart’s “recipe” called for clear casting resin. I purchased “Easy Cast” from Michael’s.
http://www.etsy.com/shop/SunAndMoonCraftKits?section_id=5486758
found these and thought of your project… hope it helps .
http://www.klutz.com/supplies/bottle-cap/Capsters-Glaze?merch_location=Search%20Results Listing
the “Klutz” kids craft books has a version of this craft and uses the above…
You are looking for this:
http://www.jerrysartarama.com/images/resized/386×450/PRODUCTS/ACRYLICS/ENVIROTEX_LITE/0050338000000-ST-01-Envirotex.jpg
It costs around 16 dollars at Michaels Crafts.
I found out about making charms with it at a Super Craft Saturday at my mother-in-laws ward. Very easy to use. Make the magnets as above (minus the polyurethane).
In a paper cup mix each bottle, one to one. I roughly measure it our with just a plastic spoon of each. Stir for one minute. Use a popsicle stick or wooden dowel to aid in pouring small amounts into the caps. The key really is to just to a little at a time because it’s easier to add more than subtract :)
Lay the caps flat and let dry for two days and they will be clear and solid. If you get really good at pouring you’ll even have a bit of a rounded top when looking at it from the side.
These are some charms I’ve made:
http://sphotos.ak.fbcdn.net/hphotos-ak-ash2/hs195.ash2/45826_417535134505_714194505_4976780_2664925_n.jpg
Wish my two year old had not been sitting on my lap yesterday. I promise, I do know how to spell :)
resin will do the trick, get it from a jeweler and you should be good to go, they even have resins that you can make different colors, which would be really pretty in these magnets (: only advise is, before the resin dries goes over the top of it with a lit match to get some of the air bubbles out! good luck!
I’m sure you have your answer by now, but I wasn’t about to read all 122 comments to find out. I made these with my first grade students and they turned out perfectly. We laminated our paper with packing tape before gluing it inside the base before gluing on charms, googly eyeballs, sequens, etc. After all that dried, we covered it with a clear sealant, which I picked up near the mod podge from a craft store. We were pleased with the end results (no bubbling and everything is dry).
Use Crystal Lacquer. It works like a charm.
My Bestie Makes Jewelry, and has done several things with bottle caps but she uses a resin that you can get from H and H and Friendze’s, which are both bead stores..We also used the same stuff to cover a small table that we covered with photos.
I’ve always read to use two part epoxy. You can find it at any craft store, and it comes in two bottles. you mix the two parts together, and then pour it in. It dries clear and hard, and it’s made to use for projects just as this. Hope this helps!
This is a great project! I work for Hobby Lobby and we carry a resin called, EasyCast,that would work great. It dries in 24 hour and is clear. It is made for jewelry so is safe after dried. I think it will help you out on this project.
I have been trying to find out what type of magnets to use that are on the inside of the bottle cap and then a design and a resin put over. The cap then becomes a magnet and will attach to a metal washer or to the refrigerator. I have looked all over the web and so far all the magnets are put on the outside and that is not what I want. Anyone got a suggestion? I have tried to put a magnet in my microwave mitt but it doesn’t work. I even made sure that the magnet side was to the side of the mitt that would be attached to something metal. Thanks Shara
I just saw your project – ever find a solution to this?
I think you should google ” Liquid Illusion” a type of acrylic resin
Used to simulate water in a glass vase setting in a silk floral arrangement.
I’ve never tried but seen this in books at Michaels crafts, the photos show
Levels of this resin dry clear and deep levels as if it were the water in a vase.
I think this would work – only maybe you have to do a bunch to use up the supply of Liquid Illusion, which I don’t know if it can be mixed in smaller batches for your bottle caps
I heard 3D Modge Podge works or diamond glaze. I used something I got from ETSY, forgot the name of it. You can do a search and you’ll find them.
Try” Glossy Accents” also comes in “Matte Accents” or “Sepia Accents” and is the best ever!
PS the Mod Podge one gets cloudy and is a waste to me.
After seeing this awesome project I will start collecting my buddy and husband beer bottle caps. Thanks!
http://craftmenot.blogspot.com
Its resin, the two part that you need to mix up. it is basically an epoxy. I put this on my counter tops, I self painted spunged my countertops and they look just as good as if someone had installed the granite countertops.
But one thing if you use this on your countertop o seal in the paints,,you will have to work fast, and watch for drips. i have a few but over all I love my countertops:)..
Love this site sooo much…….valuble information!! Epoxy resin. I started to make earings from bottle caps–actually ended up buying some because I could not get the mod podge and other mixes that I used to dry without ruining the clearness of the pictures. Trying it again!!
Hi! I started a blot recently & I have that project on there & a picture of the sealant we used. Worked well & dried overnight. Beacon Fast Finish Decoupage. Hope this helps!
I know this may be too late but here is my two cents. I use magnets from Michael’s instead of the hardware store. The hardware store magnets can have a rough edge that can scratch. I glue it to the bottom of the bottle cap with a five minute epoxy. I use the Enviro lite resin from Michael’s to fill my caps. I usually make 10 to 12 caps at a time using 2 tablespoons of mixture (1 tablespoon of each one mixed). I keep a paperclip handy to push down anything that bubbles up or to pop bubbles and a heat gun for removing small air bubbles.
I have also learned to be careful when filling these magnets because the magnets well attract each other from a short distance and send your craft spilling everywhere.
We made this craft for Christmas gifts and used “Tacky Glue”. Worked like a charm. Dried well. Even hot glue gunned some large paper clips to the back of some to make “matching” book markers. HUGE hit with the artist as well as the recipients.
ACRYLIC WATER!!! You can buy it in the floral dept at Walmart. Also at Michael’s. Good luck!
The plastic water stuffs for silk flower arrangements works great and is dry in 24 hours or less.
use epoxy!!! you can find it a michaels or any craft store!!
hello! just say this October 2012- I’m sure u have this figured out by now! lol
Epoxy, and maybe spray adhesive- spray bottlecap, place paper, spray again, place items; then spray with a Krylon clear coat to stick everything together!
Love the idea and excellent pictures! I will be doing this as well! thanks
Amber
inkessentials glossy accents or diamond glaze!
I did the same project with my granddaughter and I used the clear Elmers School glue in the bottle…looks like regular white school glue but is crystal clear going on and stays that way. It’s great for kid projects like yours.
I love your site! I have been wanting to make these with my kids for some time. I was going to use a Modge Podge product called Dimensional Magic. I used it on bezel jewelery pieces (over photos) and it works well.
We just got some. Back in Illinois its called Liquid Glass at Ace Hardware, but we got some here in Hawaii and forgot the name of it but it dries like glass n hard as a rock within 24 hours its in the Polyeurothane section but in a box
I did this same project and used Mod Podge’s Dimensional Magic. It takes about 30 hrs to dry completely but worked like a charm!
You could replace it with Diamond Glaze. I’m sure that you will love it!!
DITTO!!! Best stuff ever for projects like these!
Epoxy takes too long until dry completely and can yellowish. Diamond Glaze takes about 1hour to dry and the result is wonderful. Try it!
I use Glass Coat. I call it pouring glass: it is easy to use although children will need supervision.
I have made tables and embedded all sorts of things with this stuff.
Good Luck
Mod Podge!!!!
Stamping up makes a perfect product for this…crystal effects!
This is a very cool idea for an arts and crafts project.
USE MOD PODGE!!!! Mod Podge works great, can be bought at craft stores. My bottle says mod podge dimensional magic. On the back of packaging there are pictures of – tada – bottlecap magnets!
Hi there,
I just started making these (in the experimental stages) and sometime I find the paper I use inside gets blotchy and discolored etc after I put the resin in. sometimes I use glue behind it and sometimes I don’t……would it be the resin I am using or the glue behind it? Does it matter which kind of paper you use? I am using some sort of very stinky plastic resin I bought that you mix with a ‘catalyst’………cannot find Diamond Glaze to save my life……..heard so many reviews on different resins that I am not even certain still which one to use. I also found that if you put pressure on your magnet inside a few times….the resin shape pops right out. UGH. Help?
Diamond glaze is awesome. But before using that or any epoxy resin pretreat your paper and whatever you may be pouring your substance into. Just use some modge podge painted over your paper or picture and allow to dry prior to filling your bottle cap or bezel with the diamond glaze. Check on amazon, but i bought mine at michaels craft store and have seen at several other craft stores