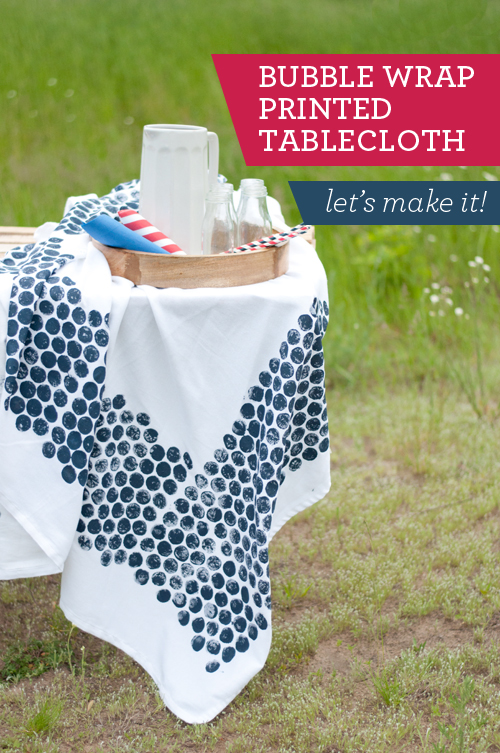
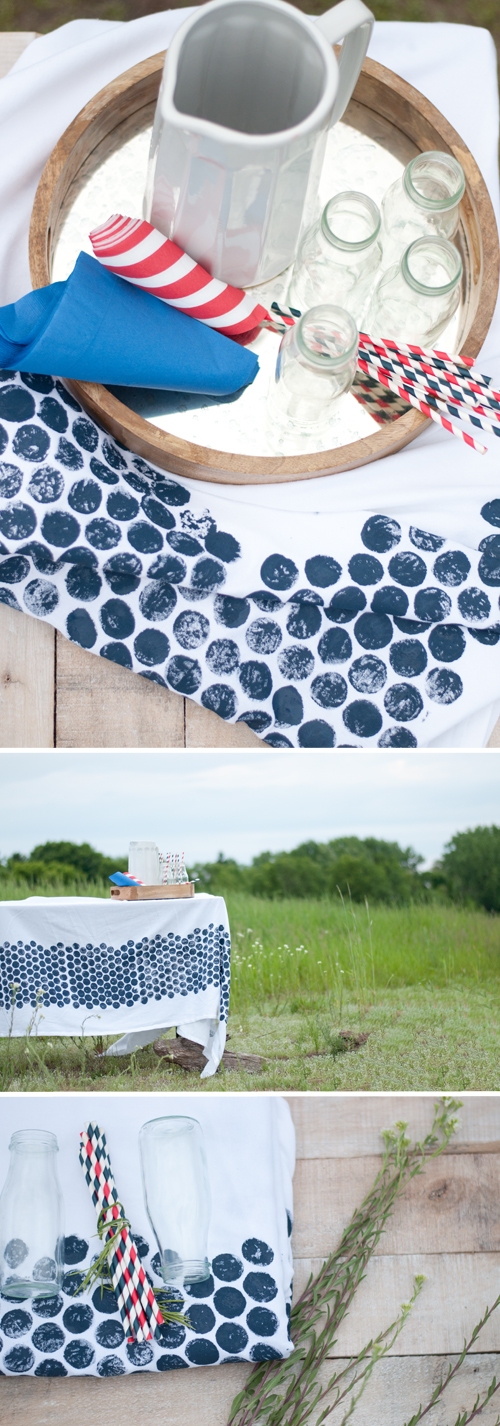
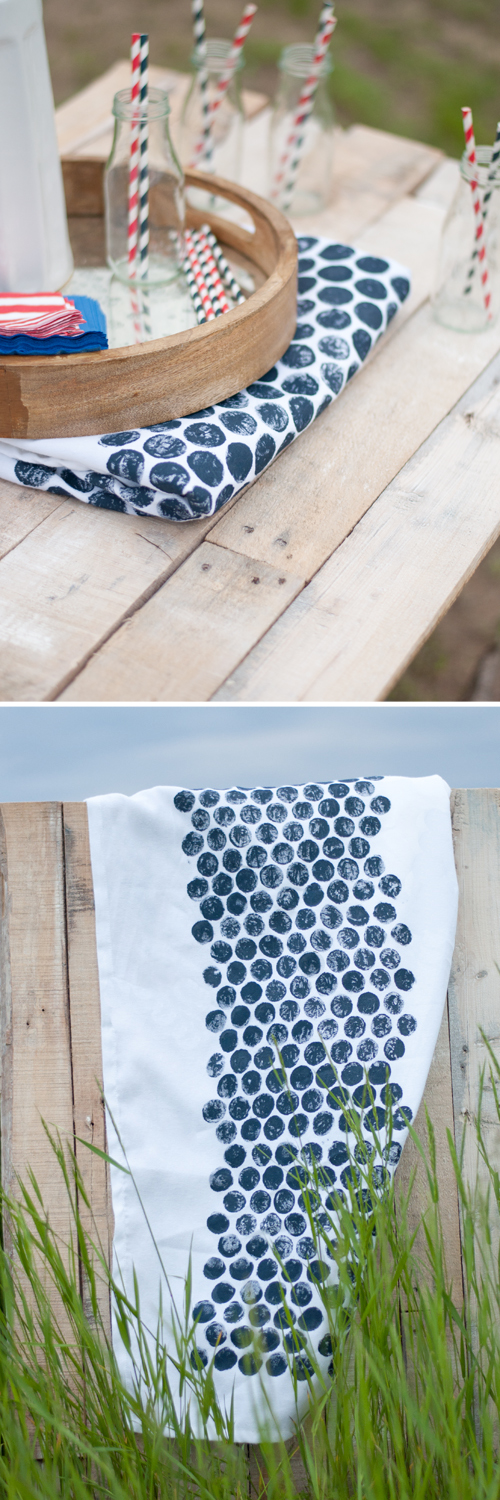
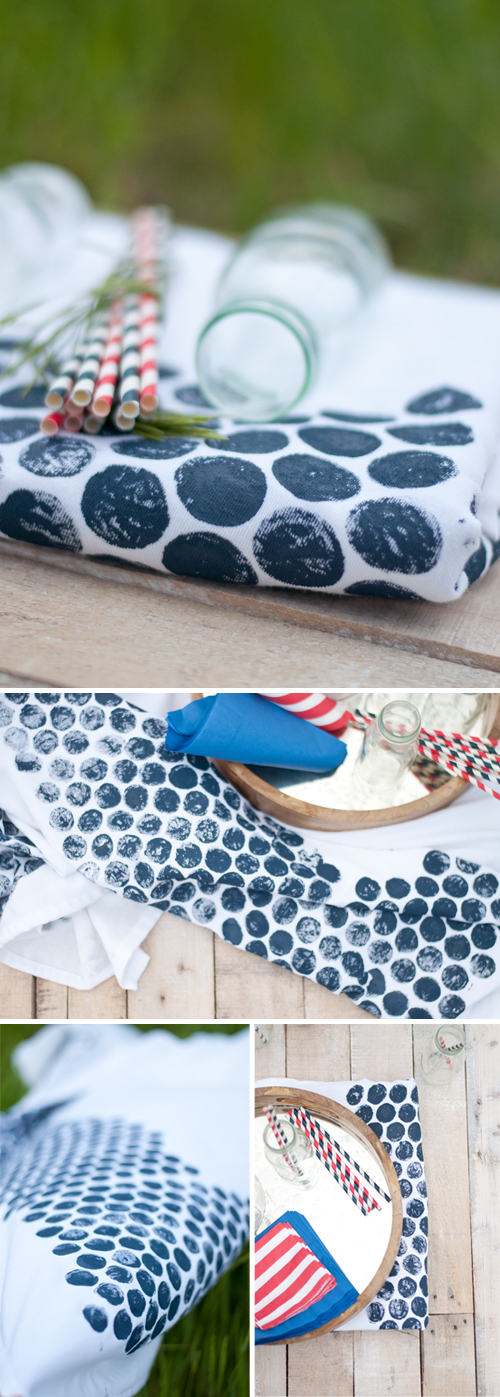
There is a reason tablecloths come in every color for every season — they add so much to a festive table setting! Have you seen this pin? I loved the idea of using something as utilitarian as bubble wrap to print with. And I thought a tablecloth — something I can use all summer long — was the perfect surface to try it out. Isn’t it fun to make art you can use?
It’s a perfectly imperfect print. You can coordinate colors to your needs and you can use the same technique on a whole list of items — napkins, wrapping paper, the wall, clothing, pillows or lampshades, to name a few.
Printing with bubble wrap takes some patience and attention to detail. But don’t worry, I have tips below. And your fingers are sure to get a little painted as well, but the outcome is well worth the effort. I think the hardest part of this particular project is saving an unpopped sheet from the happy bubble-popping feet of my kids. : )
Let’s get to printing!
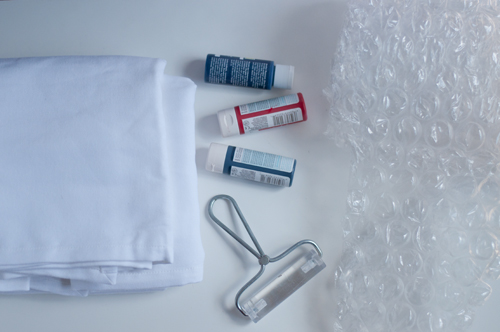
Supplies:
– tablecloth (pre-wash it if it’s new)
– paint (the tablecloth pictured used 7-8 craft paint bottles)
– brayer
– smooth, wipeable surface like plexi-glass or counter top, or a disposable smooth surface like wax or parchment paper
– bubble wrap
– rag towel to wipe fingers
Decide how wide of a print you would like and cut the wrap accordingly. You can use and print with any length of bubble wrap strip, but a shorter piece is better. It’s rather unwieldy covered in paint!
Take time to cut away any deflated or halved bubbles because they can still hold paint and will make a messy print. Note: If you prep a strip of bubble wrap and then accidentally pop one like I did, the misprint can be fixed as I’ll explain below.
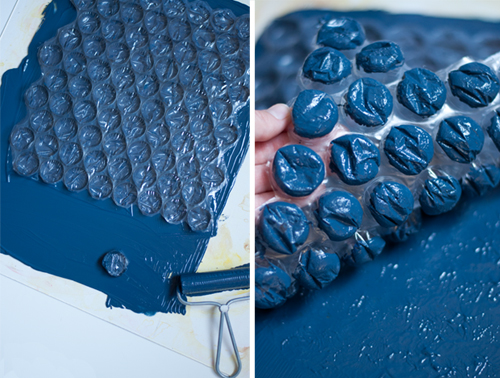
On your chosen smooth surface, add the paint. Use the brayer to smooth the paint onto a surface area large enough for your piece of bubble wrap.
A paint-loaded brayer or brush can be used to apply paint right to the bubble wrap, but, when printing on cloth, the paint color isn’t dense. The paint-on method does seem to work on paper.
Press the piece of bubble wrap into the paint, making sure all bubbles are adequately painted.
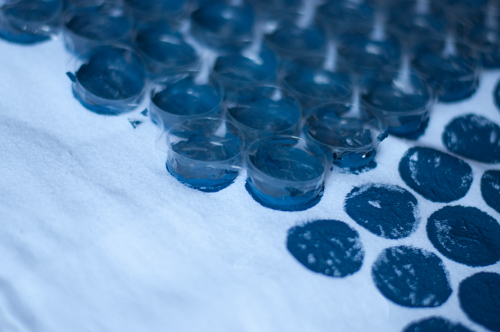
Carefully transfer the paint ladened bubble wrap to the tablecloth and press it down. When all parts of the bubble wrap have been pressed onto the tablecloth, gently pull it off.
Repeat the print around the tablecloth, making note to line up the edges for each new print.
I found that the bubbles lined up differently depending on the angle so if you turn a corner, the outer edge might be different from one side to the next.
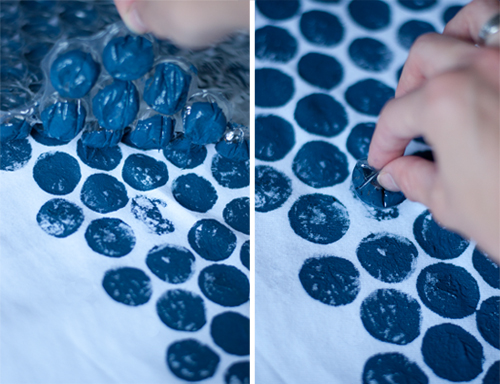
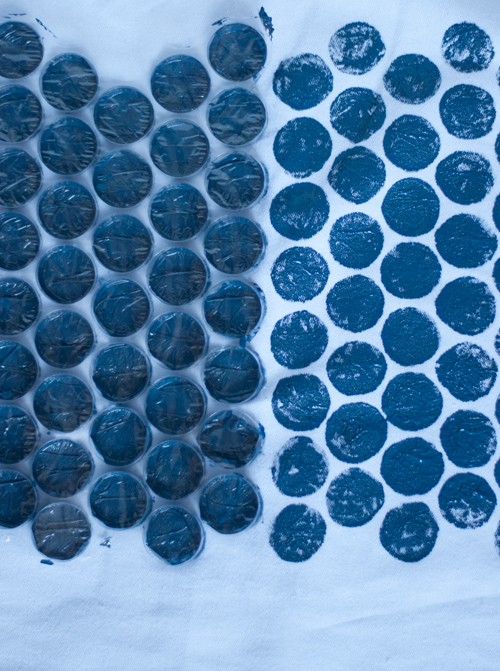
If there is a misprint or missing bubble, simply cut out one bubble and use it to correct the missing print.
One last note: I highly recommend you practice on paper first, just to get a feel for the printing process before you print the actual tablecloth.
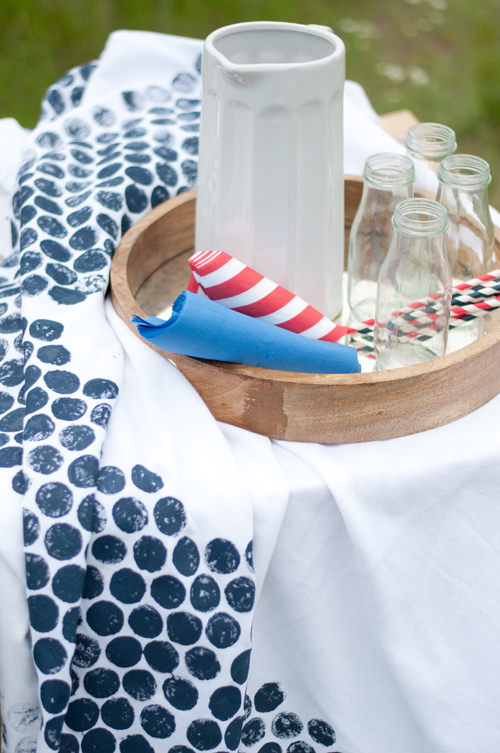
Allow to completely dry. Then get the tablewares, prep the meal, and enjoy!
P.S. — We love making things! Find lots more fun tutorials here.
Text and images by Amy Christie for Design Mom.