
We covered tying bows last week, now let’s talk about wrapping the presents themselves. I get a little giddy thinking about all of the combinations of paper and ribbon bows. So much prettiness this time of year!
It’s an assumption that every person in the world knows how to wrap and present and crease the wrapping paper just so, but I’ve been surprised on several occasions to hear friends confess they never actually learned, and that they buy gifts based on shop gift wrapping services or accessibility to gift bags. : )
HOW TO WRAP A PRESENT: 4 SECRETS


In case you are in the same boat, or in need of a little refresher, I’m here to help. And I have a few secrets to make wrapping more enjoyable.

But before we get to the wrapping part, let’s talk about paper for a second. I prefer to use a sturdier, thicker paper because it creases nicely and is less prone to tearing, and just looks nicer. Sturdier paper also comes in handy if you are wrapping something that is oddly sized. Which brings me to Secret #1: Whenever possible, find a box to fit your gift. Everyone loves the crisp look of a wrapped box! You’ll find inexpensive white gift boxes can in the wrapping paper section of stores.
On to the wrapping! Let’s begin with measuring the paper.
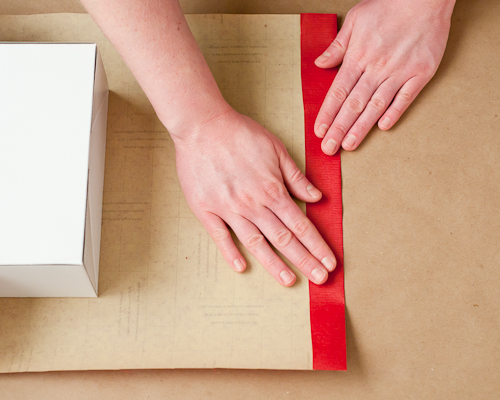
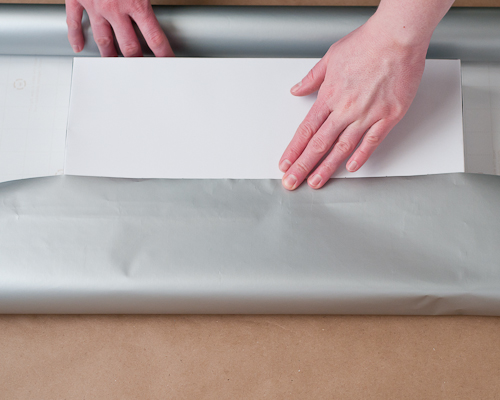
An important first step, after choosing a great paper, is to measure it correctly for the size of your present — top and bottom, side to side. Lay the box down on the paper and pull the paper up a little more than halfway up on the end of the box.
An easy way to measure the paper for the width of the box is to lay it down on one edge of the paper and “roll” it on all four sides across the width of the paper. After the fourth roll, leave a generous 3/4″ to 1 1/2″overhang.
Once you’ve made your measurements, go ahead and cut the wrapping paper all the way across the roll. Secret #2: If your scissors are sharp enough, you should be able to hold the scissors partway open and run them quickly across the paper for a clean cut. (And if your paper comes printed with a grid on the underside, you can use it as a guide!)
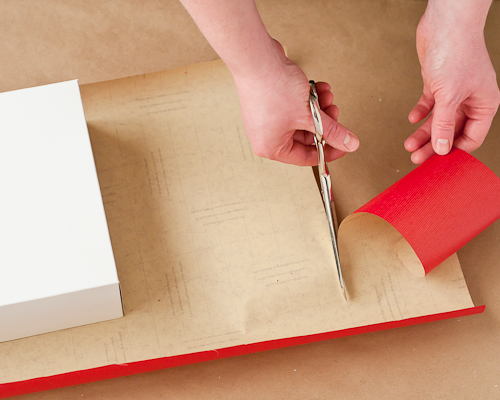
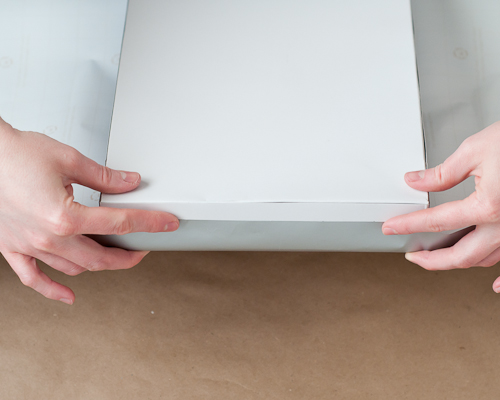
Next, trim off the ends. You don’t want the ends, which will be folded in, to be too long. It’s much easier to trim any excess now than when the present is halfway wrapped and taped.
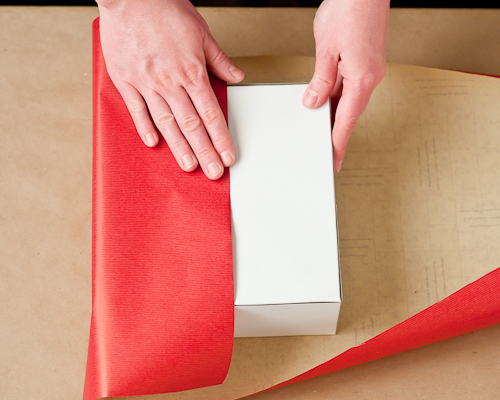
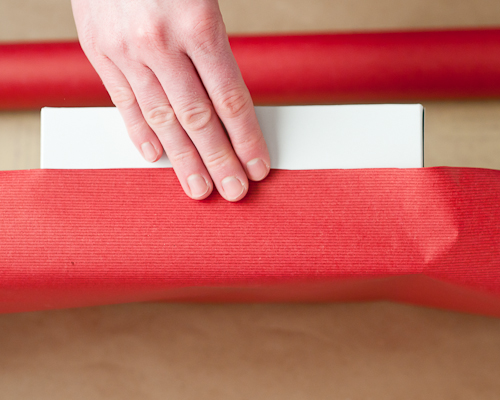
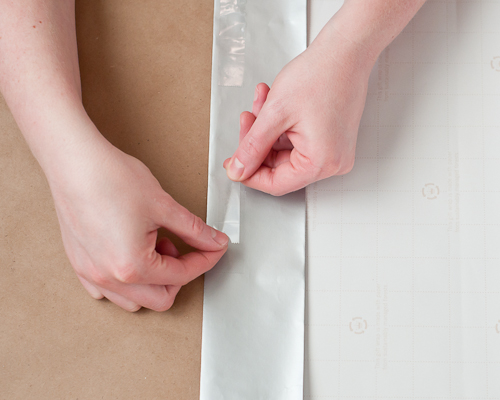
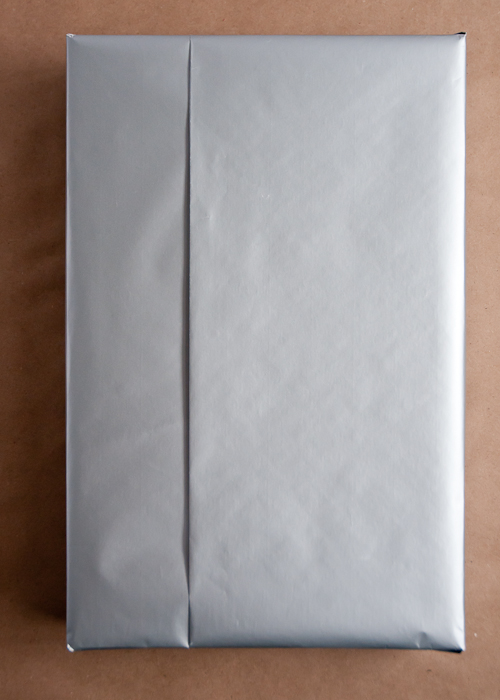
Place the package with top side down so the seam will be on the bottom. Center the box and bring one side of the paper up.
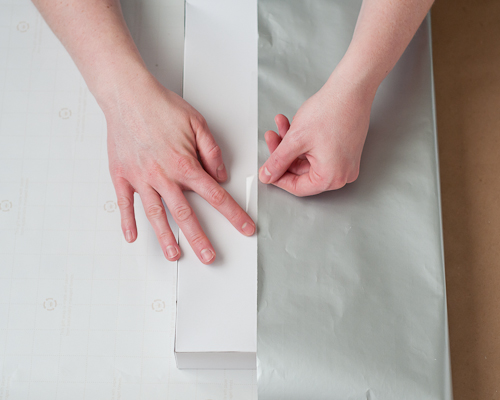
Secure with tape in the center.
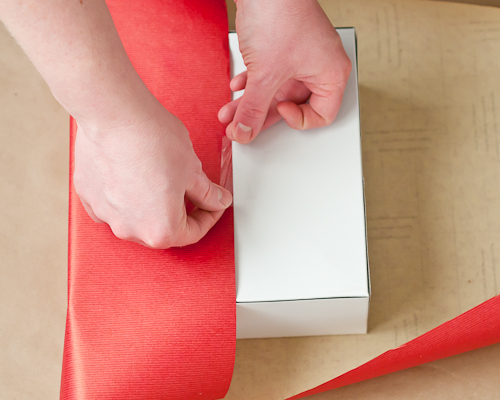
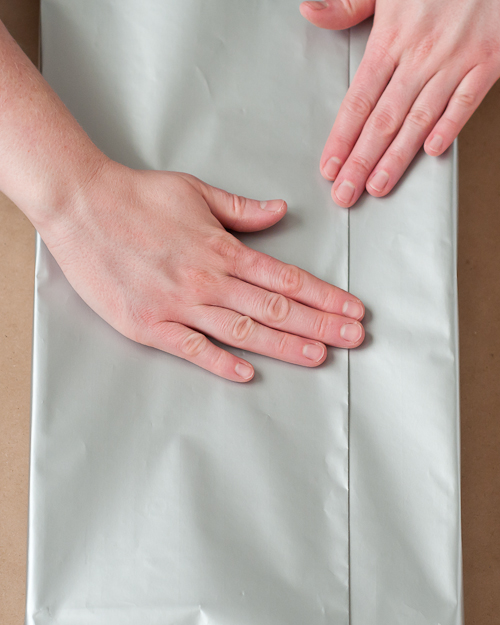
Fold the edge of the other side down just a bit and crease well. If your edge is a little uneven, folding will correct it. And even if it’s a nice straight cut, folding over the edge will fortify that edge making it less likely to develop rips. In either case, you’ll end up with a neatly folded edge facing outward.
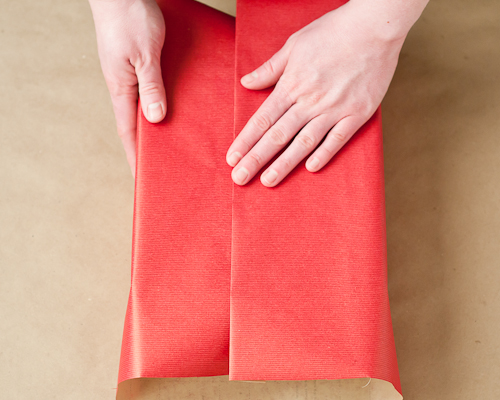
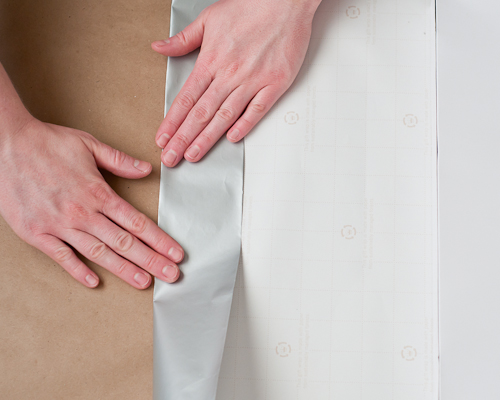
Fold the second side up to the center, pulling gently so it’s taut, but not too tight.
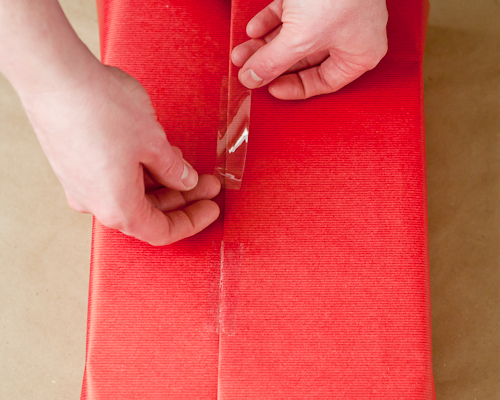
Secure again with tape. Secret #3: Magic tape or Transparent tape? Totally up to you! I like to use transparent tape most of the time because it seems less conspicuous to me.
Once the sides have been folded, it’s time for the ends.
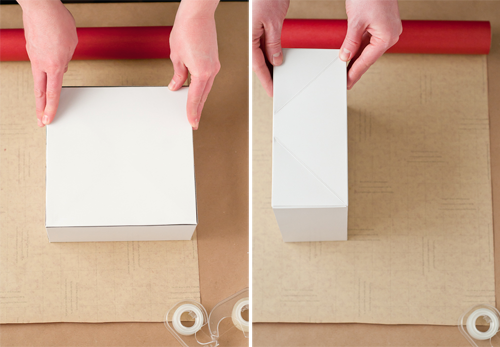
There are two main ways to fold the ends. I’m going to demonstrate both. The first one is good for bigger, taller boxes, such as perfectly square boxes, or the one that is shown in these pictures.
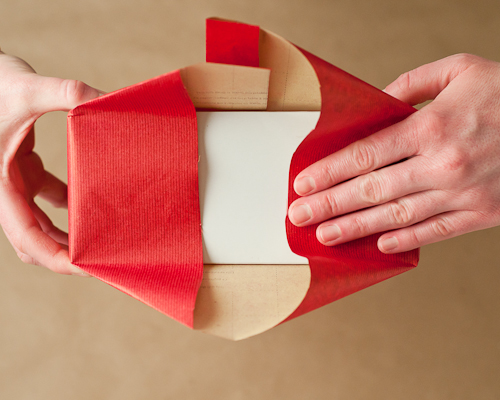
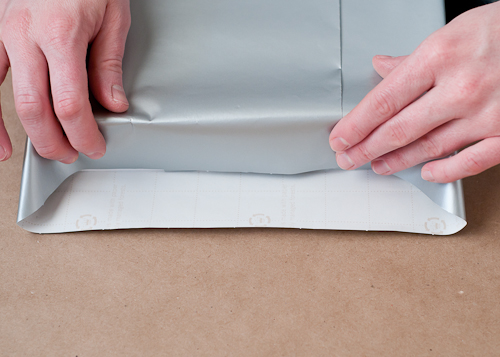
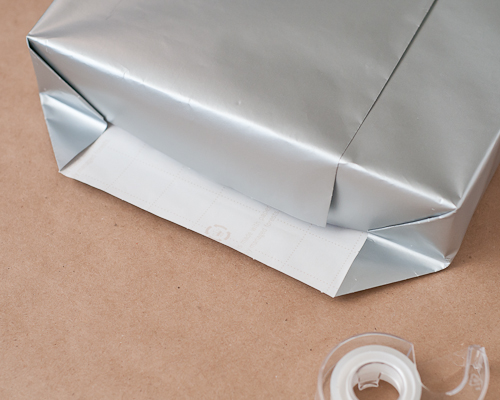
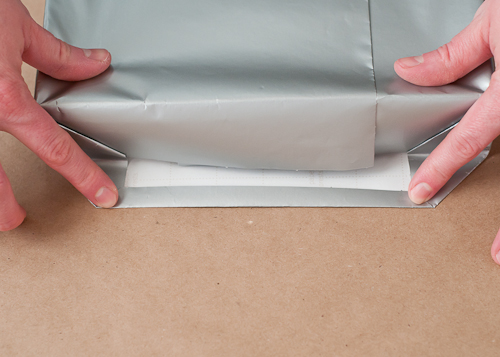
Holding the seam towards you, fold both ends in towards the center, the top and bottom flaps become triangular.
As you bring the edges to the center, be sure fold them flush against the box and crease well so they will lie flat once they are folded down and taped.
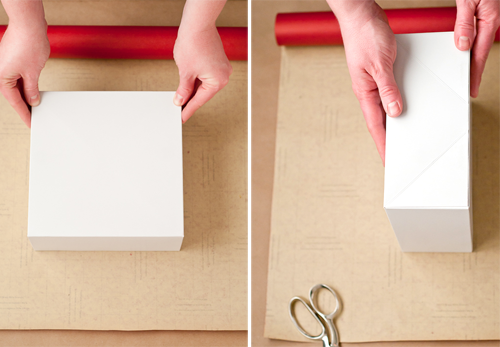
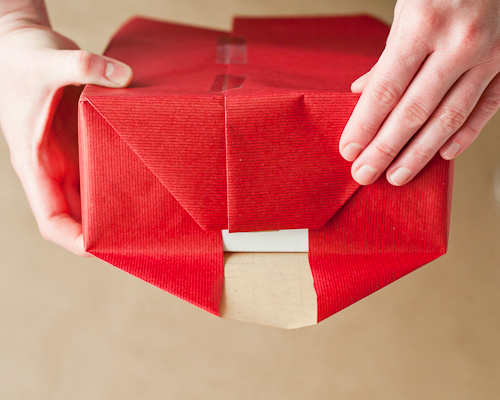
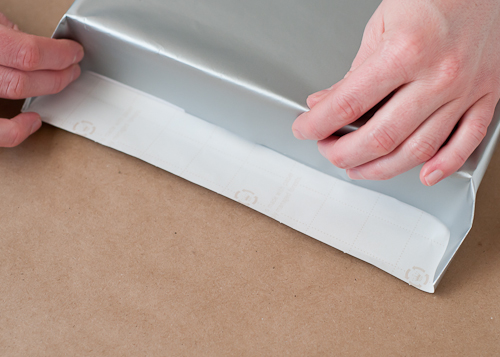
The first flap folded down should always be the seam flap. Secure it with a piece of tape to hold it firmly in place.
Flip the box around and repeat with the other (seamless) flap.
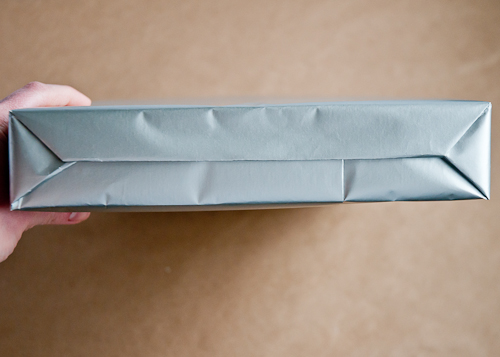
Fold down about 1/4″ of the flap to make a nicer edge.
Fold it down and secure with tape. Then repeat this process on the other end of the package.
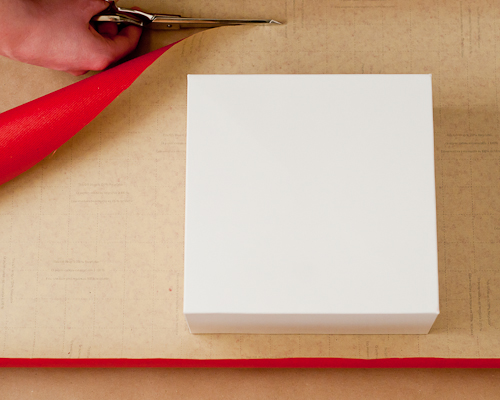
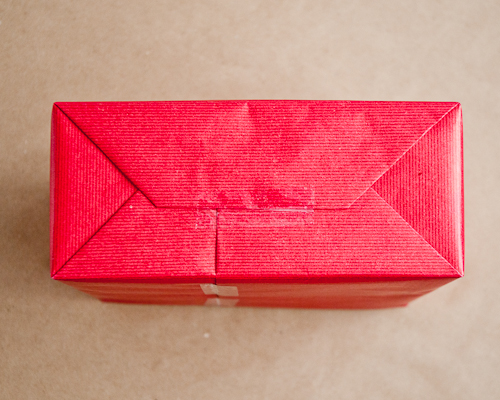
Finished. And gorgeous!
Now I will show the second way, which is better for flatter, rectangular boxes, such as clothing boxes — similar to the one pictured.
Just as before, measure the wrapping paper, leaving some overhang on the sides and bringing the paper up a little more than halfway on the ends.
Fold the first side over and secure with tape.
Again, on the remaining side, fold over some of the paper for a nicer, finished edge.
Secret #4: This time, I used double-sided tape on the underside of the paper before I folded it over. The tape becomes invisible, and the finished present looks extra pretty.
Fold over and press to secure.
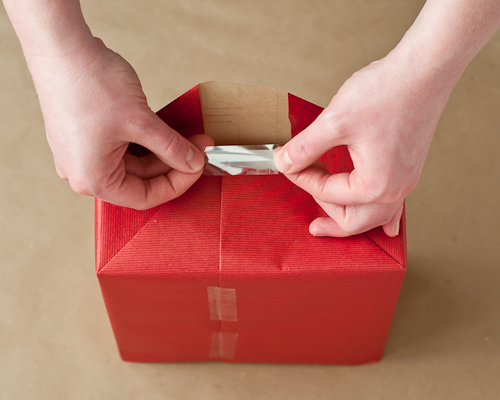
Now for the ends. Place the box face down on the table with the seam facing up. This time fold the paper down first, flat against the end of the box.
There will be triangular “wings” on the sides. Crease the edges well.
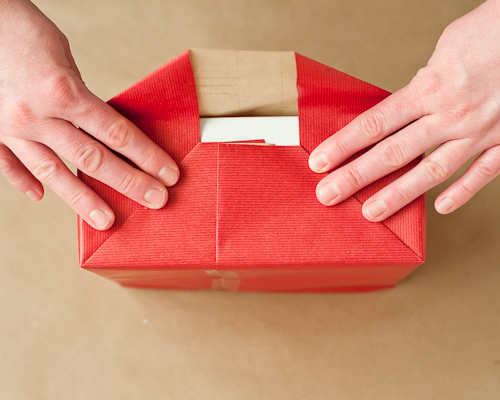
Next bring the wings towards the center and crease well.
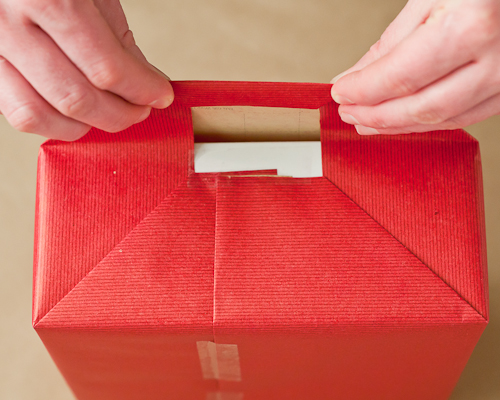
Fold the edge of the seamless flap up about 1/4″ as before, for a nicer finished edge.
If you use the double-sided tape, place a few strips on the on the folded flap and fold it up.
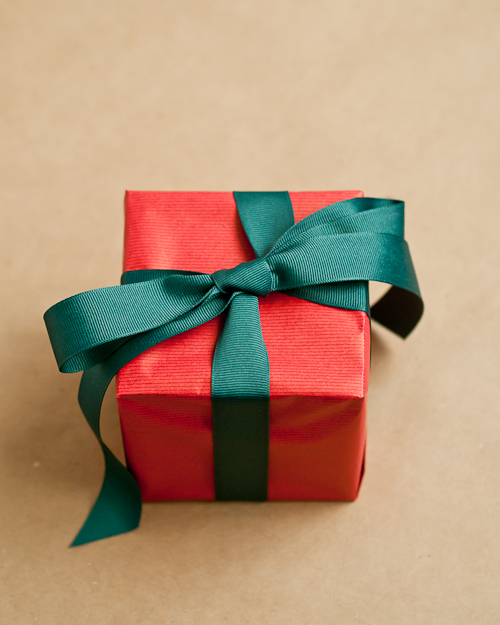
Now all this present needs is a bow!
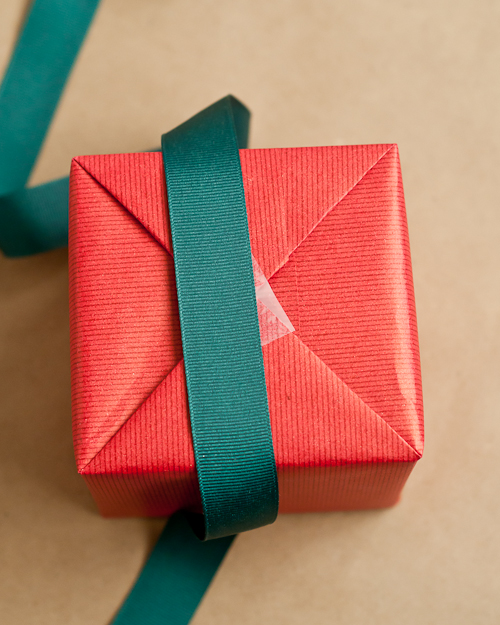
If you really want to go the extra mile with your presents, you can adjust the paper seams so they fall in the center and can be completely hidden by the ribbon. This is the ultimate way to perfectly wrap a present and takes a little practice and fidgeting to get it just right. But I’m sure the holidays will provide you plenty of opportunities to practice! : )
Happy wrapping!
P.S. — Want to know all the Secrets to Living Well? Find them here.
Text and images by Lindsey Johnson for Design Mom.
When I used to wrap gifts in the customer service department of a department store, we would bring the edge of the paper on the underneath part of the present all the way to the edge of the box. Fold it under, then use double sided sticky tape for a more “polished” look. It basically makes the gift look like there are no seams, and it’s not an added step, just a different way of doing it.
Thanks for bringing up this simple, yet effective tip Sarah!
I use a dressmaker’s tape measure to measure my boxes (just wrap it around the length and width of your box) and then just add an inch or two for folding. Quick way to figure out how much wrapping paper you need to use.
Just like my mom taught me growing up! I will have to check out the bow tutorial though, I could definitely use some help there. :)
Mom also taught me this method this growing up, though when it came time for me to wrap presents, I like to use bags or fabric! Still…the tearing apart of wrapping paper brings me back to my childhood. When I have kids, I’ll definitely go back to good old fashioned wrapping paper.
There is nothing better than a beautifully wrapped present. My husband actually matches patterns up when wrapping. haha!
I know I’m in the minority, but I won’t use wrapping paper. It is just too wasteful to me. We wrap presents in fabric and just tie them up in a bow, or reuse paper bags and decorate the blank side that faces out. I know it doesn’t give quite the same look and effect, but I hate seeing those heaping bags of trash on the curbs the first trash day after Christmas!
The prettiest wrapped present I ever received from a high-end department store used tiny pins to attach the the flaps – two pins on each side, nothing on the seams – looked gorgeous, but would be very risky for kids ;)
Hi I love this article, we have shared in my blog;)
Thank you.
Only you could have me riveted by 67 photos of gift wrap. Also, only you could make me now want to go undo all the terribly wrapped boxes under our tree and start over! Thanks Gabby.
Pingback: Don't forget to play!
It looks so simple but to wrap a perfect gifts it takes a ”gift”. I look at my shop assistants wrapping gifts for our customers and I see that not all of them have the gift or they ‘re not into it.
Cool stuff made easy
Pingback: 22 Travel Hacks You Need To Know This Holiday Season | Sharing Interesting Stuff, Updates News & Free Tips
Pingback: 22 Travel Hacks You Need To Know This Holiday Season - Totally nailed it
Pingback: Activity Blog
Pingback: Stationery Blog
Pingback: PAKETOINTIVINKKEJÄ | Musla
Nice blog!Is your theme custom made or did you download it from somewhere?
A theme like yours with a few simple adjustements would really make my blog stand out.
Please let me know where you got your design. Many thanks
Excellent, what a web site it is! This web site
presents valuable data to us, keep it up.