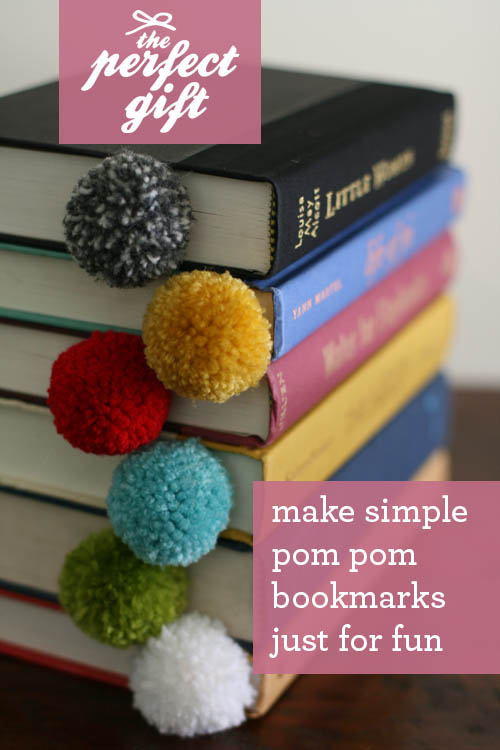
Has the weather turned cold where you live? In my neighborhood, temperatures have dropped and my instincts are to spend the day cozied up with a favorite book and favorite mug full of hot cocoa. Are you the same? I’m sure you have many fellow book worms in your neighborhood, so I thought it would be fun to create a charming little yarn ball pom pom bookmark that would make a great anytime gift for anyone that needs a little fall comfort.

It was actually my daughter’s clever idea to make a yarn ball pom pom bookmark. This is the perfect anytime gift because it’s affordable, easy to make, and turns out a fluffy pom pom of cuteness. It’s sure to improve the look of any book!

Supplies needed for your pom pom bookmark:
– yarn
– scissors
That’s it! You do want your scissors to be sharp, or the last step will be difficult. And you do not need any special tools for this pom pom ball – just your fingers!
*Before you start, cut an 8-10 inch piece of yarn and a 15 inch piece of yarn and set it aside. You will need these lengths in later steps.
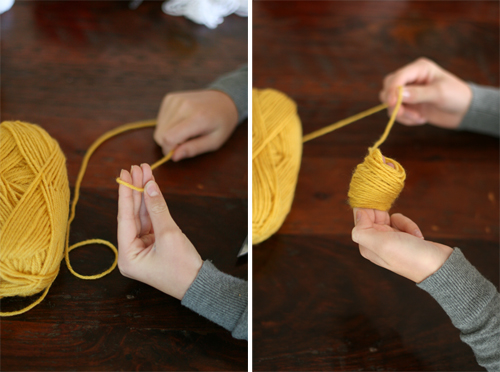
To start, hold the end of the yarn in your hand, and begin wrapping the yarn around your fingers – snug but not too tight. We recommend wrapping the yarn 90 times.
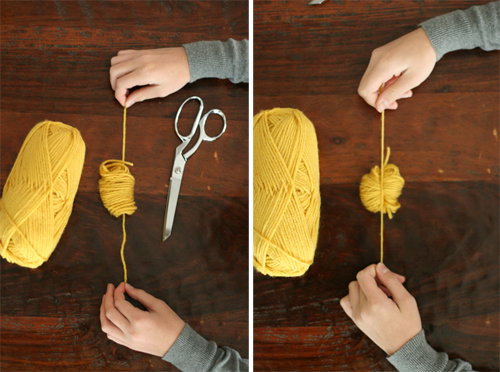
Cut the yarn after 90 wraps, and carefully slide it off your fingers. Lay it down over the 8-10 inch piece of yarn. Tightly tie a knot around the middle of the 90 loops.
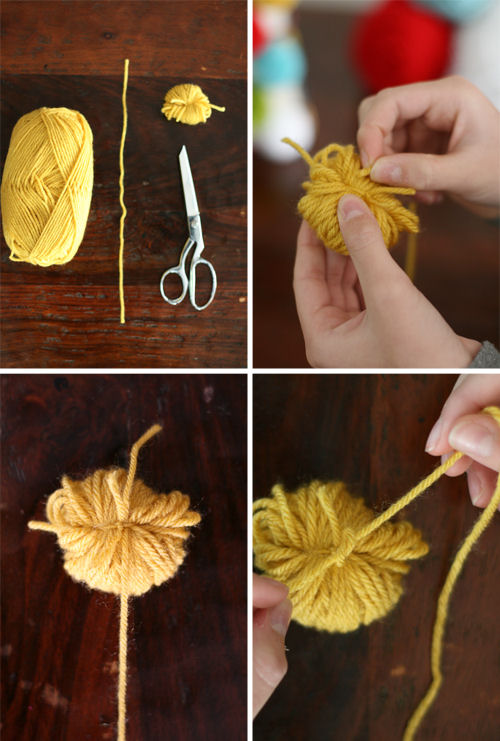
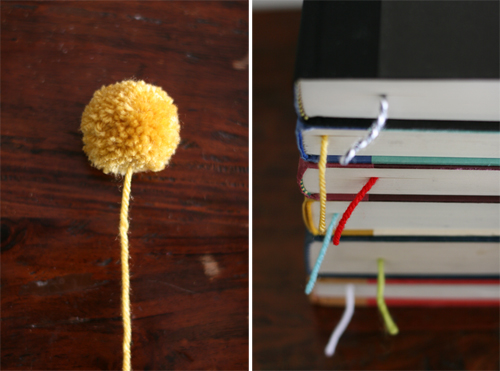
To add the yarn ball bookmark ‘tail’, use the 15-inch piece of yarn, tie it around the same string you used to tie the 90 loops together, as seen in the pictures above.
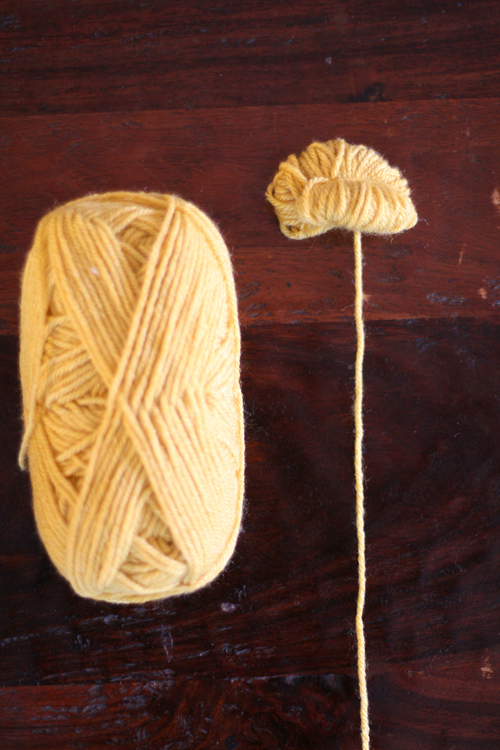
At this point, your yarn ball bookmark should look like the picture above.
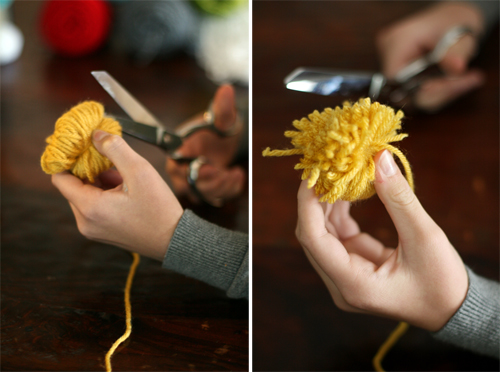
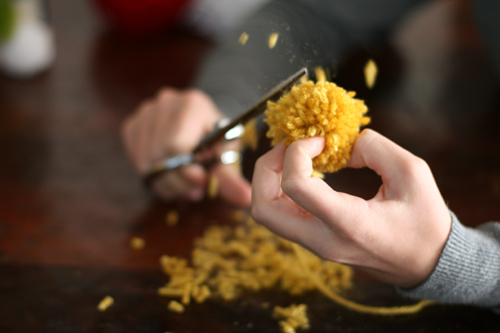
Next, holding the ball on it’s side, slide your scissors through the yarn loops and start cutting. Instant fluffy yarn!
This is what your pom pom will look like — it will start to resemble a ball, but is in dire need of a haircut!
Start snipping! {WARNING: be careful NOT to cut off the bookmark tail! Hold it out of the way while you snip.} With this step, you need to cut the yarn pom pom into the shape of a ball. Continue to turn and snip the yarn, looking at the ball from different angles while doing so. Keep rounding it off until you are pleased with the shape. This step does take practice, and you will improve with each ball you make.
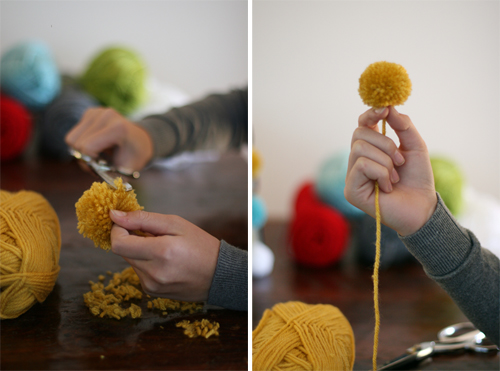
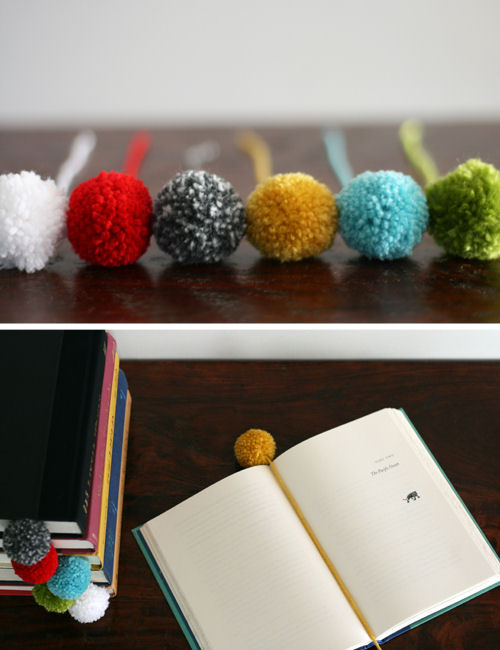
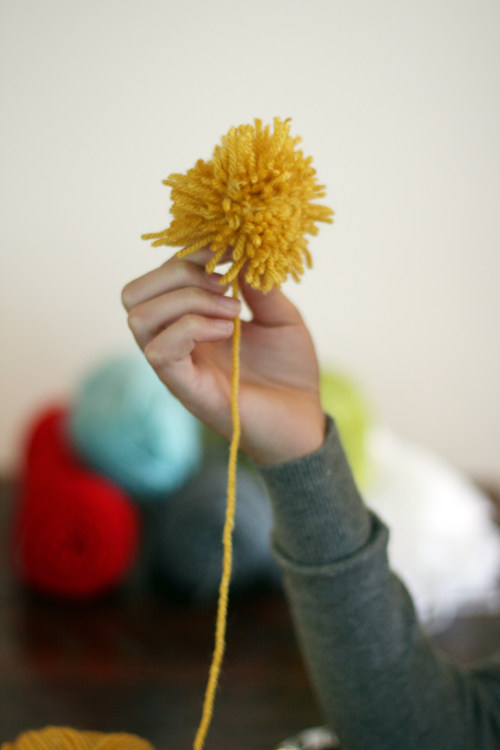
Voila! Your pom pom ball will appear! And your yarn ball bookmark is officially done!
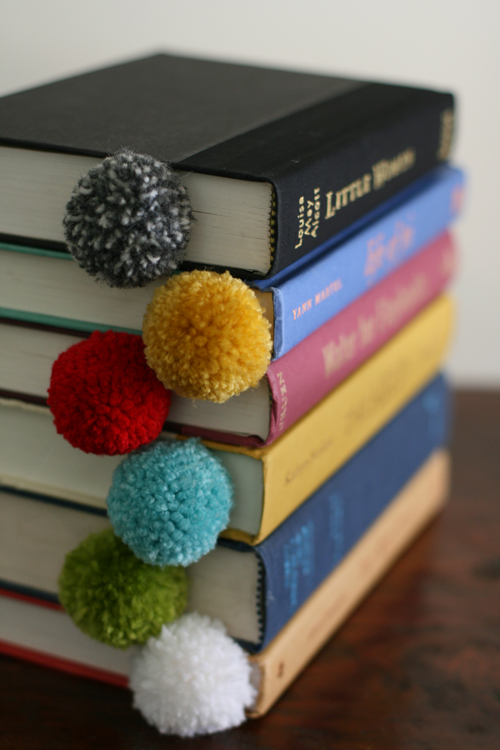
These pom pom bookmarks are sure to put a smile on any bookworm’s face, and the best part of this project is that kids can make them all by themselves!
THIS POM POM BOOKMARK WOULD ALSO BE GREAT FOR:
– A gift for a teacher — just add a favorite book!
– A little gift for guests at your next book club gathering.
– A craft activity at a book-themed birthday party.
P.S. — We love making gifts! You can find all the posts in this series here.
Credits: Created by Jane from See Jane Blog for Design Mom.
Cute! And fun! And totally fall! Great project, Jane!
these are adorable!
Agreed. I actually tweaked it a little bit. I left it a little bit more messy hair and kind of flattened one side, and glued 2 googly eyes to it.
It’s way too precious for it’s own good. Lol.
This is a great project, Jane! Thank you for sharing!
These are perfection! One, because I am always losing bookmarks and end up using my boring old library or bookstore receipt 99% of the time. And two, because I am forever in search of yarn crafts (I LOVE yarn) that don’t involve knitting, which I never have gotten the hang of! This honestly just made my day!!
So glad!
These are lovely! These would also be great as gift ‘bows’ for a book or any other reading-related gift. I plan on using this idea at the holidays.
They are perfect for the holidays!
These are so cute, but my kitty would be bad and rip them out of the book to bat them around!
love. love. love. these are perfect to do for a christmas tree garland AND gift wrapping! thank you for the great photos too!
so so cute! just had to pin it ! but not before making about a dozen of them while watching a movie with my hubby tonight! thanks for sharing and i really loved the interview!
Thank you! They are so simple to make and so fun!
Wow🤩
I adore these bookmarks and this simple gift idea, so well done. The pictures are fabulous!
gonna do this!
Thank you this is such a lovely idea for all our teachers!
absolutely smart idea and get kids to love reading! Love the colour contrast too!
Such a cute idea — and goodness knows I need inspiration on what to do with all my leftover yarn from random projects. Seems like a fun and practical way to use it all up!
Pingback: Pompom Lesezeichen | schoenstricken.de
Hi Gabrielle. This is a brilliant idea. I posted it here on my german website.
http://schoenstricken.de/2012/10/pompom-lesezeichen/
Please check if its ok for you!
Best from Berlin, Jessica
The cutest things ever! Adorable, thanks for sharing!!
Pingback: October 23: Pompoms! « Simple creative
Pingback: Amy’s Notebook 10.24.12 | The Motherload
Pingback: ModCloth Blog » Blog Archive » A Stitch in Time: Seasonal Crafts From Pinterest!
adorei a ideia foi fazer para amigos! que curte a leitura :)
Pingback: Make this Gift! DIY Yarn Ball Bookmarks : Wantist
How adorable! What a wonderful gift to give along with a book! How about adding a bead or charm at the end?!
Love that idea!!!
Pingback: Centsational Girl » Blog Archive » BOTB 10.28.12
Pingback: Eye Love It! « Inspire; to breathe
Your site is so cute! I too am a blogger and have a popular site. I was wondering if I could share you site and do a giveaway. Maybe a few pompom bookmarks?
Check out my site: http://www.blueeggbrownnest.com
I am a mom and have a small business refinihsing antique furniture & interiors in Washington, DC
Christen
These are insanely cute! Really, can’t get enough. I will be pom-pomming this week!
So, so cute and easy! I see bookmarks in all my nieces and nephews Christmas bags!
Ali
http://www.40tasks@blogspot.com
I love anything pom pom related. I can not wait to give it a try. I’d like to try it with other decor related applications too. Perhaps a yard with some metal fibers! Hmm….
Great idea! Possible improvement on the design: If you double the tail making it one-inch (plus) longer that the height of the book, you can slip one thread inside the front cover and the second thread where you stopped reading. Nicely holds the bookmark in place even when you are reading.
great idea Deb, I am going to try it!
Made one today…I made it a little bigger, but will probably make the kids ones smaller…so cute!
http://www40tasks.blogspot.com
Pingback: Yarn Pom Bookmark | The Open Door
Pingback: Worthy of the Week | Oh hey, what's up?
Pingback: DIY Pom Pom Bookmark « Bites Licks and Tastes
Pingback: Amy Christie, Editor | this heart of mine
Pingback: 4 Perfect Uses for Pom Poms - One Crafty Place
Pingback: O QUE É ISSO ? » Blog Archive » DIY : O presente perfeito - marcador bola de fio
I made one of these but you can still see the string in the middle what could I do to make it so I can’t see the string anymore?
Ellie, I would try wrapping your fingers with more loops, you want it to be so “full” that it hides the string… good luck, i hope this helps.
Gret Tutorial!!!! I have 2 Pomeranians who love pom-poms and were constantly pulling mine out of my book. I fixed it by lengthening the 18′ string and tying a loop to put the pom-pom through. No more loosing my spot!
Pingback: Day 16: Craft- Pom Pom Bookmark / Pom Pom Separador de páginas | Conchi Trivino
Oh this is so cute and it actually seems pretty easy! Thanks xxx
Pingback: Pom Pom Bookmarks » Cycads Australia – Logo Design
Pingback: Pom Pom Bookmarks « Tracing ∆'s –
Pingback: JulklappsTips | Camillas Vardag
So simple yet lovely! And perfect because I am a new knitter and was looking for projects for leftover bits of yarn.
I am loving these! I’m going to make these for my 40th birthday where I’m doing 40 whimsical acts of kindness. I’m going to pass them out as people leave our local bookstore! Perfect! Thank you for sharing this!
Pingback: Friday links « Whitbull
Pingback: Five Links For Eggheads And Other Goofs | The Spectacled Bean
Pingback: Lesson 19 : Consultation « Wairarapa Bahá'í Childrensclass Blog
omg! im making them for christmas presents, everyone loves them!!! my mom was like whaaaaatttt. i was sooo happy i found this. thanx so much for posting this:))))
Pingback: David And Goliath | Sunday Wheat